- The Structural Shield (Optional): Melt white chocolate and brush the interior of each waffle cone. The Regulation: This creates a premium barrier that prevents the filling from making the cone lose its “shatter-crisp” integrity. Let set until firm.
- The Pudding Bloom: In a small bowl, whisk the instant banana pudding mix with the milk until it begins to thicken. Set aside for 5 minutes to allow the flavors to ground.
- The Cream Cheese Emulsion: In a large mixing bowl, beat the softened cream cheese and powdered sugar until velvet-smooth and free of “clump chaos.”
- The Fusion: Fold the bloomed pudding and vanilla extract into the cream cheese mixture. The Technique: Use a rhythmic folding motion to maintain the aeration.
- The Aeration Lift: Gently fold in the whipped heavy cream and the finely diced bananas. This creates a vibrant, premium cloud of flavor.
- The Assembly: Pipe or spoon the cheesecake filling into the prepared cones.
- The Gilded Garnish: Top each cone with a generous dusting of crushed Nilla wafers and a single banana slice.
- The Final Set: Chill the cones upright in the refrigerator for at least 2 hours. This allows the protein structure to “ground” and solidify.
Service and Storage: Preserving the Crunch
- Service: Serve chilled. For a vibrant presentation, place the cones in a dedicated cone holder or a glass filled with sugar/beans to keep them upright.
- Storage: Because waffle cones are prone to “moisture chaos,” these are an honest reward best consumed within 6–8 hours of assembly.
- The Filling Hack: You can prepare the filling up to 24 hours in advance and store it in an airtight container, assembling the cones just before the event to ensure a premium snap.
The Flavor Pivot: Variations
- The Chocolate Maverick: Dip the rim of the waffle cone in dark chocolate and crushed peanuts for a “Chunky Monkey” vibrant profile.
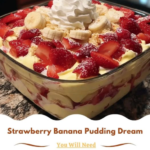
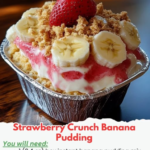
- The Orchard Finish: Substitute the banana pudding for strawberry pudding and use fresh strawberries for a vibrant, pink glow.
- The Salted Caramel Spike: Drizzle the finished cones with salted caramel sauce for a sophisticated, grounding depth.
Chef’s Tips: Mastering the Velvet Filling
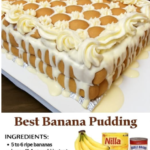
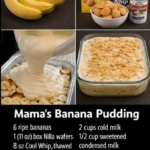
- The Ripeness Rule: Use bananas with small brown spots. They contain the highest concentration of natural sugars and provide a more vibrant aromatic bloom than green bananas.
- The Clump Regulation: Ensure the cream cheese is at true room temperature. Cold cream cheese leads to “texture chaos” that is impossible to smooth out once the cold pudding is added.
- The Dicing Secret: Toss your diced bananas in a teaspoon of lemon juice before folding them in. This prevents “oxidative chaos” and keeps the fruit looking vibrant and fresh.
Conclusion: An Honest, Vibrant Triumph
The Banana Pudding Cheesecake Cone is a testament to the power of rhythmic layering and textural contrast. It takes the simplicity of a childhood favorite and elevates it into a premium culinary reward that is both grounding and undeniably sophisticated. By respecting the structural needs of the cone and the quality of the cream cheese, you’ve created an honest masterpiece. Enjoy the velvet-rich, banana-drenched reward of every single bite!
Frequently Asked Questions
- Can I use frozen whipped topping?
- You can, but for a truly premium, velvet-smooth finish, fresh whipped heavy cream is the honest standard.
- How do I keep the cones from tipping over in the fridge?
- Use a muffin tin! Place each cone into a muffin cup; the walls will ground the cones and keep them upright during the setting phase.
- Can I use homemade pudding?
- Absolutely. However, ensure it is fully chilled and very thick. If the pudding is too thin, it will introduce “moisture chaos” and the cones will collapse.