Step 1: The Instant Gelation
In a large bowl, whisk the cold milk and instant pudding mix for 2 minutes. The “Starch Swelling” Science: Instant pudding contains pre-gelatinized starch that expands instantly when hydrated. Let it sit for 5 minutes to reach full Structural Set.
Step 2: The Creamy Emulsion
In a separate bowl, beat the softened cream cheese and sweetened condensed milk until smooth. The “Shear Force” Rule: Ensure the cream cheese is fully room temperature. If it is cold, you will experience Lipid Clumping, which ruins the velvety mouthfeel.
Step 3: The Unified Mousse
Gently fold the pudding mixture into the cream cheese mixture. The “Homogeneity” Secret: By folding rather than whisking, you maintain the Micro-Air Bubbles that keep the pudding light and airy.
Step 4: The Stratified Assembly
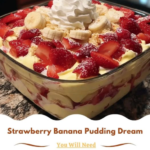
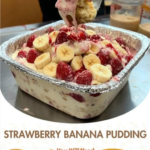
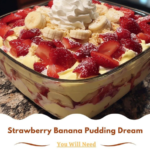
In individual cups (or a large bowl), layer vanilla wafers, sliced bananas, and the pudding mixture. Repeat until the cup is full. The “Capillary Attraction” Physics: The layers must be tight to ensure the moisture from the pudding can migrate into the dry wafers.
Step 5: The Chill (The “Magic” Hour)
Refrigerate for at least 4 hours, or overnight. The “Textural Equilibrium” Science: This time allows for Moisture Migration. The wafers lose their crunch and gain a texture nearly identical to sponge cake.
Service and Storage: Protecting the Texture
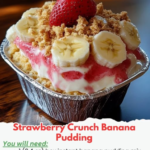
Serving: Top with an extra wafer or a dollop of whipped cream just before serving. The “Surface Tension” Rule: Do not add the garnish wafer too early, or it will lose its “crunch” contrast.
Storage: Best consumed within 48 hours. Beyond this time, the bananas will undergo Cellular Breakdown and begin to release water, making the pudding “weep.”
Tips: Pro-Level “Banana Pudding” Nuances
- The “Lemon Juice” Hack: If you are making this for a party 24 hours in advance, toss your banana slices in a teaspoon of lemon juice. The Ascorbic Acid acts as an antioxidant, delaying browning.
- The “Whipping Cream” Addition: For an even lighter texture, fold in 8 oz of whipped topping or stabilized whipped cream at the very end. This increases the Overrun (air content) of the mousse.
- Cookie Orientation: Place the wafers vertically against the side of the glass for a “professional” aesthetic that showcases the Geometry of the Layers.
Variations: Seasonal Infusions
| Variation | The Adjustment | The Vibe |
|---|---|---|
| Salted Caramel | Drizzle salted caramel between each pudding layer. | Rich, salty, and sophisticated. |
| Chocolate Banana | Use chocolate wafers and chocolate pudding mix. | Deep, cocoa-rich, and indulgent. |
| Holiday Spice | Add 1/2 tsp of cinnamon and nutmeg to the pudding. | Warm, aromatic, and festive. |
Conclusion: A Post-Christmas Comfort Victory
The Banana Pudding Cup is a masterpiece of Texture Balance. By layering porous wafers with a stabilized cream cheese pudding, you create a dessert that is functionally efficient and emotionally nostalgic. On this December 26, 2025, as you spoon into these perfectly chilled layers, you are enjoying a masterclass in moisture-management. Enjoy every creamy bite!
Frequently Asked Questions
- Can I use cook-and-serve pudding?
- You can, but it requires Thermal Processing and must be cooled completely before mixing with cream cheese. Instant pudding is preferred for its Cold-Solubility.
- Why is my pudding too thin?
- This is usually due to Lipid-Liquid Imbalance. Ensure you used cold milk and that your cream cheese was 8 oz (full fat). Low-fat versions have more water and can lead to a runny set.
- Can I freeze these?
- Not recommended. The bananas will turn to mush upon thawing, and the cream cheese emulsion may “split,” resulting in a grainy texture.
Would you like me to suggest a “Homemade Vanilla Wafer” recipe to elevate this even further, or perhaps show you how to turn these into “Banana Pudding Popsicles”?