The flavor of your taco meat comes from the Maillard Reaction. This is the chemical reaction between amino acids and reducing sugars that gives browned food its distinctive flavor. It happens most efficiently when moisture is removed.
To maximize this, do not crowd the pan. When ground meat is crowded, it “steams” in its own juices rather than searing. By cooking in batches and allowing the meat to reach $310^{\circ}\text{F}$ ($154^{\circ}\text{C}$), you create hundreds of new flavor compounds that raw or steamed meat simply lacks.
4. The Chemistry of Creamy Cheese Sauce
A “broken” cheese sauce is greasy and grainy. This happens when the proteins in the cheese (casein) clump together and separate from the fat. To prevent this, we use a stabilizer.
In a professional 2026 kitchen, we often use **Sodium Citrate** ($Na_3C_6H_5O_7$). It acts as an emulsifier that lowers the $pH$ of the cheese and allows the fats and proteins to stay in a smooth, liquid state even at high temperatures.
5. The Master Methodology
Step 1: Preparing the Protein
Heat a cast-iron skillet over medium-high heat. Add the beef/turkey. Break it apart with a spatula but let it sit for 3 minutes without moving it to develop that initial sear. Once browned, add the diced onions and garlic. Cook until translucent. Drain about 70% of the fat, leaving just enough for flavor.
Step 2: The Spice Infusion
Add your spices and **1/4 cup of water**. This water helps the spices bloom and creates a light “slurry” that coats every piece of meat, ensuring no “dry bites.” Simmer until the water has evaporated, leaving a glossy, spiced coating.
Step 3: Crafting the Cheese Sauce
In a small saucepan, melt 2 tbsp of butter. Whisk in 2 tbsp of flour. Slowly add 1.5 cups of milk, whisking constantly until thickened. Reduce heat to low and add 2 cups of shredded cheese. **Do not boil the sauce after adding cheese!** High heat will cause the cheese proteins to tighten and become grainy.
Step 4: Shell Engineering
Place your taco shells on a baking sheet. Bake at **350°F (175°C)** for 5 minutes. This “wakes up” the oils in the corn, making the shells crispier and more aromatic. Note: Warm shells are less likely to shatter when bitten.
Step 5: The Strategic Load
Layering is the key to structural taco success. Follow this order:
- Bottom Layer: A thin line of creamy cheese sauce (acts as the glue).
- The Bulk: The seasoned meat.
- The Melt: A sprinkle of shredded cheese (melts against the hot meat).
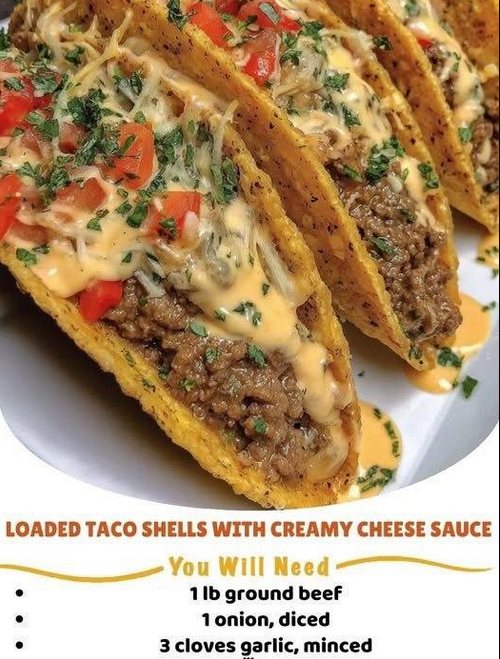
- The Toppings: Cold lettuce, tomatoes, and sour cream.
- The Crown: A final drizzle of the warm creamy cheese sauce.
6. Troubleshooting and Expert Tips
How to Prevent Soggy Shells
The “Soggy Bottom” is the enemy of the loaded taco. This is caused by the moisture in the meat and the cheese sauce soaking into the corn. To prevent this, place a thin layer of **shredded lettuce or a piece of cheese** at the very bottom of the shell before adding the meat. This creates a moisture barrier.
Variation: The 2026 “Fusion” Taco
Want to modernize this? Replace the standard cumin blend with a **Gochujang-honey glaze** for the beef and use a **Queso Blanco with green chilies** for the sauce. The sweet-heat profile is a major trend this year.
7. Conclusion: The Joy of the Load
Loaded Taco Shells with Creamy Cheese Sauce represent the ultimate comfort food. By applying a bit of science—understanding emulsification and the Maillard reaction—you elevate a simple weeknight dinner into a culinary event. These tacos are balanced, textured, and, most importantly, engineered for maximum enjoyment. Whether you’re cooking for a family of four or a party of twenty, these principles remain the gold standard for taco excellence in 2026.