
The process is divided into three phases: the Protein Lacquer, the Creamy Emulsion, and the Thermal Finalization.
- Phase One: Thermal Preparation. Preheat your oven to 350°F (175°C). Prepare a 9×9-inch or 2-quart baking dish by lightly greasing it. This ensures a clean “scoop” once the cheese has caramelized against the edges.
- Phase Two: The Protein Lacquer. In a heavy-bottomed skillet over medium heat, brown your ground beef or sausage. As the fat renders, use a wooden spoon to break the meat into fine crumbles. Once fully browned, drain the grease—this is vital to prevent an oily film on your dip. Stir in the taco seasoning and water, simmering for 3 minutes until a thick, savory glaze coats the meat. Remove from heat.
- Phase Three: The Creamy Emulsion. In a large mixing bowl, combine the softened cream cheese and sour cream. Beat them together until they are silky. Fold in the refried beans, salsa, green chiles, 1 cup of the shredded cheese, garlic powder, and onion powder. The goal is a homogenous, pale-orange mixture.
- Phase Four: Integration. Gently fold the warm, seasoned meat into the creamy bean base. Do not over-mix; you want identifiable “nuggets” of beef throughout the dip.
- Phase Five: The Assembly. Spread the mixture evenly into your baking dish. Smooth the top with a spatula and sprinkle the remaining 1 cup of cheese over the surface.
- Phase Six: The Bake. Place in the center of the oven for 25–30 minutes. You are waiting for the internal temperature to reach a bubbling state and for the cheese topping to undergo the Maillard reaction, turning a beautiful golden brown.
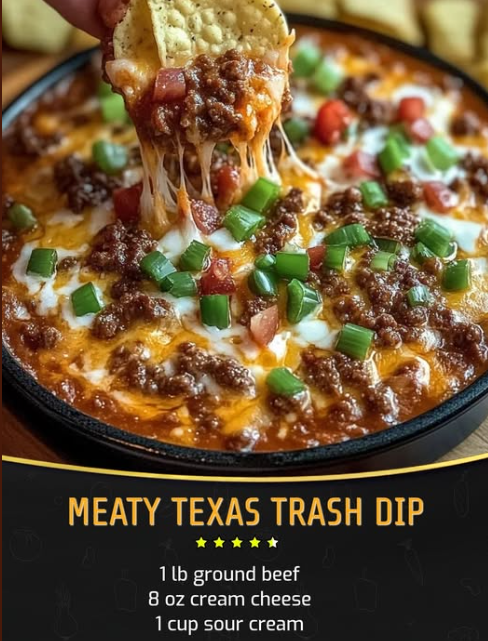
- Final Touch: Garnish with your fresh toppings immediately before serving to maintain the contrast between the hot dip and cold, crisp vegetables.
Serving and Storage
This is a “high-viscosity” dip, meaning it requires a sturdy delivery vehicle. Thick-cut corn tortilla chips are the gold standard, but toasted baguette slices or sturdy celery stalks offer a great alternative.
Storage Table:
| Environment | Timeframe | Technique |
|---|---|---|
| Refrigerator | 3–5 Days | Keep in an airtight container. The beans will firm up; reheat gently to restore the dip’s flow. |
| Freezer | 2 Months | Freeze unbaked. Wrap in plastic and foil. Thaw for 24 hours in the fridge before the final bake. |
Tips for the Perfect Scoop
“The secret to a professional Texas Trash Dip is moisture control. If your salsa is particularly watery, strain it through a fine-mesh sieve before adding it to the bowl.”
- The Cheese Factor: Always shred your own cheese from a block if possible. Pre-shredded cheese is coated in cellulose (wood pulp) to prevent clumping, which can lead to a grainy melt.
- Softening the Beans: If your refried beans are too stiff to mix, stir in a tablespoon of the liquid from the salsa or a splash of milk to “loosen” the starches.
- Vessel Strength: Always test your chips. A thin, “restaurant-style” chip will break under the weight of this meaty dip. Look for “scoops” or “kettle-style” chips.
Creative Variations
Texas is a big state, and there are many ways to put your own “brand” on this recipe:
- The Smokehouse Variant: Use leftover smoked brisket instead of ground beef and substitute the salsa with a smoky BBQ sauce.
- The ‘Fire Eater’s’ Dip: Swap the green chiles for minced habaneros and use Pepper Jack cheese for the topping.
- The Baja Twist: Stir in a half-cup of sweet corn and black beans, and finish with a heavy squeeze of fresh lime juice.
- White Texas Trash: Use White American cheese and Monterey Jack for a creamy, ivory-colored aesthetic.
Tips for Entertaining
- The Slow Cooker Hack: If you are serving this at a long party, transfer the baked dip to a small crockpot on the “warm” setting. This prevents the beans from setting into a solid block.
- Color Contrast: Don’t skip the green onions and tomatoes. The dip itself is brown and beige; the bright reds and greens make it visually appetizing.
- Individual Servings: For a sophisticated look, bake the dip in individual ramekins. This prevents “double-dipping” and gives everyone their own cheesy crust.
Conclusion
The Meaty Texas Trash Dip is a testament to the fact that comfort food doesn’t have to be complicated to be brilliant. It honors the rich, cross-cultural flavors of the Southwest while providing a reliable, crowd-pleasing option for any host. By combining the protein-packed punch of seasoned beef with a silky, three-cheese base, you create a dish that is more than just an appetizer—it’s an experience. As we ring in 2026, let this warm, bubbly, and unapologetically bold dip be the highlight of your celebration. It is hearty, it is festive, and it is undeniably Texas. Enjoy every savory bite!
Frequently Asked Questions
- Can I use Greek Yogurt instead of Sour Cream?
- Yes! Plain Greek yogurt is a fantastic 1:1 substitute that adds a bit more protein and a sharper tang.
- Why did my dip separate and get oily?
- This usually happens if the ground beef wasn’t drained well or if the oven was too hot. Ensure the meat is dry and keep the temp at 350°F.
- Is this dip gluten-free?
- Mostly, yes! However, check your taco seasoning packet for “wheat flour” or “yeast extract,” as these are common thickeners that contain gluten.
Related posts:
 The Ultimate Homemade Beef Meximelt
 Mastering Mexican White Trash Casserole
 Perfect Appetizer: Mastering the Classic 7-Layer Dip
 Homestead Comfort: Mastering Chicken Tenders on Texas Toast
 The 10-Minute Classic: Mastering the Ultimate 7-Layer Taco Dip
 The Ultimate Guide to French Dip Tortilla Roll Ups
