ADVERTISEMENT
Phase 1: Preparing and Seasoning the Filling
- **Cook Beef and Drain (FAT BALANCE RULE):** In a large skillet, cook the **ground beef** over medium-high heat. Break it up until no longer pink. **Drain off ALL excess grease.**
- **Sauté and Season:** Add the **diced onion and minced garlic** to the beef. Cook, stirring, for 5-7 minutes until the onion softens. Stir in the **Worcestershire sauce, smoked paprika, onion powder, and garlic powder**, seasoning generously with **salt and pepper**. Cook for 2-3 minutes to meld flavors.
- **Cool Filling (TEMPERATURE TRAP):** Remove from heat and spread the mixture on a plate to **cool slightly** (to just above room temperature).
Phase 2: Assembly and Shaping
- **Prep Dough and Oven:** Preheat your oven to $190^\circ\text{C}$ ($375^\circ\text{F}$). Line a baking sheet with parchment paper. Unroll the **crescent roll dough** and press perforations together to form a seamless rectangle.
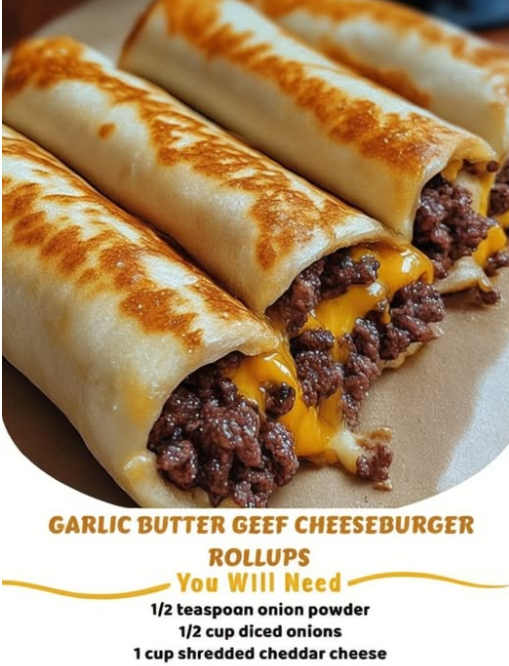
- **Layer Filling and Cheese:** Evenly spread the cooled beef mixture over the dough, leaving a small border. Arrange the **cheese slices or shredded cheese** evenly over the beef.
- **Roll and Slice (TIGHT ROLL PROTOCOL):** Starting from one long side, carefully **roll up the dough tightly into a log**. Using a sharp knife, slice the log into **12–16 even pieces** (about 1-inch thick).
Phase 3: Glaze and Bake
- **Make Garlic Butter:** In a small bowl, melt the **4 tablespoons of butter** and stir in the **2 cloves of minced garlic**.
- **Glaze and Bake (GOLDEN FINISH PROTOCOL):** Arrange the rollups **cut-side up** on the prepared baking sheet. **Brush the tops** of each rollup generously with the **garlic butter**. Sprinkle with sesame seeds if desired. Bake for **20–25 minutes**, or until golden brown and the cheese is bubbly.
- **Serve:** Garnish with fresh chopped parsley and serve immediately.
Serving and Storage: Maximizing Flakiness
Optimal handling for this savory pastry:
- **Serving:** Best served hot and fresh, as the crescent roll dough is at its flakiest immediately after baking.
- **Storage (Room Temperature):** Store leftovers in an airtight container for up to **2 days**. The dough will soften upon cooling.
- **Reheating:** Reheat in a toaster oven or oven at $175^\circ\text{C}$ ($350^\circ\text{F}$) for 5–7 minutes to crisp up the crust. Avoid the microwave, which turns the crust soft.
Tips: Essential Techniques for Crunch and Flavor
Dough Temperature: Use the **crescent dough cold** (Instruction 4). The cold laminated layers are essential for maximum puff and flakiness during baking.
Cheese Choice: **American cheese slices** (Ingredient II) melt exceptionally well and provide the best, most cohesive cheeseburger flavor. Shredded cheddar works, but may not melt as smoothly.
Spice Toasting: After adding the dry spices (Instruction 2), cook them for a full 2-3 minutes. This brief cooking, known as toasting, wakes up their flavor, preventing them from tasting raw or dusty in the final product.
Garlic Butter Preparation: Use **freshly minced garlic** (Ingredient III) for the butter glaze—not garlic powder. The fresh garlic provides the vibrant aroma and intense flavor that defines this recipe.
Sealing the Seams: When pressing the crescent dough perforations together (Instruction 5), use your fingertips to tightly pinch and seal the seams. A weak seam can break during rolling or baking, causing the filling to spill out.
Variations: Customizing Flavors and Textures
Easily adapt the flavor profile of the rollups:
- **Bacon Cheeseburger:** Stir in $\frac{1}{2}\text{ cup}$ of **cooked, crumbled bacon** with the shredded cheddar cheese (Instruction 5).
- **Spicy Kick:** Add $\frac{1}{2}\text{ teaspoon}$ of **red pepper flakes** to the beef seasoning (Instruction 2), or drizzle with hot sauce before serving.
- **Onion Crunch:** Substitute the finely diced onion with $\frac{1}{4}\text{ cup}$ of **crispy fried onions** (like French’s) folded into the beef mixture right before rolling.
- **Deluxe Topping:** Before baking, substitute the plain garlic butter with a mixture of **melted butter, Dijon mustard, and everything bagel seasoning**.
**Use a Pizza Cutter:** A pizza cutter is excellent for slicing the rolled log (Instruction 6), as it maintains the circular shape of the rollups better than a traditional knife, which can compress them.
**Par-Cooking the Filling:** The beef filling must be fully cooked (Instruction 1) because the final bake time (20-25 minutes) is only sufficient to heat the ingredients through and brown the crust, not to cook the meat completely.
**Brush Before and After:** For the ultimate glossy and flaky crust, brush the rollups **before** baking with the garlic butter for browning, and **after** they come out of the oven for a final fresh garlic pop (Instruction 7).
**No Egg Wash Needed:** The garlic butter glaze serves as a rich alternative to an egg wash, providing ample fat for browning and adhesion for the sesame seeds.
Conclusion: A Delicious Twist
The **Garlic Butter Beef Cheeseburger Rollups** are the perfect example of maximizing flavor with minimal effort. By following **The Fat and Flavor Balance Rule** to ensure a dry filling, avoiding **The Filling Temperature Trap**, and executing **The Tight Roll and Golden Finish Protocol**, you produce an appetizer that is crisp, flaky, and bursting with rich cheeseburger flavor. This recipe is a guaranteed crowd-pleaser that delivers on its promise of comfort food magic.
Frequently Asked Questions (FAQ)
Q: Why did my dough get soggy on the bottom?
A: You likely skipped the crucial step of **draining the grease** (Instruction 1). Excess fat in the filling melts and soaks into the laminated dough during baking.
Q: Why did my rollups spread out and flatten?
A: The dough was likely **too warm** (Tip 6) when rolled, causing the butter layers to melt, or the log was not rolled **tightly enough** (Instruction 6), which prevents the layers from holding their shape.
Q: Can I use ground turkey instead of beef?
A: **Yes**, but ground turkey is much leaner. You may need to add an extra tablespoon of butter or oil to the filling during the seasoning stage to prevent it from tasting dry (Instruction 2).
Q: Can I assemble these ahead of time?
A: **Not recommended**. The moisture from the filling will seep into the dough over time, making it soggy. It’s best to assemble them just before baking.
ADVERTISEMENT