ADVERTISEMENT
Phase 1: Preparing the Pudding and Crunch
- **Make Pudding (SET AND STABILIZE, Part 1):** In a large bowl, whisk the **instant banana pudding mix** and **2 cups cold milk** vigorously for **$2\text{ minutes}$**.
- **Set Pudding (SET AND STABILIZE, Part 2):** Allow the mixture to stand for $5\text{ minutes}$ until thickened.
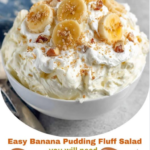
- **Fold in Whipped Topping (WHIPPED FOLD PROTOCOL):** Gently **fold** the **thawed whipped topping** into the set pudding mixture until no streaks remain. Do not over-mix.
- **Prepare Crunch:** In a separate bowl, combine the **crushed vanilla wafers, pulverized freeze-dried strawberries, $\frac{1}{4}\text{ cup}$ melted butter, and optional red food coloring**. Stir until crumbly and uniformly coated.
Phase 2: Assembly and Final Set
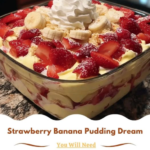
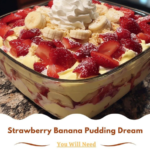
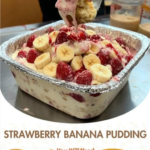
- **Layer Base:** In a $9\times 13\text{ inch}$ dish (or individual cups), spread a thin layer of the pudding mixture. Follow with a layer of **vanilla wafers** and **sliced bananas**.
- **Repeat Layers:** Repeat the layers: pudding mixture, then wafers/bananas, ending with a final layer of pudding.
- **Chill:** Cover the dish and **refrigerate for at least $4\text{ hours}$** (preferably overnight). This allows the wafers to soften and the pudding layers to fully stabilize.
- **Serve (MOISTURE BARRIER PRINCIPLE):** Just before serving, sprinkle the **Strawberry Crunch** mixture evenly over the top layer of the pudding.
Serving and Storage: The Perfect Chill
Optimal handling for this chilled, layered dessert:
- **Serving:** Always serve cold, straight from the refrigerator. The chill ensures the pudding layers are firm and clean when scooped.
- **Storage:** Store, covered, in the refrigerator for up to **4 days**. Note that the crunch will soften after the first day if left on top (Tip 7).
The Milk Temperature: Using **milk that is ice-cold** (Ingredient I) is the most critical step for instant pudding. It ensures the fastest set time and maximum viscosity for the **instant banana pudding mix**.
Preventing Soggy Wafers: For the ultimate texture, dip the **vanilla wafers** (Ingredient III) very quickly into $\text{milk}$ or $\text{water}$ before layering. This jumpstarts the softening process without making them too mushy.
The Freeze-Dried Advantage: Using **pulverized freeze-dried strawberries** (Ingredient II) for the crunch provides intense strawberry flavor and color without adding any moisture, which is essential for maintaining crispness.
Topping Substitution: If avoiding whipped topping (Cool Whip), you may substitute with **2 cups of fresh, stabilized whipped cream**. The cream must be stabilized (with powdered sugar or gelatin) to prevent it from weeping into the pudding.
Assembly Time: The entire assembly process (Instruction 5) should be performed efficiently. If the pudding sits too long at room temperature, it can lose viscosity, leading to a weaker structure.
Variations: Customizing Crunch and Flavor
Easily adapt the flavor profile of the pudding:
- **Chocolate Crunch:** Substitute the freeze-dried strawberries (Ingredient II) with **cocoa powder** and the vanilla wafers with **Oreo wafers** for a chocolate crunch banana pudding.
- **Tropical Twist:** Use **coconut milk** for the pudding base (Ingredient I) and incorporate a layer of **toasted shredded coconut** between the pudding layers.
- **Homemade Pudding:** For a richer flavor, use a **cooked banana custard recipe** instead of the instant mix. Ensure the custard is fully cooled and set before folding in the whipped topping.
- **Nutty Crunch:** Add **$\frac{1}{4}\text{ cup}$ of finely chopped pecans or walnuts** to the Strawberry Crunch mixture (Instruction 4).
**Stirring Consistency:** When whisking the pudding (Instruction 1), do not stop until the full $2\text{ minutes}$ is complete; this ensures every starch granule is properly hydrated.
**Aesthetic Prep:** For the neatest presentation in a clear dish, arrange the **banana slices** (Ingredient I) and **vanilla wafers** (Ingredient III) against the glass sides first before pouring the pudding into the middle.
**Serving Crunch:** If you are unsure of serving time, store the majority of the **Strawberry Crunch** (Ingredient II) separately and only dress the individual portions as they are served to maximize crispness.
**Banana Timing:** Slice the bananas (Ingredient I) just before adding them to the layers. Slicing them too early will cause browning due to oxidation.
Conclusion: The Ultimate Dessert Fusion
The **Strawberry Crunch Banana Pudding** is a delightful fusion achieved through technical precision. By adhering to **The Set and Stabilize Rule** for the pudding’s firmness, ensuring the filling is lightened via **The Whipped Fold Protocol**, and preserving the crucial texture with **The Moisture Barrier Principle**, you create a layered dessert that offers creamy comfort and an exciting strawberry crunch every single time.
Frequently Asked Questions (FAQ)
Q: Why did my pudding layer turn out runny?
A: You likely used **warm or room-temperature milk** (Tip 6) or did not whisk the **instant pudding mix** (Instruction 1) for the full $2\text{ minutes}$ required for setting.
Q: Can I use fresh strawberries instead of freeze-dried?
A: **No**, fresh strawberries contain too much moisture (Tip 6). They will make the crunch soggy and shorten the shelf life of the pudding.
Q: What is the best way to crush the vanilla wafers for the crunch?
A: Use a **food processor** for a uniform, fine crumb, or place them in a Ziploc bag and crush them with a rolling pin.
Q: Can I assemble this in individual cups?
A: **Yes**, individual serving cups are excellent for portion control and presentation. Layering steps (Instruction 5) remain the same.
ADVERTISEMENT