ADVERTISEMENT
Phase 1: Setting the Base and Creating the Creamy Layer
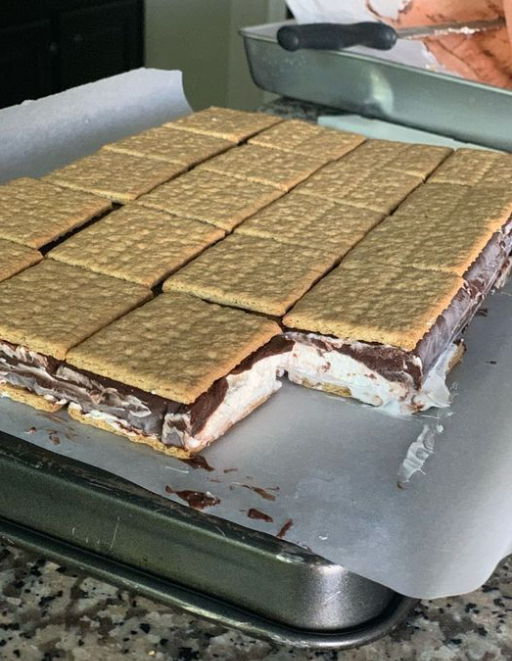
- **Prepare the Pan:** Line a **$9 \times 13$ inch baking dish** with the first layer of **graham cracker squares**. Arrange them in a single, snug layer, breaking them as necessary to completely cover the bottom of the pan.
- **Cream the Stabilizers:** In a large bowl, ensure the **cream cheese is fully softened**. Beat the cream cheese until smooth. Add the **marshmallow creme** and beat until thoroughly combined, light, and fluffy.
- **Fold in Whipped Topping:** Gently **fold in the thawed Cool Whip** until the mixture is uniform. Folding, rather than beating, keeps the whipped topping light and airy, maintaining the desired texture.
- **Layer the Filling:** Carefully spread the cream cheese and marshmallow mixture evenly over the graham cracker base. Use an offset spatula to create a smooth, flat layer.
- **Add the Second Cracker Layer:** Place the remaining **graham cracker squares** over the creamy layer, pressing them lightly into the filling. This creates the ‘sandwich’ structure.
Phase 2: The Pudding Topping and Setting
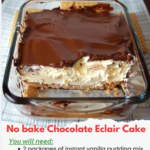
- **Prepare the Thick Pudding (CRITICAL):** In a separate bowl, whisk together the **instant chocolate pudding mix** and **2 ½ cups of cold milk**. Whisk vigorously for 2 minutes. The pudding will set quickly. This reduced amount of milk ensures the pudding is extra firm and stable for freezing.
- **Spread the Pudding:** Immediately pour the thickened chocolate pudding over the second layer of graham crackers. Use the offset spatula to spread it smoothly and quickly to the edges of the pan.
- **Cover and Freeze (MANDATORY):** Cover the dish tightly with plastic wrap or aluminum foil. Place the dessert in the **freezer for at least 4 hours**, or until completely firm. This deep chill is what softens the crackers and sets all the layers simultaneously.
Phase 3: Serving
- **Thaw Slightly (Optional but Recommended):** For easier slicing and a creamier mouthfeel, remove the dessert from the freezer **15–20 minutes** before serving.
- **Slice and Serve:** Use a long, sharp knife dipped in hot water and wiped dry to cut the dessert into 16 clean squares.
Serving and Storage: The Freezer is Your Friend
This dessert is designed for the freezer, making it an excellent candidate for advance preparation.
- **Serving:** Serve directly from the freezer or after a short 15-minute thaw. Slicing with a hot knife is the best way to achieve clean portions.
- **Storage:** Store the assembled and frozen dessert, tightly wrapped, in the **freezer for up to 3 months**. Cut pieces also freeze well in an airtight container.
- **Refrigerated Storage:** The dessert can be kept in the **refrigerator** if preferred, but it will not be as firm and sliceable. It will maintain a soft, cake-like texture for up to 4 days.
- **Defrosting:** If freezing entire slices, allow them to thaw for 30–45 minutes in the refrigerator before serving for a softer, pudding-like consistency.
Tips: Guaranteeing a Stable, Sliceable Dessert
Room Temperature Cream Cheese: Ensure the cream cheese is fully softened (Step 2). Cold cream cheese will result in lumps, which will compromise the silky texture of the filling layer.
Pudding Firmness Check: The instruction to use only **$2 \frac{1}{2}$ cups of milk** (less than the box often calls for) is the recipe’s safeguard against a runny pudding. Always use cold milk, as this accelerates the setting process, ensuring maximum thickness before the pudding is spread.
The Hot Knife Technique: For truly beautiful, clean slices (especially from the freezer), heat your knife under hot running water for 30 seconds, wipe it dry, and slice quickly. Reheat and wipe the knife between each cut.
Flavor Sealing: Because this dessert is stored in the freezer, ensure it is tightly wrapped in two layers (plastic wrap then foil) to prevent it from absorbing any off-flavors from the freezer.
Cracker Density: Lay the graham crackers very close together, but do not overlap them. The goal is a uniform layer that softens into a cohesive base layer, not a thick, dense crust.
Variations: Customizing Flavors and Textures
This flexible structure allows for easy, delicious substitutions:
- **Flavor Swap:** Substitute the chocolate pudding for **instant vanilla, banana, or pistachio pudding**. The cream cheese/marshmallow layer remains a fantastic pairing for any flavor.
- **Crust Change:** Swap the graham crackers for **vanilla wafers, chocolate wafers, or thin sugar cookies**. Note that thinner cookies will soften faster than graham crackers.
- **Creamer Upgrade:** Instead of milk, use a **stable liquid coffee creamer** (like vanilla or caramel flavor) when preparing the instant pudding for an added layer of richness and flavor complexity.
- **Ganache Topping:** For a richer finish, replace the pudding with a thick, cooled **chocolate ganache** (equal parts melted chocolate and heavy cream). This requires a chilling set time, not instant setting.
- **Extra Crunch:** Sprinkle a layer of **chopped, toasted pecans or walnuts** over the creamy filling (Step 4) for an unexpected textural crunch against the smooth layers.
Marshmallow Creme Substitution: If marshmallow creme is unavailable, you can substitute it with 1 cup of **mini marshmallows melted with 2 tablespoons of milk** and cooled slightly before mixing with the cream cheese. This provides the same binding effect.
Homemade Whipped Cream Stabilization: If using fresh whipped cream instead of Cool Whip, stabilize it by whipping in **1 tablespoon of powdered gelatin** (dissolved in 3 tablespoons of hot water and cooled). This prevents the cream from deflating or weeping during the long chill/freeze time.
A Faster Softening Trick: If you need to soften the crackers faster, lightly brush the first layer of crackers with a tiny amount of **milk** before spreading the filling (Step 4). Be careful not to use too much, or they will become soggy immediately.
Perfect Layering:** Use an offset spatula (a small, flexible spatula) to spread both the filling and the pudding. This tool provides the best control for creating smooth, even layers that touch the edges of the pan without disturbing the cracker base.
Conclusion: The Ultimate Make-Ahead Dessert
The No-Bake Chocolate Eclair Dessert earns its status as an all-time classic through simplicity and guaranteed success. By mastering the ratios—especially the reduced milk for the pudding—and respecting the essential freezing time, the dish transforms into a cohesive, perfectly layered, and tender dessert. It is the ultimate make-ahead freezer treat, offering complex textures and satisfying chocolate flavor with zero oven time, making it a perfect, reliable staple for any gathering.
Frequently Asked Questions (FAQ)
Q: My dessert is falling apart when I slice it. What is the issue?
A: It likely did not freeze long enough (less than 4 hours). The full freezing time is required to solidify the pudding and filling and allow the crackers to soften into a cake-like base, which provides stability. The marshmallow creme needs time to fully set.
Q: Why did my pudding layer seem runny?
A: You may have used too much milk or skim milk. The recipe intentionally calls for less milk than the package usually suggests (2 1/2 cups for a large box) to ensure maximum firmness. Always use cold, full-fat milk for the best set.
Q: Can I use fresh whipped cream instead of Cool Whip?
A: Yes, but you must stabilize it. Fresh whipped cream often weeps liquid when frozen and thawed. To stabilize, whip the cream with 1-2 tablespoons of **powdered sugar** and 1 teaspoon of **vanilla pudding mix** (or a commercial stabilizer) to ensure it holds its shape.
Q: Do the graham crackers get soggy?
A: No, not soggy, but they soften dramatically. The moisture absorbed from the creamy layers transforms them from crunchy crackers into a tender, cake-like layer, much like ladyfingers in a tiramisu.
ADVERTISEMENT