
Step 1: Prep and Sift
Preheat your oven to 350°F. Line a 13×9 metal baking pan with foil, leaving an overhang on the sides to act as “handles” later. Spray with cooking spray. Sift the flour, cocoa powder, and salt together in a bowl and set aside.
Step 2: The Whipping Phase
In a stand mixer, combine the sugar, vanilla, espresso powder, and cold eggs. This is the secret step: Whip on medium-high for a full 7 to 9 minutes. The mixture should become pale yellow, fluffy, and significantly increased in volume.
Step 3: The Chocolate Melt
In a small saucepan over low heat, melt the butter and vegetable oil together. Once the butter is melted, remove from the heat and stir in the finely chopped dark chocolate. Stir until the mixture is glossy and completely smooth.
Step 4: The Incorporation
Reduce the mixer speed to low. Slowly pour in the warm chocolate mixture. Once combined, add the sifted dry ingredients. Mix for only one minute to avoid over-developing the gluten. Finish by gently folding the batter with a spatula to ensure no pockets of flour remain.
Step 5: The Bake
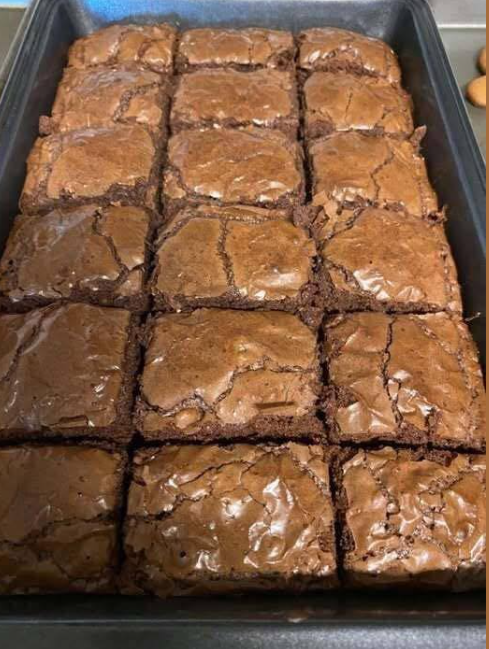
Pour the batter into the prepared pan. Bake for 30–35 minutes. When finished, the edges should be set, but a toothpick inserted in the center should come out with a few moist crumbs—not dry, and not liquid batter.
Serving and Storage
Serving: You must allow these brownies to cool completely to room temperature before cutting. This sets the “fudge” structure. For the cleanest cuts, use the foil handles to lift the entire block out of the pan and use a hot, dry knife.
Storage: These brownies stay fresh in an airtight container at room temperature for up to 4 days. Fridge Tip: Storing them in the refrigerator makes them even denser and chewier—perfect for those who love a cold, truffle-style treat.
Tips: The Secret to the Crackle
- Don’t Scrimp on Whipping: That 7–9 minute whipping time is non-negotiable. It dissolves the sugar into the egg proteins, which rises to the top during baking to form that delicate, shiny crust.
- Metal vs. Glass: Use a metal pan for brownies whenever possible. Metal conducts heat more efficiently, leading to crispier edges and a more even bake compared to glass.
Variations: Elevating the Fudge
- Salted Caramel Swirl: Drop dollops of salted caramel onto the batter before baking and swirl with a knife.
- The Nutty Crunch: Fold in 1 cup of toasted walnuts or pecans during the final folding step.
- Peanut Butter Marble: Melt 1/4 cup of peanut butter and swirl it into the top layer of the batter for a salty-sweet contrast.
Tips: Quality Matters
- Choose Your Chocolate: Since the 6 oz of dark chocolate is the primary flavor, use a bar you would enjoy eating on its own (at least 60% cacao).
- Espresso Powder: Don’t worry, your brownies won’t taste like coffee! The espresso powder simply acts as a chemical enhancer that makes the chocolate taste “more like chocolate.”
Conclusion: A New Gold Standard
Mastering the homemade fudge brownie is a rite of passage for any home baker. While the technique requires a bit more patience than a box mix—specifically in the whipping and the cooling—the results are incomparable. You are left with a dessert that is unapologetically rich, structurally perfect, and deeply satisfying. These brownies are the ultimate crowd-pleaser, whether served at a high-end dinner party or enjoyed as a midnight snack with a cold glass of milk. Once you’ve tasted the difference that real dark chocolate and properly whipped eggs make, there is no going back.
Frequently Asked Questions
- Why are my brownies cakey?
- Cakey brownies usually result from too much flour or over-beating the batter after the flour is added. Ensure you measure your flour accurately (spoon and level) and only mix the flour in for 60 seconds.
- Can I use milk chocolate instead of dark?
- You can, but the brownies will be significantly sweeter and lose that deep cocoa “punch.” If using milk chocolate, you may want to reduce the granulated sugar by 1/4 cup.
- How do I get those perfectly clean squares?
- Chill the brownies in the fridge for an hour after they reach room temperature. Use a large chef’s knife, dip it in hot water, wipe it dry, and make one clean slice. Repeat the cleaning/dipping for every cut.
Would you like me to suggest a recipe for a homemade bourbon-infused whipped cream to serve on top, or perhaps show you how to scale this recipe down for an 8×8 pan?
Related posts:
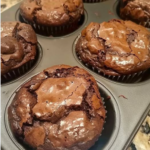 The Corner Advantage: Mastering Crispy-Chewy Brownie Cupcakes
 Oreo Fudge Brownie Pizza
 The Ultimate Oreo Fudge Brownie Pizza: A Decadent Dessert
 Ultra-Fudgy Keto Cheesecake Brownies: The Comprehensive Guide
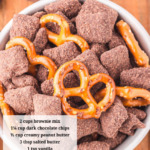 Brownie Batter Puppy Chow: A Technical Masterclass
 Fudge Factor: Mastering Cookies from Brownie Mix
