

- The Yeast Bloom: Combine the 110°F milk, sugar, and yeast in a bowl. Let it sit for 5–10 minutes until it becomes “foamy.” If it doesn’t foam, your yeast is inactive and you must start over.
- The Dough Build: In a stand mixer fitted with a dough hook, mix the flour and salt. Add the yeast mixture and the eggs. Mix on low until a shaggy dough forms.
- The Butter Integration: With the mixer running, add the softened butter one tablespoon at a time. Wait for each piece to disappear before adding the next. This creates the “laminated” richness of brioche.
- The Knead: Knead on medium speed for 8–10 minutes. The dough should be tacky but pull away cleanly from the sides of the bowl.
- The First Rise: Place in a greased bowl, cover with a damp cloth, and let rise in a warm spot for 1.5 to 2 hours, or until doubled in size.
- The Shape: Punch down the dough. Divide into 12–15 equal portions. Roll into smooth balls and place on a parchment-lined baking sheet.
- The Second Rise: Cover and let rise for another 45 minutes. They should look “puffy” and delicate.
- The Bake: Brush with an egg wash (1 egg + 1 tbsp milk) for that professional shine. Bake at 350°F (175°C) for 20–25 minutes until deep golden brown.
Serving and Storage
Serving: These are best served warm, ideally within 2 hours of baking. Brush the tops with a little extra melted butter immediately after they come out of the oven for a “soft, satin” finish.
Storage: Because brioche is high in fat, it stays soft longer than lean breads. Store in an airtight bag for up to 3 days. To refresh, microwave for 10 seconds or toast lightly. They also freeze beautifully—wrap tightly in plastic and foil for up to 2 months.
Tips: The “Windowpane” Test
How do you know if you’ve kneaded enough? Take a small piece of dough and gently stretch it between your fingers. If you can stretch it thin enough to see light through it without it tearing, your gluten is perfectly developed. This is called the “windowpane test” and it’s the secret to a roll that pulls apart in long, soft strands.
Variations: Sweet and Savory Twists
- The Honey-Butter Glaze: Replace the granulated sugar with honey in the dough for a deeper, floral sweetness.
- The Herb Brioche: Knead in 1 tablespoon of fresh rosemary or thyme during the final stage of mixing for a savory dinner roll.
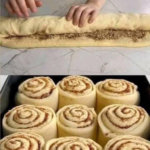
- The Cinnamon Swirl: Roll the dough flat, sprinkle with cinnamon sugar, and roll it up like a log before slicing into rolls for a “breakfast style” brioche.
Tips: Why 110 Degrees?
Temperature control is the difference between a master baker and a beginner. At 110°F, the milk is the perfect “incubator” for yeast. Once you hit 130°F, you risk damaging the yeast cells, which leads to a flat, dense roll. Use a thermometer—it’s the best investment you can make for your bread baking!
Conclusion: A Labor of Love
Making Milk Brioche Rolls is a commitment to the process. It is a slow, methodical journey that rewards you with the most intoxicating aroma in the world. This bread is simple, nourishing for the spirit, and provides a level of satisfaction that store-bought bread simply cannot match. Thank you for your support and for keeping the art of home baking alive. Happy baking!
Frequently Asked Questions
- Can I make the dough ahead of time?
- Yes! You can let the first rise happen in the refrigerator overnight. Cold fermentation actually develops a deeper, more complex flavor in the dough.
- My dough is very sticky, should I add more flour?
- Resist the urge! Brioche dough is supposed to be rich and tacky. If you add too much flour, the rolls will be heavy and dry rather than light and airy.
- Can I use bread flour instead of all-purpose?
- You can, but the rolls will have a “chewier” texture similar to a bagel. All-purpose flour is preferred for that delicate, “cake-like” brioche bite.
Related posts:
 The Ultimate Guide to Soft and Fluffy Cinnamon
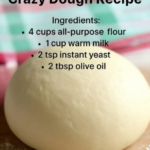 The Ultimate Versatility: Mastering the Crazy Dough Recipe
 Soft & Fluffy Cinnamon-Walnut Rolls: A Hearty Family Favorite
 The Banana-Cinnamon Hybrid
 The Ultimate Guide to Homemade Krispy Kreme-Style Yeast Donuts
 The Ultimate Brunch Hack: King’s Hawaiian Cinnamon Rolls
