Step 1: The Salting and Icing
Place your sliced cucumbers and onions in a very large ceramic or glass bowl. Sprinkle the 1/3 cup of kosher salt over the vegetables and toss thoroughly. Cover the entire surface with a thick layer of ice cubes. Let this sit for 3 hours. As the ice melts and the salt penetrates the skins, the vegetables will release their water. This is the “crunch insurance” step that separates amateur pickles from heirloom-quality ones.
Step 2: The Rinse and Drain
After three hours, discard the remaining ice. Rinse the vegetables thoroughly in cold water to remove the excess salt. Drain them well in a colander, pressing down gently to ensure no pools of water remain. If the cucumbers are too salty at this stage, the final pickle will be unpalatable.
Step 3: Crafting the Golden Brine
In a large stainless steel pot, combine the cider vinegar, sugar, mustard seeds, celery seeds, and turmeric. Bring the mixture to a rolling boil, stirring occasionally until the sugar has completely dissolved. The aroma of the vinegar and spices should be pungent and sweet.
Step 4: The Hot Pack
Add the drained cucumbers and onions to the boiling brine. Heat them just until the mixture almost reaches a boil again. Do not overcook! You want the vegetables to be heated through so they absorb the brine, but boiling them for too long will destroy their structural integrity.
Step 5: Canning and Processing
Ladle the hot pickles into sterilized canning jars, leaving 1/2 inch of headspace at the top. Ensure each jar has an equal distribution of spices and onions. Process in a boiling water bath for 10 minutes (adjust for altitude) to ensure a shelf-stable seal.
Serving and Storage Regulations
Storage: While you can eat these immediately, the flavors are not yet integrated. Store your processed jars in a cool, dark place for at least 2 to 4 weeks. This “mellowing” period allows the turmeric and mustard seeds to permeate the core of the cucumber slices. Once a jar is opened, it must be refrigerated and will remain at peak quality for up to 3 months.
Serving: Bread and Butter pickles are the ultimate accompaniment to fatty meats. Serve them alongside a pulled pork sandwich, atop a buttery smash burger, or chopped finely into a homemade potato salad. For a truly old-fashioned experience, serve them chilled in a crystal dish alongside sharp cheddar cheese and saltine crackers.
Tips: The Science of the Crunch
- Temperature Matters: Always use ice-cold water for the initial rinse. The colder the vegetable, the harder the cell walls remain when they hit the hot vinegar.
- Uniformity: Use a mandoline slicer. If your rounds vary in thickness, some will be mushy while others remain raw. Aim for a consistent $6$mm thickness.
- Hard Water Alert: If your tap water is very high in minerals (hard water), it can darken the pickles. Use filtered water for your brine to keep the turmeric color bright and neon-yellow.
Variations: Putting a Spin on Tradition
Once you master the base recipe, you can adjust the flavor profile to suit your family’s palate:
- The Spicy Kick: Add 1/2 teaspoon of red chili flakes or two sliced habanero peppers to the brine for a “Sweet and Heat” variation.
- The Garlic Infusion: Add 4 cloves of smashed garlic to the pot during the brine-boiling phase for a savory, pungent undertone.
- The Honey Alternative: Replace half of the granulated sugar with local honey for a floral, more complex sweetness.
Tips: Perfecting the Visuals
- The Turmeric Stain: Turmeric is a powerful dye. Avoid using plastic utensils or bowls during the cooking process, as they will be permanently stained yellow. Use stainless steel or glass.
- Headspace Logic: If you leave too much headspace in your jar, the top layer of pickles will oxidize and turn brown. Ensure the brine completely covers the vegetables.
Conclusion: A Legacy in a Jar
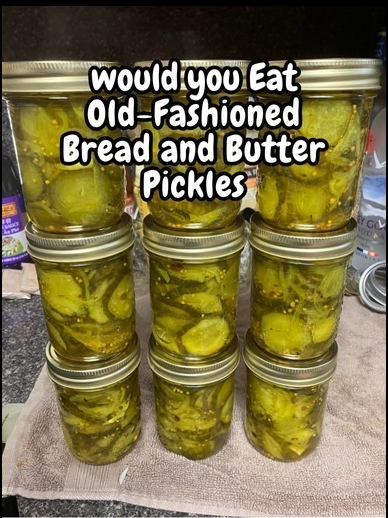
Making Old-Fashioned Bread and Butter Pickles is an act of patience and a tribute to the resourcefulness of generations past. By following the strict regulations of salting, icing, and quick-brining, you aren’t just making a snack; you are preserving a piece of culinary history. These pickles represent the perfect marriage of garden-fresh bounty and pantry-staple science. As you line your shelves with these glowing amber jars, take pride in knowing that you have mastered a skill that has brought comfort and flavor to kitchen tables for nearly a century.
Frequently Asked Questions
Can I use English or Salad cucumbers?
While you can, the results will be inferior. English cucumbers have thinner skins and a higher water content, making them prone to mushiness. Pickling cucumbers (Kirbys) are designed to withstand the heat of the brine.
Why did my brine turn cloudy?
This is usually caused by using table salt instead of pickling or kosher salt. The anti-caking agents in table salt dissolve and create a cloudy appearance. If the brine is cloudy and the jar hasn’t been processed, it might also indicate spoilage.
Do I have to use a water bath canner?
If you want them to be shelf-stable (stored in the pantry), yes. If you do not wish to can them, you can simply put the hot pickles in jars, let them cool, and store them in the refrigerator as “Fridge Pickles.” They will last about 4-6 weeks this way.