

Phase 1: The First Thermal Cycle (3 Minutes)
Combine the sugar, butter, and milk in a large microwave-safe glass bowl. Choose a bowl bigger than you think you need—the mixture will bubble up significantly. Microwave on high for 3 minutes. This cycle is effectively doing the work of a stovetop boil, bringing the sugar syrup to the correct concentration.
Phase 2: The Emulsion (The Hand Mixer)
Once the 3 minutes are up, the mixture will be incredibly hot. Immediately use a hand mixer to blend the ingredients. This mechanical agitation helps break down any remaining sugar granules and incorporates the butter thoroughly into the milk. This is the “seeding” phase that prevents a grainy texture.
Phase 3: The “Flash” Cycle (31 Seconds)
Why 31 seconds? This final burst of heat ensures the syrup is at the peak temperature to accept the cold peanut butter. It creates a “super-saturated” state. Add the peanut butter immediately after this cycle. The Golden Rule: Mix by hand from this point forward. Using a hand mixer with the peanut butter can over-aerate the fudge, making it too light and airy rather than dense.
Phase 4: The Set and Foil
Line an 8×8 pan with aluminum foil, leaving an overhang for easy removal. Pour the mixture in and smooth the top. Unlike oven-baked goods, fudge “sets” through cooling. The peanut butter oils will solidify as the temperature drops, locking the sugar syrup in place.
Phase 5: The Chill and Chop
Allow the pan to sit on the counter for 30 minutes, then move to the refrigerator for at least 2 hours. Once firm, use the foil to lift the entire block out and use a sharp, warm knife to chop it into 1-inch squares.
The Science of “No-Fail” Fudge
Traditional fudge fails when sugar crystals grow too large. By using peanut butter, we are introducing a massive amount of “interfering agents” (fats and proteins). These agents physically block the sugar crystals from finding each other and growing. This is why peanut butter fudge is almost always smoother and more forgiving than chocolate fudge. The 31-second microwave burst is just enough to lower the viscosity of the peanut butter so it can encapsulate every sugar molecule perfectly.
Chef’s Tips for Perfection
- The “Luster” Trick: If your fudge looks dull, add 1/2 teaspoon of vanilla extract along with the peanut butter. The alcohol in the extract helps the fats in the peanut butter shine, giving the fudge a professional, glossy look.
- Salt Balance: If you are using unsalted peanut butter, add a pinch of sea salt. Salt is a flavor enhancer that makes the “nutty” notes of the peanut butter vibrate against the sugar.
- The Foil Shortcut: Lightly spray your aluminum foil with non-stick cooking spray before pouring the fudge. Peanut butter fudge is notoriously “grabby,” and this ensures the foil peels away perfectly from the edges.
Gourmet Variations
| Variation | The Addition | The Vibe |
|---|---|---|
| Crunchy Holiday | Use Crunchy Peanut Butter. | Added texture and rustic feel. |
| Buckeye Style | Drizzle melted semi-sweet chocolate on top. | The classic chocolate-PB pairing. |
| Maple Nut | Add 1/2 tsp maple extract. | Warming, autumnal depth. |
Conclusion: Sweet Success in Record Time
Peanut Butter Microwave Fudge is a testament to the fact that great cooking doesn’t always require hours of labor. It’s about understanding how ingredients react to heat. By mastering this 15-minute recipe, you gain a versatile, reliable dessert that can be whipped up whenever the “sweet tooth” strikes. As you share these squares this Tuesday night, enjoy the looks of disbelief when you tell your guests it only took three minutes in the microwave. Happy holidays and happy indulging!
Frequently Asked Questions
- My fudge didn’t set! Why?
- This usually means the sugar mixture didn’t get hot enough. Microwaves vary in power (wattage). If your fudge is runny, try increasing the initial 3-minute cycle by 20 seconds next time.
- Can I use “Natural” peanut butter?
- It is not recommended. Natural peanut butter (the kind that separates) has too much free-floating oil, which can cause the fudge to remain greasy or fail to set firmly.
- Is this recipe gluten-free?
- Yes! Peanut butter, sugar, milk, and butter are all naturally gluten-free. Just ensure your peanut butter hasn’t been processed on shared equipment if you have a severe allergy.
Would you like me to suggest a “Chocolate Ganache Topping” for this fudge, or perhaps show you how to turn this into “Peanut Butter Fudge Swirl Ice Cream”?
Related posts:
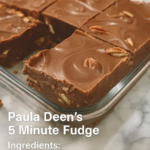
 Mastering Paula Deen’s 5 Minute Fudge
 Holiday Magic: The Ultimate Guide to Two-Ingredient No-Bake Fudge
 Mastering 3 Minute Condensed Milk Fudge
 Mastering Old-Fashioned Chocolate Fudge
 Confectionery Chemistry: Mastering No-Bake Banana Fudge
 Holiday Magic in Minutes: Mastering Paula Deen’s 5 Minute Fudge
