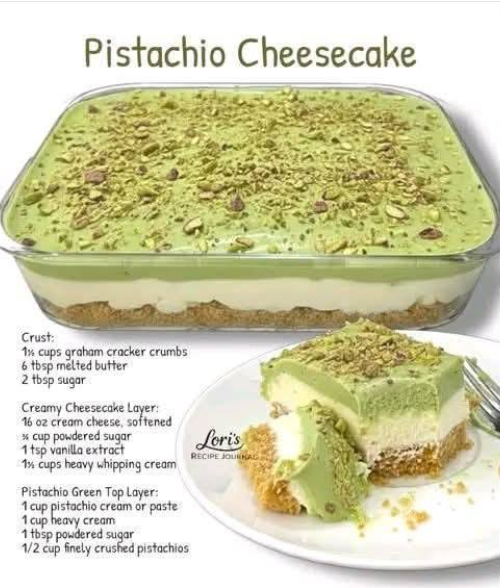
- The Foundation: Combine the crumbs, butter, and sugar. Press firmly into the bottom of a 9-inch springform pan. Pro-Tip: Use the bottom of a flat measuring cup to get a perfectly level surface. Pre-bake at 350°F for 8 minutes, then cool.
- The Creaming: In a large bowl, beat the cream cheese and sugar until “unabashedly” smooth. Do not over-mix, or you will incorporate too much air, which causes cracks.
- The Nutty Infusion: Fold in the pistachio paste and vanilla. The batter should turn a beautiful, natural pale green.
- The Egg Integration: Add eggs one at a time, mixing on low speed just until combined.
- The Water Bath (Bain-Marie): Wrap the outside of your pan in heavy-duty foil to prevent leaks. Place the pan in a larger roasting dish filled with 1 inch of hot water.
- The Slow Bake: Bake at 325°F (160°C) for 55–65 minutes. The edges should be set, but the center should still have a “soft” jiggle.
- The Cooling (The Patience Phase): Turn off the oven and crack the door open. Let the cheesecake sit inside for 1 hour. This slow temperature drop is the secret to a crack-free surface.
Serving and Storage
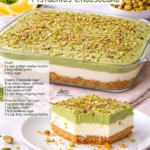
Serving: Chill the cheesecake for at least 6 hours (preferably overnight). Top with a handful of crushed roasted pistachios and a drizzle of white chocolate for a “gourmet” finish. Slice with a hot, wet knife for professional, clean edges.
Storage: This treasure stays fresh in an airtight container in the fridge for up to 5 days. You can also freeze individual slices wrapped in parchment and foil for up to 3 months—they taste like high-end pistachio ice cream when eaten slightly thawed!
Tips: The Temperature Secret
If you take your cream cheese straight from the fridge to the mixer, you will end up with “beads” of cheese that never fully incorporate. To get that “soft and silky” professional texture, leave your cream cheese, eggs, and cream on the counter for at least 2 hours before you begin. Room-temperature ingredients emulsify much better, creating a uniform, dense, yet creamy crumb.
Variations: Customizing the Emerald
- The Chocolate-Pistachio: Use chocolate graham crackers for the crust to create a “Reese’s-style” flavor profile but with pistachios.
- The Lemon-Bright: Add 1 tbsp of lemon zest to the batter. The acidity highlights the floral notes of the pistachio beautifully.
- The Baklava Twist: Drizzle the finished cake with honey and a sprinkle of cinnamon for a Middle-Eastern inspired treat.
Tips: Why the Water Bath?
Cheesecake is essentially a custard. Custards are delicate and hate direct, dry heat. The water bath ensures that the temperature around the pan never exceeds 212°F (100°C), the boiling point of water. This gentle heat cooks the eggs slowly, preventing them from “scrambling” and ensuring your pistachio masterpiece is as smooth as silk from edge to center.
Conclusion: A Nutty Triumph
Mastering the Pistachio Cheesecake is a rite of passage for the serious baker. It is a dish that rewards precision with “soul-deep” satisfaction. Every bite is a reminder of why simple, high-quality ingredients like butter, cream, and nuts are the cornerstones of the kitchen. Lean back, take a bite, and enjoy your emerald treasure!
Frequently Asked Questions
- Can I use pistachio pudding mix instead of paste?
- You can, but it will change the texture and the color will look more “artificial.” For a real “treasure” result, stick to 100% pistachio paste or butter.
- How do I stop the crust from getting soggy in the water bath?
- Double-wrap (or even triple-wrap) the bottom of your pan in heavy-duty aluminum foil. You can also place the springform pan inside a slightly larger cake pan, then place that in the water bath for a 100% leak-proof seal.
- Why did my cheesecake crack?
- Cracks are usually caused by over-mixing (adding too much air) or cooling too quickly. Follow the “oven-door-crack” cooling method to keep it smooth!