Step 1: Prep the Base
In a medium bowl, combine the crushed vanilla wafers, melted butter, and sugar. Mix until the crumbs are evenly moistened. Press about 3/4 of this mixture into the bottom of a 9×13-inch baking dish or a large trifle bowl. Set the remaining crumbs aside for the topping.
Step 2: Whisk the Pudding
In a large mixing bowl, whisk together the instant vanilla pudding mix and the cold whole milk for 2 minutes until it begins to thicken. Stir in the sweetened condensed milk until completely smooth. Fold in half of the whipped topping (4 oz) to give the pudding an airy, mousse-like texture.
Step 3: The Fruit Layer
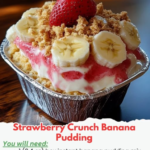
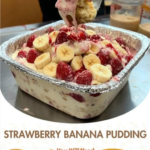
Arrange a single layer of banana slices over the crust, followed by a layer of sliced strawberries. Be generous—you want fruit in every single bite!
Step 4: The Creamy Blanket
Pour the pudding mixture over the fruit, spreading it gently with a spatula to ensure it fills all the gaps. Smooth the top until even.
Step 5: The Final Flourish
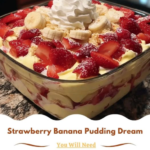
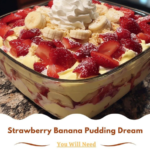
Spread the remaining whipped topping over the pudding layer. Sprinkle the reserved buttery wafer crumbs across the top. For a professional look, garnish with a few fresh strawberry halves and a couple of whole vanilla wafers.
Step 6: The Essential Chill
Refrigerate for at least 4 hours, though overnight is best. This allows the wafers to soften and the flavors of the strawberry and banana to infuse into the cream.
Serving and Storage
Serving: Scoop directly from the dish into bowls. If you used a trifle bowl, ensure your spoon reaches all the way to the bottom to get the crust in every serving.
Storage: This dessert is best eaten within 2 days. Because bananas naturally oxidize (turn brown) when exposed to air, the dish is most visually appealing on the first day. Keep it tightly covered with plastic wrap in the refrigerator.
Tips: Preventing Soggy Fruit
- Lemon Juice Trick: To keep your bananas looking bright and yellow, toss the slices in a tablespoon of lemon juice before layering them. This prevents browning without affecting the flavor.
- Dry Your Berries: After washing the strawberries, ensure they are bone-dry before slicing. Excess water will thin out the pudding and make the dessert runny.
Variations: Customizing the Dream
- The Chocolate Dream: Use chocolate pudding mix instead of vanilla and add a layer of mini chocolate chips between the fruit.
- Cheesecake Twist: Beat 8 oz of softened cream cheese into the pudding mixture for a denser, cheesecake-flavored filling.
- Shortbread Substitute: Swap the vanilla wafers for crushed shortbread cookies or Chessmen cookies for a more buttery, upscale flavor.
Tips: Professional Presentation
- Trifle Elegance: If using a glass trifle bowl, press the strawberry slices against the glass walls before adding the pudding. This creates a stunning visual “ring” of fruit around the dish.
- Crust Crunch: If you prefer a crunchier crust, bake the butter/wafer mixture at 350°F for 8 minutes and let it cool completely before adding the fruit.
Conclusion: A Dessert Worth the Wait
The Strawberry Banana Pudding Dream is proof that you don’t need an oven to create a showstopping dessert. It relies on the perfect marriage of creamy, sugary custard and the natural brightness of fresh fruit. While the “no-bake” aspect makes it easy to assemble, the real secret is the patience required to let it set in the fridge. That waiting period transforms the dish into a cohesive, velvety experience that your guests won’t soon forget. It’s a nostalgic nod to the past with a fresh, fruity update that makes it a modern classic.
Frequently Asked Questions
- Can I use frozen strawberries?
- It is not recommended. Frozen berries release too much liquid as they thaw, which will turn the pudding into a watery mess. Stick to fresh berries for the best result.
- How do I make this lighter?
- You can use sugar-free pudding mix, fat-free condensed milk, and skim milk. While the texture will be less “dreamy” and rich, it will still satisfy a sweet craving.
- What if I can’t find vanilla wafers?
- Graham crackers or even Golden Oreos (with the cream removed) make an excellent substitute for the crust and layers.
Would you like me to help you adjust this recipe for a smaller family size, or perhaps suggest a few other “no-bake” summer desserts?