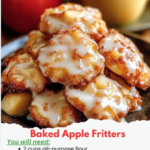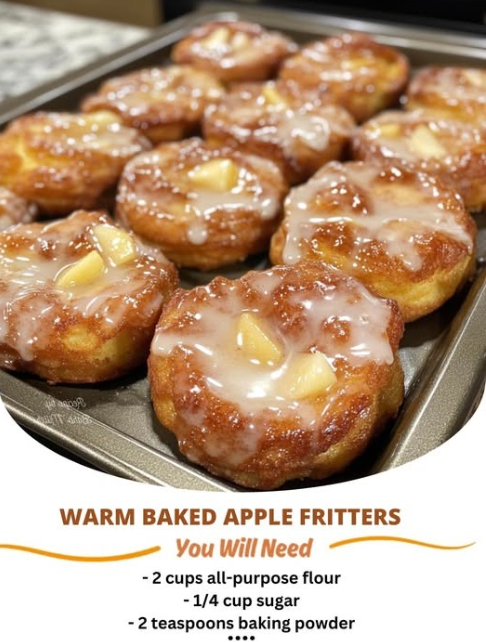
For the Fritter Body
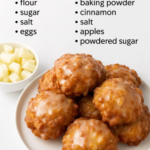
- 2 cups All-Purpose Flour: The reliable foundation for a sturdy yet tender crumb.
- 1/4 cup Granulated Sugar: A modest amount of sweetness, allowing the glaze and fruit to shine.
- 2 teaspoons Baking Powder: The essential leavening agent for that “pillowy” lift.
- 1/2 teaspoon Salt: To sharpen the flavors and balance the sugar.
- The Spices: 1 teaspoon cinnamon and 1/4 teaspoon nutmeg (optional) for that quintessential “harvest” aroma.
- 2 large Apples: Peeled, cored, and finely diced. Granny Smith or Honeycrisp offer the best tart-to-sweet ratio.
- 3/4 cup Milk: To bind the dough into a soft, drop-style consistency.
- 2 Eggs: For richness and structural integrity.
For the Signature Glaze
- 1 cup Powdered Sugar: Sifted to ensure a velvet-smooth finish.
- 1–2 tablespoons Milk or Cider: For a pourable, glossy consistency.
- 1/2 teaspoon Vanilla Extract: To round out the sweetness with a floral note.
The Protocol: Instructions
- The Thermal Start: Preheat your oven to 400°F (200°C). Line a large baking sheet with parchment paper. High heat is vital here to create a “quick-set” exterior while keeping the inside moist.
- Dry Integration: In a large bowl, whisk together the flour, sugar, baking powder, salt, and spices. This ensures the leavening is evenly distributed, preventing “lopsided” fritters.
- The Apple Fold: Toss the finely diced apples into the dry mixture. This coats the fruit in flour, which prevents them from sinking or clumping together in the batter.
- Wet Marriage: In a small bowl, whisk the eggs and milk together. Pour this into the dry ingredients and stir with a wooden spoon just until a thick, lumpy dough forms. Do not overmix, or the fritters will become tough rather than tender.
- The Drop: Using a large spoon or an ice cream scoop, drop mounds of dough onto the prepared baking sheet. Gently flatten them slightly with the back of the spoon to ensure even baking.
- The Bake: Bake for 12–15 minutes. You are looking for a golden-brown exterior and a center that springs back when touched.
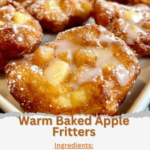
- The Glaze Finish: While the fritters are warm (but not hot), whisk the glaze ingredients together and drizzle generously over the fritters. Let them sit for 5 minutes to allow the glaze to set into a “shatter-crisp” shell.
Presentation: Serving and Storage
Serving: Serve these while they are still carrying the residual heat of the oven. They pair magnificently with a cup of dark roast coffee or a glass of cold apple cider. A small dusting of extra cinnamon on the plate adds a professional, aromatic touch.
Storage: Baked fritters are best consumed within 24 hours. If you have leftovers, store them in a paper bag (rather than plastic) to help maintain the crust.
Reheating: Revitalize the texture by placing them in a 350°F oven for 3–5 minutes. Avoid the microwave, as it will cause the glaze to melt into the dough, making it soggy.
Chef’s Tips: Mastering the Fruit
- Uniform Dice: Cut your apples into 1/4-inch pieces. If they are too large, the fritter will fall apart; if they are too small, you lose that “burst” of fresh fruit texture.
- Temperature Check: Ensure your eggs and milk are at room temperature to help the batter emulsify more smoothly.
- The Glaze Window: Glaze the fritters while they are still warm! This allows a little bit of the glaze to soak into the top layer, while the rest dries into a beautiful, crackly crust.
The Flavor Pivot: Variations
- The Maple Harvest: Substitute the vanilla extract in the glaze for pure maple syrup for a deeper, woody sweetness.
- Berry Fritters: Replace half the apples with fresh blueberries for a “Summer Orchard” twist.
- The Nutty Crunch: Add 1/2 cup of finely chopped pecans or walnuts to the batter for an earthy, savory contrast.
- Salted Caramel: Instead of the milk glaze, drizzle with a warm salted caramel sauce for a truly indulgent dessert experience.
Success Strategies: The Dough Regulation
To ensure your baked fritters have the “loft” and texture of their fried counterparts, follow these baker’s regulations:
- Avoid the Whisk: Once you add the wet ingredients to the dry, switch to a spatula or spoon. A whisk will over-develop the gluten, resulting in a rubbery fritter.
- High Heat is Key: 400°F is higher than standard cookie temperatures. This high heat causes the baking powder to react quickly, creating the airy “domes” that define a great fritter.
- Parchment Only: Do not just grease the pan; use parchment. The sugar in the apples and the glaze can stick easily, and parchment ensures a “stress-free” removal.
Conclusion: An Honest, Vibrant Tradition
Warm Baked Apple Fritters represent the best of “honest” home baking. They strip away the unnecessary complexity of deep-frying and replace it with a focused, fruit-forward experience. By respecting the natural moisture of the apples and the science of the leavening, you’ve created a dish that is both vibrant and grounding. This is a recipe that welcomes the “chaos” of a busy kitchen and turns it into something refined and comforting. Enjoy the golden-brown crust, the soft, spiced interior, and the simple joy of an orchard classic, perfected.
Frequently Asked Questions
- Do I need to peel the apples?
- While you can leave the skins on for a more rustic, fiber-rich fritter, peeling them provides a more “velvety” and consistent texture in every bite.
- Can I use a different flour?
- A 1:1 gluten-free baking flour works well here. Whole wheat flour can be used, but it will result in a much denser, “heartier” fritter that requires a bit more milk.
- Why didn’t my fritters brown?
- This usually means the oven wasn’t hot enough or you didn’t bake them long enough. Ensure your oven is fully preheated before the fritters go in.
- Can I freeze these?
- Yes! Freeze the *unglazed* fritters in a single layer. When ready to eat, bake at 350°F until warm, then apply fresh glaze.
**Would you like me to suggest a “Cinnamon-Spiced Whipped Cream” recipe to serve as an elegant dollop on the side?**