ADVERTISEMENT
The ingredient list for the Strawberry Banana Pudding Dream is deceivingly short, yet these three primary components, when combined with a simple, supporting filling (which we will define as the necessary adjuncts), create a symphony of flavor. Precision in selecting the quality and ripeness of the fruit is paramount.
The Core Dream Trio:
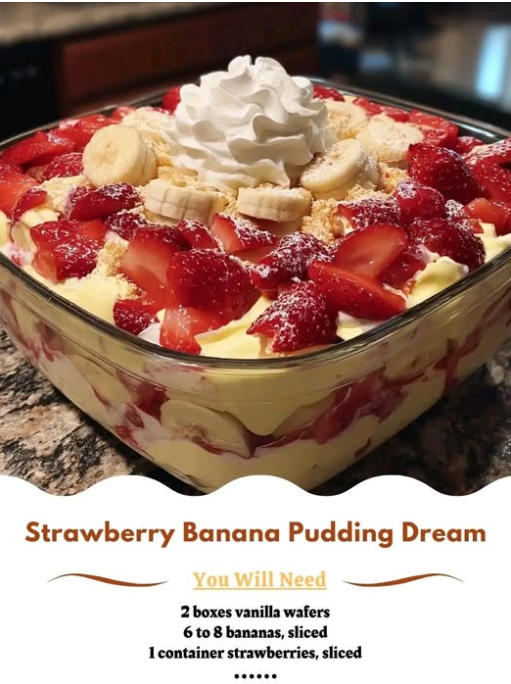
- 2 boxes vanilla wafers: These wafers are the foundation and the cake component of the pudding. They should be the classic, small, circular type. **Two boxes** (typically 11-12 oz each) are necessary to ensure enough coverage for multiple layers and decorative touches. Their crisp texture is temporary; they are designed to soften beautifully as they absorb the pudding, turning into a moist, delicate base.
- 6 to 8 bananas, sliced: The primary fruit component. The number of bananas depends on the size of your dish. Crucially, they should be **ripe but still firm**—yellow with just a few tiny specks of brown. Overly ripe bananas (mostly brown) will quickly turn mushy and oxidize too fast, resulting in a dark, unattractive layer. Slicing them uniformly ensures consistent tenderness in every bite.
- 1 container strawberries, sliced: The vibrant differentiator. Use a standard 16-ounce container. The strawberries should be **bright red, fresh, and slightly firm**. Slicing them lengthwise provides a beautiful, visible layer and ensures a juicy pop of tartness.
The Essential Adjuncts (The Filling Foundation):
To turn the Dream Trio into a pudding, we must incorporate the necessary binders and creams. While not explicitly listed as the trio, these are the essential structural “regulations” for the pudding:
- **Instant Vanilla Pudding Mix:** Typically, two large (5.1 oz) boxes are needed. Instant pudding is the quickest way to create the rich, vanilla base.
- **Milk:** Cold milk is required to activate and set the instant pudding. Whole milk or 2% is recommended for the best texture and richness.
- **Sweetened Condensed Milk (Optional but Recommended):** A can (14 oz) of condensed milk is often folded into the pudding mix to deepen the vanilla flavor and create a sweeter, richer, and denser custard-like texture.
- **Whipped Topping (or fresh whipped cream):** A large (12 oz) container of thawed whipped topping (or equivalent cups of freshly whipped cream) is folded into the custard mixture to lighten it, making the pudding part fluffy and airy—essential for the “Dream” texture.
The successful execution of this recipe hinges on the perfect ripeness of the fruit and the correct preparation of the airy filling.
Instructions: The Art of Layered Assembly
The beauty of this no-bake dessert lies in its assembly process, which is fast and methodical. Use a clear, large glass trifle bowl or a 9×13 inch casserole dish to showcase the stunning layers of red, white, and yellow.
Phase 1: Preparing the Creamy Dream Base
- Whip the Custard: In a large bowl, whisk together the two boxes of instant vanilla pudding mix and the specified amount of cold milk (as directed on the pudding box) until thick. Whisk in the can of sweetened condensed milk, if using, until fully incorporated and the mixture is smooth and luxurious.
- Aerate the Filling: Gently fold in the large container of thawed whipped topping (or fresh whipped cream) using a rubber spatula. Use a cutting and lifting motion to maintain the airiness of the whipped topping. The final mixture should be light, fluffy, and voluminous—this is the **Dream Base**.
Phase 2: The Layering Blueprint
The standard arrangement is three layers of each component. Consistency is key for visual appeal.
- Layer 1 (The Foundation): Place a solid, single layer of **vanilla wafers** on the bottom of your chosen dish. Break wafers as needed to fill in gaps.
- Layer 2 (The Golden Layer): Arrange half of your **sliced bananas** in a neat layer over the wafers. Overlap them slightly to ensure good coverage.
- Layer 3 (The Ruby Layer): Place half of your **sliced strawberries** over the bananas. Distribute them evenly, ensuring the red color contrasts against the golden bananas.
- Layer 4 (The Dream Cloud): Gently spoon and spread exactly **one-third** of the prepared **Dream Base** (the pudding/whipped topping mixture) over the fruit layers. Ensure the pudding completely covers the fruit and wafers to begin the softening process.
- The Second Repetition: Repeat the layering sequence: another layer of **vanilla wafers**, the remaining half of the **bananas**, the remaining half of the **strawberries**, and the second third of the **Dream Base**.
- The Final Cap: Top the structure with a final layer of **vanilla wafers** and the remaining **Dream Base**. Ensure the entire surface is covered smoothly with the final pudding mixture.
Phase 3: The Maturation
Cover the dish tightly with plastic wrap, ensuring the plastic touches the surface of the pudding to prevent a skin from forming. Refrigerate for a minimum of **6 hours**, but preferably **overnight**. This extended chill time is the most crucial step, allowing the wafers to absorb moisture and achieve that signature cake-like texture.
Serving and Storage: The Importance of Chill and Presentation
The Strawberry Banana Pudding Dream requires careful handling to ensure its stunning presentation and delicate texture are maintained. Since it is a chilled dessert, temperature control is essential.
Presentation and Serving:
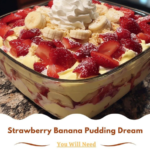
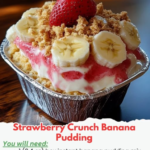
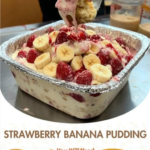
Before serving, you can optionally garnish the top with reserved vanilla wafers, fresh strawberry halves, or a dusting of finely crumbled wafers. Serving from a **clear glass trifle bowl** is highly recommended, as the red, white, and golden layers are part of the dessert’s visual appeal. Serve the pudding cold, using a large spoon or spatula to scoop out generous portions that show off the layers.
Storage Guidelines:
Due to the presence of fresh fruit, the storage life is shorter than typical baked goods. The primary enemy is the oxidation of the bananas and the breakdown of the pudding structure.
- Refrigeration: The pudding must be stored in an airtight container in the **refrigerator** at all times. It is best consumed within **2 to 3 days** of assembly. After the third day, the bananas may begin to turn overly soft and brown, and the wafers may become too mushy.
- Freezing: **Do not freeze** this dessert. The high water content in the fruit and the whipped topping will result in a grainy, watery texture upon thawing, destroying the creamy “Dream” consistency.
- Serving Window: If serving at a party, do not let the pudding sit out at room temperature for more than **two hours** total. The creamy base requires refrigeration to maintain food safety and structural integrity.
Tips: Ensuring a Flawless, Delicious Dream
The Secrets to Success:
- The Ripeness Rule: The bananas must be slightly firm. If they are too soft, they will disintegrate during chilling. The strawberries must be firm to hold their shape against the weight of the pudding.
- Combatting Banana Browning: To slow down the inevitable oxidation of the banana slices, briefly toss them in a tablespoon of **lemon juice** or a diluted solution of **ascorbic acid (Vitamin C)** immediately after slicing. Drain them well before layering. This small step significantly improves the pudding’s appearance after 24 hours.
- The Pudding Consistency: Ensure your pudding is thick before folding in the whipped topping. If the mixture is too loose, the final pudding will be runny instead of holding its shape. Always use cold milk to help the instant pudding set faster and firmer.
- Wafers on Top: Reserve a small handful of wafers to place on top immediately before serving. This provides a final textural contrast and a professional look, as they won’t have time to soften.
Variations: Customizing the Fruity Layers
While the vanilla pudding and wafer base is sacred, the fruit layers can be adapted to suit seasonal availability or personal preference, allowing for endless customization of your “Dream.”
Tropical Dream:
Substitute **sliced mango** and **pineapple chunks** for the strawberries. The tropical tartness pairs beautifully with the sweet banana and vanilla base, creating a vacation in a bowl.
Berry Patch Dream:
Replace the strawberries entirely with a mix of **fresh raspberries and blueberries**. The variety of small berries adds tiny bursts of juice and color to the layers, creating a richer red, white, and blue aesthetic perfect for summer holidays.
Chocolate Decadence:
Use **chocolate wafers** (like chocolate Nilla Wafers) instead of vanilla wafers, and substitute the vanilla pudding for **chocolate instant pudding**. Keep the strawberries and bananas, but consider adding a layer of **shaved dark chocolate** for an intensely rich version of the pudding.
The Cake Crunch Variation:
Instead of relying solely on the vanilla wafers, add **1 cup of finely chopped pecans or walnuts** to the Dream Base mixture before layering. This introduces a toasted, nutty crunch that holds up well against the soft pudding.
Conclusion: The Sweet Satisfaction of Simplicity
The Strawberry Banana Pudding Dream is a triumphant example of no-bake confectionery, where time spent chilling yields flavor and texture complexity that belies its simple construction. We have explored the critical steps, from choosing the perfectly ripe fruit to mastering the aeration of the Dream Base and respecting the non-negotiable chill time. The fusion of the tender vanilla wafers, the creamy, light pudding, and the invigorating pop of fresh strawberries creates a dessert that is refreshing, comforting, and deeply satisfying.
This recipe provides a flexible template for creativity, allowing for seasonal variations while preserving the core joy of the classic banana pudding. By adhering to the layering blueprint and the crucial storage guidelines, you can consistently deliver a dessert that is not only visually stunning but delivers an immediate, nostalgic rush of sweet, fruity goodness. Go forth and create your perfect layered Dream—it’s the easiest path to dessert enlightenment.
Frequently Asked Questions: Troubleshooting and Clarifications
Q: Can I use fresh, homemade whipped cream instead of whipped topping?
A: Absolutely! Freshly whipped cream will provide a superior flavor and texture. Whip 3 cups of heavy cream with 1/2 cup of powdered sugar and 1 teaspoon of vanilla until stiff peaks form, then fold this into the custard. The homemade version may be slightly less stable than the store-bought topping, so ensure extra chill time.
Q: Why did the bananas turn brown even though I used firm ones?
A: Browning (oxidation) is inevitable, but it accelerates when exposed to air. Ensure every banana slice is completely covered by the Dream Base pudding mixture. If they are exposed on the sides of a glass dish, they will brown faster. Using the lemon juice tip (see Tips section) is the most effective preventative measure.
Q: My pudding is runny, not thick and fluffy. What went wrong?
A: This usually happens if the milk wasn’t cold enough or if the pudding was not whisked for the full time required to set. If using sweetened condensed milk, ensure it is fully mixed into the set pudding before folding in the whipped topping. If the pudding base is too loose before adding the whipped topping, the final result will be runny.
Q: How far in advance can I make this dessert?
A: The ideal time to make this is **12 to 24 hours** before serving. This allows the wafers to soften perfectly without turning completely mushy. Do not assemble more than 48 hours in advance, as the fresh fruit begins to break down significantly after that point.
ADVERTISEMENT