- The Pudding Base: In a medium bowl, whisk together the cold milk and the instant vanilla pudding mix until thick. Set aside in the refrigerator.
- The Cream Emulsion: In a separate large bowl, beat the softened cream cheese and sweetened condensed milk together until the mixture is velvet-smooth and free of any lumps.
- The Marriage: Gently fold the chilled pudding mixture into the cream cheese mixture. Once combined, fold in half of the whipped topping (6 oz) to add lightness.
- The Assembly (Layering):
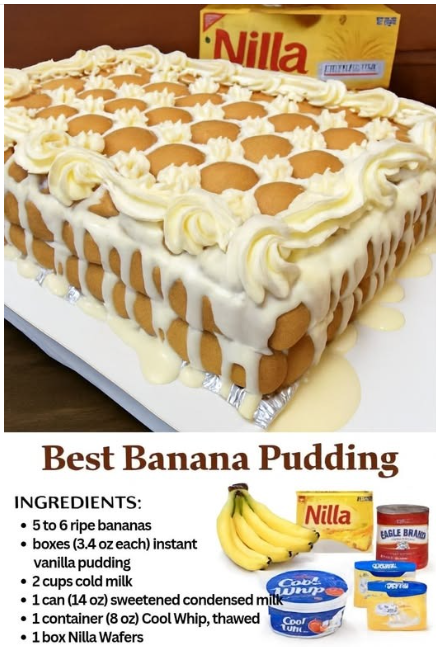
- In a large glass bowl or 9×13 dish, line the bottom with a layer of vanilla wafers.
- Add a layer of sliced bananas on top of the wafers.
- Pour half of the pudding mixture over the bananas.
- Repeat the layers (Wafers, Bananas, Pudding).
- The Final Crown: Spread the remaining whipped topping over the top. Crush a few extra vanilla wafers and sprinkle them over the surface for texture.
- The Set (The Rule of 4): Refrigerate for at least 4 hours (or overnight). This is a non-negotiable regulation; it allows the wafers to absorb moisture and transform into a tender, sponge-cake texture.
Presentation: Serving and Storage
Serving: Scoop deep to ensure every guest gets all the layers. For a premium touch, garnish with a few fresh banana slices just before serving to prevent browning.
Storage: This pudding is best eaten within 48 hours. Store in an airtight container in the refrigerator.
Note: Bananas will naturally oxidize (turn brown) over time, but the taste remains delicious. Do not freeze, as the texture of the wafers and bananas will become unpleasantly mushy upon thawing.
Chef’s Tips: Mastering the Layer
- Oxidation Prevention: If you are worried about bananas browning, toss the slices in a little bit of lemon juice or pineapple juice before layering. The acid slows down the browning process.
- Softening the Cheese: Ensure your cream cheese is truly at room temperature. If it’s cold, you’ll end up with white lumps in your “velvet” pudding.
- The Waffle Edge: Line the very sides of your glass bowl with wafers standing vertically for a beautiful “scalloped” look.
The Flavor Pivot: Variations
- The Caramel Drizzle: Add a layer of salted caramel sauce between the pudding and bananas for a “Banoffee” twist.
- Chocolate Chip Crunch: Sprinkle mini semi-sweet chocolate chips between the layers for a textural contrast.
- The Peanut Butter Glow: Whisk 1/2 cup of creamy peanut butter into the cream cheese mixture for a “Elvis-style” pudding.
- Shortbread Upgrade: Replace vanilla wafers with butter shortbread cookies for a denser, more buttery experience.
Conclusion: An Honest, Vibrant Classic
This Banana Pudding is a testament to the fact that the most memorable desserts are often the most honest. It eschews the “chaos” of complex baking in favor of perfect layering and a velvet-smooth finish. By respecting the set time in the refrigerator, you create a dish that is vibrant, grounding, and undeniably premium. Enjoy the nostalgic snap of the wafer and the creamy, banana-filled center. It truly is the best you’ll ever have!
Frequently Asked Questions
- Can I use homemade whipped cream?
- Yes! You can substitute the whipped topping with 3 cups of heavy cream whipped with 1/2 cup of powdered sugar. However, the pudding may be slightly less stable and should be eaten more quickly.
- Can I use different pudding flavors?
- Banana cream pudding or white chocolate pudding are excellent alternatives that change the flavor profile slightly but maintain the same premium texture.
- Why is my pudding runny?
- This usually happens if the milk wasn’t cold enough or if the pudding wasn’t allowed to set in the fridge before being folded into the cream cheese mixture.