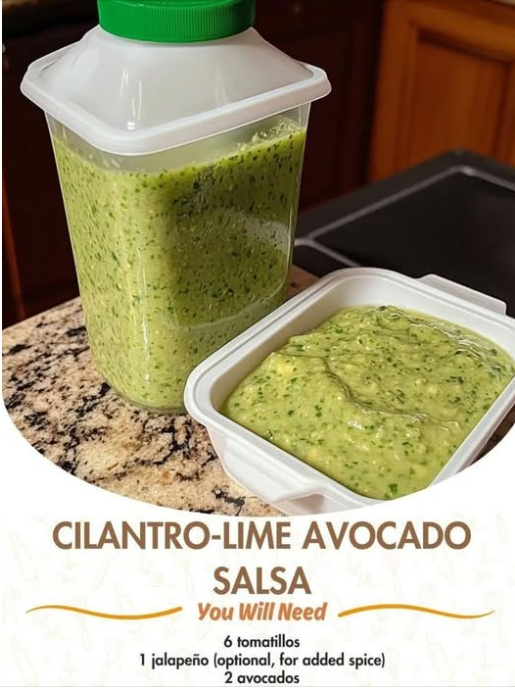
The full ingredient list, emphasizing roles and potential substitutions:
I. The Base and Cream:
- **6** tomatillos, husked and rinsed
- **1** jalapeño (optional), stemmed and halved
- **2** ripe avocados, peeled and pitted
- **½ cup** crema mexicana (Substitute with sour cream or plain Greek yogurt for thicker texture)
II. The Aromatics and Seasoning:
- **A handful** of fresh cilantro (Approx. $\frac{1}{2}$ cup packed)
- **1 tablespoon** minced garlic (Approx. 3-4 cloves)
- **1 tablespoon** chicken bouillon powder (The secret umami enhancer)
- **1 tablespoon** salt (or to taste)
- **Juice of 2 limes** (Essential for flavor and color)
- **¼ of a white onion** (Approx. $\frac{1}{4}$ cup rough chopped)
Instructions: Preparing the Base and Achieving Emulsification
Phase 1: Preparing the Tang Base (Tomatillos)
- **Prep Tomatillos and Pepper:** Remove the husks and rinse the **6 tomatillos** to remove the sticky residue. Halve them and the **jalapeño** (if using).
- **Cook Base (Flavor Choice):** **Option A (Roast for Smoky Flavor):** Place tomatillos and jalapeño on a foil-lined baking sheet and broil for 5–7 minutes until skins are slightly charred and soft. **Option B (Boil for Pure Tang):** Boil in water for 10–15 minutes until softened. Drain all liquid.
- **Cool:** Allow the cooked tomatillos and jalapeño to cool slightly before blending.
Phase 2: Blending and Emulsification (Texture Control)
- **The Liquid Layer:** Place the **cooked tomatillos and jalapeño**, the **$\frac{1}{4}$ white onion**, **minced garlic**, **cilantro**, **chicken bouillon**, and **salt** into a high-speed blender or food processor.
- **Add Acid and Cream:** Pour in the **Juice of 2 limes** and add the **½ cup crema mexicana**.
- **Initial Blend:** Blend on low speed until the ingredients are mostly broken down and the liquid is swirling.
- **Add Avocado (Emulsification Agent):** Add the **2 avocados**, peeled and pitted.
- **Final Blend (Velvety Smooth):** Blend on medium-high speed for **1–2 minutes straight**. The mixture should transition into a thick, uniform, velvety sauce. Stop and scrape down the sides if necessary. If the dip is too thick, add water, 1 tablespoon at a time, until the desired consistency is reached.
Phase 3: Rest and Serve Protocol
- **Taste and Adjust:** Taste the finished salsa. Adjust the salt (add $\frac{1}{2}$ teaspoon more at a time) or lime juice (add $\frac{1}{2}$ lime more at a time) to your preference.
- **Chill for Flavor Infusion (MANDATORY):** Transfer the salsa to an airtight container. **Refrigerate for at least 30 minutes.** This allows the bouillon powder and garlic/onion flavors to fully meld and deepen, and the salsa will thicken slightly as it chills.
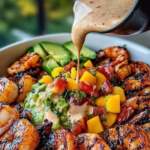
- **Serve:** Serve cold with tortilla chips, over tacos, or as a rich sauce for grilled meats.
Serving and Storage: The Oxidation Defense
The high avocado content means storage is focused on preventing browning (oxidation).
- **Storage (Refrigeration):** Store in an **airtight container** in the refrigerator. To maximize freshness, press plastic wrap directly onto the surface of the salsa before sealing the container. It should remain vibrant for up to 3 days.
- **Reviving Color:** If the surface oxidizes slightly, simply stir it vigorously to mix the brown top layer back into the green interior.
- **Serving Suggestions:** This creamy salsa is excellent as a dip, a vibrant replacement for guacamole, a topping for scrambled eggs, or a generous spread on burritos.
- **Freezing:** **Not recommended.** Freezing and thawing avocado-based products breaks the emulsion and results in a watery, grainy texture.
Tips: Essential Techniques for Color and Creaminess
The Ripe Avocado: Ensure the **2 avocados** (Step 7) are perfectly ripe (dark skin, yields to gentle pressure). Underripe avocados will not blend smoothly and will result in a chunkier, less creamy salsa.
Chicken Bouillon: Do not omit the **1 tablespoon chicken bouillon powder** (Step 4). This ingredient is a powerful source of salt and umami, replicating the savory complexity found in the best Mexican restaurant-style salsas.
Preventing Lumps: Always blend the **cooked tomatillos and aromatics first** (Step 6) to a smooth consistency before adding the avocado. Adding the avocado too early can result in small, stubborn chunks.
Lime Power: Use a **citrus press or reamer** (Step 5) to extract the most juice from the **2 limes**. The fresh acid is non-negotiable for both flavor and color preservation.
Heat Control (Jalapeño): If you want the flavor of the **jalapeño** without the intense heat (Step 1), slice it open and remove the inner white membrane and seeds before cooking.
Variations: Customizing Heat and Spice
Easily adapt the recipe to suit different heat preferences and dietary needs:
- **Spicy Factor:** Substitute the single **jalapeño** with a **serrano pepper** (significantly hotter) or add **$\frac{1}{4}$ teaspoon of chipotle powder** to the seasoning blend (Step 4) for a smoky heat.
- **Vegan Version:** Substitute **crema mexicana** with a high-quality **dairy-free sour cream** or an equal amount of full-fat **coconut milk** (the solid part from a chilled can).
- **Herb Swap:** For a slightly different flavor, substitute half of the **cilantro** with **fresh parsley** (Step 4).
- **Roasted Garlic:** Instead of raw minced garlic (Step 4), use 4-5 **roasted garlic cloves** for a sweeter, nuttier flavor profile.
**Blender Sequence:** The blending sequence (Steps 4, 5, 7) is key. The liquid (limes, crema) must be added *before* the avocado to ensure the blades can move freely and create a vortex, achieving that perfect emulsion.
**Water Content:** Be mindful of the **water content** of the tomatillos (Step 2). If boiled, ensure they are fully drained. Excess water will thin the salsa and make it look runny rather than thick and creamy.
**Batching:** If making a double batch, use a **food processor** only for the initial rough chop of the tomatillos and aromatics, then switch to a powerful **high-speed blender** for the final emulsification, which requires higher RPMs to achieve the velvety texture.
**Serving Temperature:** While chilling is mandatory for flavor (Step 10), serving the salsa slightly warmer than refrigerator temperature will allow the savory notes to bloom more fully on the palate.
Conclusion: A Creamy Culinary Achievement
The **Cilantro-Lime Avocado Salsa** is a luxurious departure from traditional chunky salsas. By successfully executing the **pre-cooking of the tomatillo base**, leveraging the high-fat ingredients for **emulsification**, and using **lime juice for color and tang**, you achieve a smooth, bright, and savory sauce. This recipe is a vibrant and addictive addition to any meal, providing a cooling, herbaceous contrast to rich, spicy dishes.
Frequently Asked Questions (FAQ)
Q: Why did my salsa turn brown in the fridge?
A: Oxidation (Step 10). The **lime juice was likely insufficient** to coat all the avocado fat. When storing, press plastic wrap directly onto the surface to eliminate air exposure.
Q: My salsa is separated and watery. How do I fix it?
A: The emulsion broke (Step 8). To fix, add **1 tablespoon of fresh cream or sour cream** and a tiny splash of water back into the blender. Blend again on high until the mixture comes back together.
Q: Is this salsa supposed to be hot?
A: The heat level is adjustable (Step 1). The base recipe is mild. For guaranteed heat, include the **jalapeño** with its seeds, or upgrade to a **serrano pepper**.
Q: Can I use dried cilantro?
A: **Not recommended.** Dried cilantro lacks the vibrant oil and fresh flavor necessary for the bright “cilantro-lime” profile. Only use a fresh, generous handful.