ADVERTISEMENT
Phase 1: Cooking the Syrup
- **Combine Ingredients:** Lightly grease an $8\text{x}8\text{ inch}$ pan. In a heavy-bottomed $4\text{ quart}$ saucepan, combine the **granulated sugar, salt, cocoa powder, and whole milk**. Stir over medium-low heat until the sugar is fully dissolved.
- **Wash Down Sides (CRYSTAL PREVENTION RULE):** Once boiling, stop stirring. Use a wet pastry brush to wash down the sides of the saucepan, removing any sugar crystals that may have splashed up.
- **Cook to Soft-Ball Stage:** Insert a candy thermometer, ensuring the tip does not touch the bottom of the pan. Continue to boil without stirring until the temperature reaches **$114^\circ\text{C}$ ($238^\circ\text{F}$)** (The soft-ball stage).
Phase 2: Cooling and Setting
- **Add Butter and Cool UNDISTURBED:** Remove the pan immediately from the heat. Stir in the **$\frac{1}{4}$ cup of butter**. **Crucially, do not stir the mixture again.** Allow the mixture to cool undisturbed until the temperature drops to **$43^\circ\text{C}$ ($110^\circ\text{F}$)**.
- **Beat (COOLING AND BEATING PROTOCOL):** Once the mixture reaches $43^\circ\text{C}$ ($110^\circ\text{F}$), add the **1 teaspoon of vanilla extract**. Using a wooden spoon or a stand mixer with a paddle attachment, begin beating the fudge vigorously. Continue beating until the fudge loses its glossy sheen and starts to thicken and hold its shape. This typically takes 5–10 minutes.
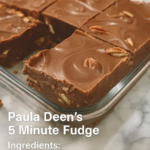
- **Pour and Set:** Immediately pour the fudge into the prepared $8\text{x}8\text{ inch}$ pan. Press it down evenly. Allow the fudge to cool and set completely at room temperature or in the refrigerator for **2–3 hours** before cutting.
Serving and Storage: Maximizing Freshness
Optimal handling for this rich confection:
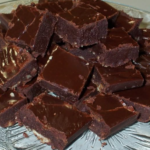
- **Serving:** Cut into small squares. Use a large, sharp knife to cut cleanly.
- **Storage (Room Temperature):** Store in an airtight container at room temperature for up to **2 weeks**. Layer parchment paper between the fudge slices to prevent sticking.
- **Freezing:** Fudge freezes exceptionally well. Wrap tightly in plastic wrap, then foil, and freeze for up to **3 months**. Thaw at room temperature.
Tips: Essential Techniques for a Smooth Texture
Use a Candy Thermometer: Accuracy is everything in candy making. Using a high-quality, calibrated **candy thermometer** (Step 3) is essential; guessing the soft-ball stage will almost certainly lead to failure.
Whole Milk Only: Use **whole milk** ($1\frac{1}{2}$ cups) (Step 1). The higher fat content (compared to skim or low-fat) helps inhibit crystal growth, aiding in the smooth texture.
The Beating Signal: The fudge is ready to be poured (Step 5) when you scrape the bottom of the pan with the spoon and the fudge quickly pulls away, showing the pan bottom. It will become noticeably stiffer and dull.
Preventing Graininess: If you accidentally stir the mixture while it is cooling (Step 4), you will prematurely trigger large crystal growth. This means you will have to restart the recipe, as grainy fudge is difficult to salvage.
High Altitude Adjustment: At high altitudes, water boils at a lower temperature. Subtract $1^\circ\text{F}$ for every $500\text{ feet}$ above sea level from the target temperature of $238^\circ\text{F}$ (Step 3).
Variations: Customizing Crunch and Flavor
Easily adapt the flavor profile of the fudge after beating:
- **Nutty Crunch:** Fold in **1 cup of chopped pecans, walnuts, or almonds** with the vanilla extract during the beating stage (Step 5).
- **Mint Chocolate:** Add **$\frac{1}{2}\text{ tsp}$ of peppermint extract** with the vanilla (Step 5) for a minty flavor. You can also layer the top with a thin layer of melted white chocolate tinted green.
- **Marshmallow Fluff Addition:** For a slightly easier set (though less traditional), fold in **1 cup of marshmallow fluff** with the butter when the pan is removed from the heat (Step 4).
- **Cream Cheese Fudge:** Beat in **4 ounces of softened cream cheese** with the butter (Step 4) for a tangier, ultra-rich finish (though this technically makes it a different style of fudge).
**Pan Choice:** Using a **heavy-bottomed saucepan** (Step 1) is crucial as it distributes heat evenly and prevents the sugar and milk mixture from scorching on the bottom.
**Dissolve Fully:** Ensure the **sugar is fully dissolved** (Step 1) before the mixture comes to a full boil. Feel the side of the pan with a clean finger; if it feels gritty, continue stirring over low heat.
**Checking Soft-Ball Stage without a Thermometer:** Drop $\frac{1}{2}\text{ tsp}$ of the boiling syrup into a glass of ice-cold water. If the syrup forms a soft, pliable ball that holds its shape but flattens when pressed, it is ready (Step 3).
**Humidity Issues:** Humidity can significantly affect candy making. Avoid making fudge on very humid or rainy days, as the excess moisture in the air prevents the sugar syrup from reducing properly.
Conclusion: A Lesson in Confectionery Control
The **Old-Fashioned Fudge** is a rewarding culinary challenge rooted in candy chemistry. By strictly following **The Crystal Prevention Rule** to ensure a clean start, hitting **The Soft-Ball Temperature Threshold** for the correct sugar concentration, and executing **The Cooling and Beating Protocol** at $43^\circ\text{C}$ ($110^\circ\text{F}$), you guarantee a non-grainy, creamy texture. This classic method yields a superior fudge that epitomizes rich, chocolatey indulgence.
Frequently Asked Questions (FAQ)
Q: Why is my fudge grainy or crumbly?
A: The fudge **crystallized prematurely** (Step 2 or 4). This happens if you stir the mixture while it’s cooling or if sugar crystals were left on the side of the pan and fell back in.
Q: Why did my fudge not set?
A: The fudge **did not reach the required temperature** (Step 3). It must hit at least $112^\circ\text{C}$ ($234^\circ\text{F}$) for the sugar concentration to be high enough to set.
Q: Can I use low-fat milk?
A: **Not recommended** (Step 1). The low fat content increases the chance of the sugar mixture separating or crystallizing prematurely. Use whole milk for stability.
Q: How long should I beat the fudge?
A: Beat it until it **loses its gloss and stiffens** (Step 5). The time (5-10 minutes) varies, so rely on the visual cue rather than the clock.
ADVERTISEMENT