ADVERTISEMENT
Phase 1: Melting the Base
- **Prep Pan:** Line an $8\times 8\text{-inch}$ baking pan with parchment paper or aluminum foil, leaving an overhang on two sides for easy removal.
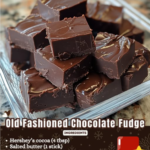
- **Combine:** In a large, microwave-safe bowl, combine the **sweetened condensed milk** and **chocolate chips**. Add the optional **salt**.
- **Microwave Melt (TEMPERATE MELT MANDATE):** Microwave on **HIGH for $30\text{-second}$ intervals**. After the first interval, stir well. Continue microwaving and stirring, typically for a total of **$1\text{ to }2\text{ minutes}$**, until the chips are mostly melted. Do not overcook. The residual heat from the milk and melted chips will finish the process.
Phase 2: Final Stir and Set
- **Finish Mixing (QUICK STIR PROTOCOL):** Remove from the microwave. Stir vigorously until the mixture is **completely smooth and glossy**. This should take about $30\text{ seconds}$. Stir in the **vanilla extract** and **chopped nuts** (if using).
- **Pour and Set (CHILL PROTOCOL):** Immediately scrape the fudge mixture into the prepared $8\times 8\text{-inch}$ pan. Smooth the top with a spatula. Refrigerate for a minimum of **$2\text{ hours}$** until firm.
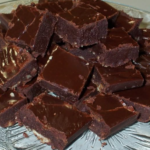
- **Slice:** Use the foil/parchment overhang to lift the set fudge from the pan. Peel away the paper and slice into small $1\text{-inch}$ squares.
Serving and Storage: Post-Set Integrity
Optimal handling for this shelf-stable treat:
- **Serving:** Fudge is best served at **room temperature**, which softens the texture.
- **Storage:** Store in an airtight container between layers of wax paper at **room temperature for up to $2\text{ weeks}$** or in the **refrigerator for $3\text{ weeks}$**.
- **Freezing:** This fudge freezes excellently. Wrap the entire uncut block tightly in plastic wrap, then foil. Freeze for up to **3 months**. Thaw overnight in the refrigerator.
Tips: Essential Techniques for Smoothness and Stability
Microwave Power: **Know your microwave.** If your microwave is high-powered (over 1000 watts), reduce the power to 70% during the melting process (Instruction 3) to prevent scorching the chocolate.
Quality of Chocolate: Use high-quality **semi-sweet chocolate chips**. Avoid using chocolate that is labeled “compound coating” or “baking discs,” as these often do not contain enough cocoa butter to set properly and can lead to a sticky, soft fudge.
Residual Heat is Key: **Always stop microwaving when small lumps of chocolate remain** (Instruction 3). If you wait until it’s entirely liquid, the mixture is already overheated and prone to becoming grainy or separating.
Stirring Vigorously: The vigorous stirring (Instruction 4) is not just about blending; it’s about forcing the cocoa butter and the condensed milk to form a tight, stable emulsion. Do not be gentle at this stage!
Salt Balance: The optional $\frac{1}{4}\text{ teaspoon}$ of salt (Ingredient II) is important. Fudge is incredibly sweet, and the **salt acts as a necessary flavor counterpoint**, enhancing the depth of the chocolate and reducing the cloying sweetness.
Variations: Customizing Flavor and Texture
Easily adapt the flavor profile of the fudge:
- **White Chocolate Base:** Substitute the semi-sweet chips with **white chocolate chips**. White chocolate melts faster, so reduce the total microwave time to $\text{45}\text{ to }60\text{ seconds}$ total.
- **Peanut Butter Fudge:** Substitute **1 cup** of the semi-sweet chips with **1 cup** of **creamy peanut butter**. Add the peanut butter after the chocolate and condensed milk are fully melted.
- **Espresso Depth:** Add $\frac{1}{2}\text{ teaspoon}$ of **instant espresso powder** along with the salt (Instruction 2). The coffee deepens the flavor of the chocolate without tasting like coffee.
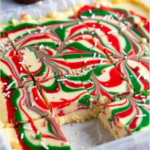
- **Holiday Swirl:** After pouring the fudge into the pan (Instruction 5), immediately drizzle $\frac{1}{4}\text{ cup}$ of **melted white chocolate or a contrasting flavor (like raspberry jam)** on top. Use a knife to gently swirl the toppings into the fudge for a decorative pattern.
**Double Boiler Option:** If you prefer not to use a microwave, combine the ingredients in a heatproof bowl set over a saucepan of simmering water (a double boiler). Stir constantly until melted, then proceed with Instruction 4.
**Fudge Too Soft:** If, after the $2\text{-hour}$ chill, the fudge is too soft, it means the mixture was not heated enough or there was too much liquid. You can attempt to fix it by remelting the fudge, adding an extra $\frac{1}{2}\text{ cup}$ of chocolate chips (to increase the fat/solid ratio), and then setting it again.
**Aesthetic Topping:** To achieve a perfect-looking top, wait $10\text{ minutes}$ after pouring the fudge (Instruction 5), then sprinkle the top with extra chopped nuts, flaky sea salt, or sprinkles before chilling.
**Cutting Surface:** For the cleanest cuts (Instruction 6), use a **large, sharp knife** that has been briefly run under **hot water** and wiped dry between slices. This prevents the fudge from sticking to the blade.
Conclusion: A Reliable, Quick Confection
The **3 Minute Fudge** is a testament to the power of high-quality ingredients and quick technique. By diligently adhering to **The Temperate Melt Mandate** to preserve the chocolate’s texture and executing **The Quick Stir and Chill Protocol** to set the structure, you achieve a flawless, sliceable fudge that requires minimal time and effort.
Frequently Asked Questions (FAQ)
Q: Why did my fudge turn grainy or seize up?
A: The fudge was **overheated** (failure of **The Temperate Melt Mandate**, Instruction 3). You heated the mixture too long in the microwave, causing the chocolate to scorch and its components to separate.
Q: Why is my fudge too soft or sticky?
A: It likely **did not chill long enough** (Instruction 5). If it is still soft after $4\text{ hours}$ in the fridge, it means the chocolate-to-milk ratio is off. Remelt, add $\frac{1}{2}\text{ cup}$ more chocolate chips, and reset.
Q: Can I use milk or evaporated milk instead of condensed milk?
A: **Absolutely not.** Sweetened condensed milk is required. Regular milk or evaporated milk lacks the high concentration of sugar and milk solids needed to bind the chocolate and sugar, resulting in a runny, unstable mess.
Q: Should I add butter to the recipe?
A: This recipe does not strictly require butter, as the cocoa butter in the chocolate is sufficient. However, adding $\frac{1}{4}\text{ cup}$ of **softened butter** along with the chocolate chips can add a further layer of richness and chewiness.
ADVERTISEMENT