ADVERTISEMENT
Phase 1: Preparing the Filling (Moisture Control)
- **Sear Aromatics:** Preheat the oven to **$400^\circ\text{F}$ ($200^\circ\text{C}$)**. Line a baking sheet with parchment paper. In a large skillet, cook the **ground beef, onion, and garlic** until the beef is browned. Drain any excess grease.
- **Season and Thicken:** Stir in the **taco seasoning and $\frac{1}{2}\text{ cup}$ water**. Cook for $2\text{–}3\text{ minutes}$ until the mixture **thickens slightly** (FILLING MANDATE). Remove from heat and let cool for a few minutes.
- **Mix Cheese:** Mix the shredded **cheddar and Monterey Jack cheeses** into the slightly cooled beef mixture.
Phase 2: Folding the Chimichangas (Structural Integrity)
- **Warm Tortillas (FLEXIBILITY):** Warm the **tortillas slightly** (e.g., $15\text{ seconds}$ in the microwave) to make them pliable and prevent cracking when folded.
- **Fill and Fold (FOLDING MANDATE):** Place about **$\frac{1}{2}\text{ cup}$ of the beef and cheese mixture** in the center of each tortilla. Fold in the sides (left and right), then roll up tightly from the bottom edge like a burrito.
- **Place and Brush:** Place the chimichangas **seam-side down** on the prepared baking sheet. **Brush generously with melted butter or vegetable oil** (BRUSH PROTOCOL).
Phase 3: Baking and Finishing (The Crisp)
- **Bake:** Bake for **$20\text{–}25\text{ minutes}$**.
- **Turn:** **Turn the chimichangas once halfway through** (approx. $10\text{–}12\text{ minutes}$) to ensure even browning and crispness on all sides (BAKE PROTOCOL). Bake until golden brown and crispy.
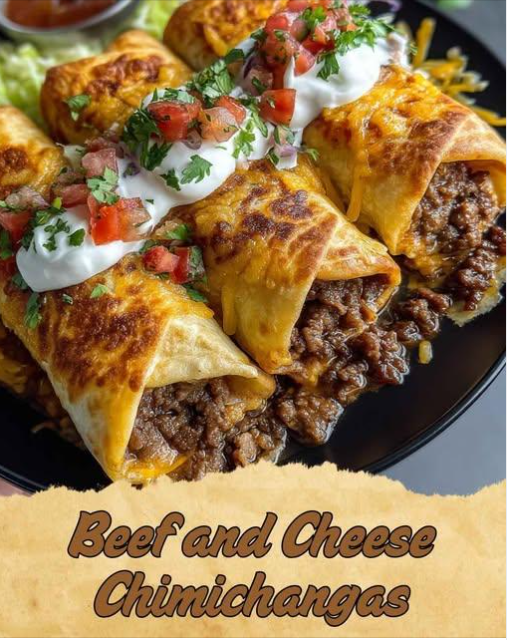
- **Serve:** Serve hot immediately with **sour cream, salsa, and chopped cilantro**.
Tips & Technical Insights:
The Fat Brush is Crucial: The **melted butter or oil** (Instruction 8) acts as the substitute for deep-frying fat. Coating the exterior generously is non-negotiable for achieving a truly crispy, browned surface in the oven. Butter provides a richer flavor, while oil ensures a slightly crisper texture.
The Tortilla Temperature: Warming the **flour tortillas** (Instruction 5) is essential for elasticity. Cold tortillas tear easily when folded, compromising the tight seal needed to hold the steam and filling inside during baking (FOLDING MANDATE).
Cooling the Filling: Allow the meat to cool slightly (Instruction 2) before adding the cheese. If the cheese is mixed into very hot meat, the fat and protein separate, leading to an **oily, clumpy filling** that leaks out during baking.
Cheese Blend: The use of two cheeses—**cheddar** (for sharpness) and **Monterey Jack** (for superior melt and creaminess)—creates the perfect binding matrix inside the filling.
The Seam-Side Down Start: Starting the chimichanga **seam-side down** (Instruction 7) on the baking sheet ensures that the filling and heat stabilize the seam first, effectively “gluing” it shut before the full crisping process begins.
Variations: Customizing Filling and Spice
Easily adapt the components and richness of your chimichangas:
- **Added Bulk:** Stir in $\frac{1}{2}\text{ cup}$ of **cooked rice or black beans** (rinsed and drained) with the cheese (Instruction 3) for a heartier filling.
- **Extra Creaminess:** Substitute $\frac{1}{2}\text{ cup}$ of the water with **cream cheese** (softened) when simmering the taco seasoning (Instruction 2) for an even richer, creamier internal filling.
- **Crunchy Element:** Add $\frac{1}{4}\text{ cup}$ of **chopped water chestnuts or celery** to the meat filling for an unexpected internal crunch.
- **Spicy Heat:** Add $1\text{ minced jalapeño}$ to the aromatics (Instruction 1) or $\frac{1}{2}\text{ tsp}$ of **cayenne pepper** to the taco seasoning mix.
Conclusion: Flavor Without the Fryer
The **Crispy Beef and Cheese Chimichanga** is a triumphant example of modifying a classic fried dish for the oven without sacrificing flavor or texture. By adhering to **The Filling and Folding Mandate** for a tight structure and meticulously following **The Bake and Brush Protocol** for an even crisp, you achieve a delightful, satisfying, and easy weeknight meal.
Frequently Asked Questions (FAQ)
Q: Why did my chimichanga seams split open during baking?
A: The seam was likely not rolled **tightly enough** (FOLDING MANDATE), or the tortilla was not warmed, causing it to crack. Ensure the folds are snug and the seam starts and stays on the bottom.
Q: Can I use corn tortillas?
A: **No**. Corn tortillas do not have the gluten structure necessary to fold tightly and will shatter when rolled. **Only flour tortillas** (Ingredient II) are suitable for chimichangas and burritos.
Q: My chimichangas are soft, not crispy. What went wrong?
A: This is usually due to insufficient fat application (BRUSH PROTOCOL) or skipping the **turning step** (Instruction 9). Brush them more generously, ensure the oven is fully preheated to $400^\circ\text{F}$, and turn them halfway through.
Q: Can I prepare these ahead of time?
A: **Yes**. Assemble and place the chimichangas on the baking sheet (Instruction 7), but do not brush with butter/oil yet. Cover and refrigerate for up to $24\text{ hours}$. When ready to bake, apply the fat and bake as directed, adding $5\text{ minutes}$ to the total baking time.
ADVERTISEMENT