
The Ultimate No-Bake Treat: Mastering Chocolate Chip Cookie Dough M&M Cups
Introduction: The Confectionery Dream Without the Oven
In the world of indulgence, there is a universal truth: cookie dough is often better than the finished cookie. The No-Bake Chocolate Chip Cookie Dough M&M Cups lean into this reality, offering a decadent, multi-layered treat that requires zero oven time. This recipe is a “chef’s kiss” for those who love the contrast of a soft, buttery dough core against a snap of hard chocolate and the festive crunch of M&M candies.
By using a heat-treated flour method and omitting eggs, this dough is entirely safe and designed specifically for chilled enjoyment. These cups aren’t just a snack; they are a miniature dessert experience that mimics the luxury of a high-end truffle but with the nostalgic, playful energy of a childhood bake sale. Whether it’s a summer party where you want to keep the kitchen cool or a weeknight rescue for your sweet tooth, these 320 kcal bundles of joy are the ultimate solution.
Ingredients: The Anatomy of an Edible Dough
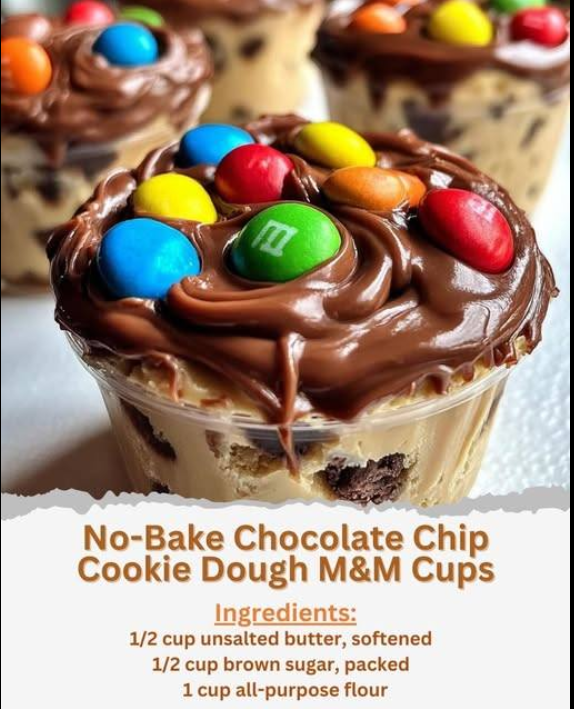
To achieve that signature fudge-like consistency that sets properly in the fridge, you will need the following pantry essentials:
- 1/2 cup Unsalted Butter: Softened to room temperature. This provides the creamy, fat-rich base that carries the flavor of the sugar.
- 1/2 cup Brown Sugar: Packed tightly. The molasses in brown sugar is what gives cookie dough its characteristic deep, caramelized taste.
- 1 teaspoon Vanilla Extract: The aromatic backbone that makes the dough smell and taste authentic.
- 1 cup All-Purpose Flour: The structural foundation. (See tips on heat-treating for safety).
- 1/4 teaspoon Salt: A tiny but vital addition to balance the sweetness of the chocolate.
- 1/4 cup Milk: Used to adjust the dough to a “spoonable” and soft consistency.
- 1/2 cup Mini Chocolate Chips & 1/2 cup M&M Candies: The textures that provide the internal “pop” and crunch.
- 1 cup Semi-Sweet Chocolate Chips & 1 tablespoon Coconut Oil: The components for the smooth, glossy “magic shell” topping.
Instructions: Building the Perfect Cup
This process is about layering textures. Follow these steps for a professional-grade finish:
- The Creaming Phase: In a medium bowl, cream together the softened butter and brown sugar. Use a hand mixer or a sturdy spoon until the mixture is light, airy, and free of sugar grit.
- The Flavor Infusion: Stir in the vanilla extract until fully incorporated.
- The Flour Fold: Gradually add the flour and salt. Mix until the dough looks crumbly.
- The Softening: Pour in the milk and stir. The mixture will transition from dry crumbles to a cohesive, soft dough.
- The Inclusions: Gently fold in the mini chocolate chips and M&M candies. Be careful not to over-mix, or the candy colors might bleed into the dough.
- The Base Layer: Line a muffin tin with paper or silicone liners. Spoon the dough evenly into the 12 cups, pressing down with the back of a spoon to create a flat surface.
- The Melting: Combine the melting chips and coconut oil in a microwave-safe bowl. Heat in 30-second intervals, stirring each time. The coconut oil ensures the chocolate doesn’t crack when you bite into it.
- The Shell: Spoon the melted chocolate over each cup, tilting the tin slightly to ensure the chocolate reaches the edges.
- The Set: Refrigerate for at least 2 hours. Patience is key—the dough needs to firm up and the chocolate needs to fully snap.
