Phase 1: The Creaming Regulation
In a large bowl, beat the softened butter until it is completely smooth and pale. Gradually add 2 cups of the powdered sugar, the heavy cream, and the peppermint extract. Mix until creamy. The “Lump-Free” Rule: Ensure no butter pockets remain before adding the final two cups of sugar.
Phase 2: The Kneading Process
Incorporate the remaining sugar. Turn the dough out onto a surface dusted with powdered sugar and knead until it feels like smooth, soft clay. It should be “yummy” to the touch—not sticky, but pliable enough to roll into ropes.
Phase 3: The Color Separation
Divide the dough in half. Leave one half white. To the second half, add a tiny drop of red gel coloring and knead until the color is uniform. Pro Tip: Use gloves to avoid staining your hands during this festive stage!
Phase 4: The Rope Twist
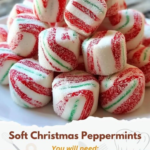
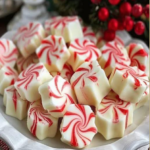
Roll small portions of the white and red dough into thin “snakes.” Lay a red rope next to a white one and twist them together gently. This creates that “dreamy” holiday swirl. Cut the ropes into ½-inch pieces using a sharp knife or clean kitchen shears.
Phase 5: The Curing Stage
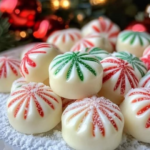
Lay the mints on parchment paper in a single layer. The “Pillow” Regulation: Let them air-dry for at least 12–24 hours. This creates the signature delicate exterior while the inside remains a “melt-in-your-mouth” treasure.
Tips for “Yummy” Success
- The “Lila” Hack: If twisting ropes is too time-consuming, you can simply roll the red and white dough together into a marbled ball for a “dreamy” galaxy effect.
- Flavor Balance: If you prefer a stronger kick, increase the peppermint to ½ teaspoon, but do so gradually—the flavor intensifies as the mints cure.
- Storage: These mints are best stored in an airtight container in a cool place. They freeze exceptionally well, maintaining their “yummy” texture for up to 3 months.
Conclusion
The Old-Fashioned Butter Mint is a testament to the fact that the best holiday traditions are often the simplest. By respecting the “Butter-to-Sugar” ratio and allowing for a proper cure, you produce a “dreamy” confection that far surpasses store-bought alternatives. It is a foolproof recipe that delivers a “yummy” and sentimental result every time. These little peppermint pillows aren’t just sweets; they are edible holiday memories.
Frequently Asked Questions
- Can I use milk instead of heavy cream?
- Yes, but the texture will be slightly less “yummy” and rich. Heavy cream is the gold standard for that “melt-in-your-mouth” finish.
- Why are my mints too soft to cut?
- This usually happens if the butter was too warm or the room is humid. Add another ¼ cup of powdered sugar and knead until the dough is firm like clay.
- Can I use liquid food coloring?
- It is not recommended. Liquid coloring can thin the dough, making it sticky. Gels are the better regulator for candy making.
Would you like me to suggest a “Chocolate-Peppermint” variation of this dough, or perhaps provide a guide on the best ways to package these mints for holiday gift-giving?