

The full components for $1\text{ pound}$ of classic chocolate fudge:
I. The Foundation & Fat:
- **$2\text{ cups}$** white sugar (Crystalline structure)
- **$1\text{ cup}$** milk (Liquid base, moisture)
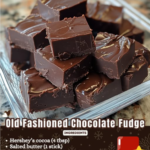
- **$4\text{ tablespoons}$** butter (Richness, smoothness, anti-crystallization aid)
II. The Flavor & Texture Control:
- **$\frac{1}{2}\text{ cup}$** unsweetened cocoa powder (Flavor, color, anti-crystallization aid)
- **$1\text{ teaspoon}$** vanilla extract (Aromatic finish)
- **$\frac{1}{4}\text{ teaspoon}$** salt (Flavor contrast)
III. Equipment Note:
- **Candy Thermometer** (Essential for accuracy)
Directions: Cook, Cool, and Beat
Phase 1: Syrup Creation and Dissolution
- **Prep:** Line an $8\times 8\text{-inch}$ pan with parchment paper or butter it thoroughly.
- **Combine (CRYSTALLIZATION CONTROL):** In a heavy-bottomed $3\text{-quart}$ pot, combine the **sugar, cocoa, milk, and salt**. Stir thoroughly over low heat until the sugar is completely dissolved. **Use a damp pastry brush to wash down any sugar crystals** sticking to the sides of the pot.
- **Cook (SUGAR TRANSFORMATION):** Add the **butter**. Insert a candy thermometer. Increase heat to medium-high and bring the mixture to a boil without stirring. Cook until the thermometer reads **$234^\circ\text{F}$ ($112^\circ\text{C}$)** (soft-ball stage).
Phase 2: Critical Cooling and Crystallization
- **Cool (CRYSTALLIZATION CONTROL):** Remove the pot from the heat. **DO NOT STIR OR SHAKE THE POT.** Let the fudge cool, undisturbed, to **$110^\circ\text{F}$ ($43^\circ\text{C}$)**. This cooling process takes approximately $30\text{–}45\text{ minutes}$.
- **Beat (BEAT/SET TIMING):** Remove the thermometer. Add the **vanilla extract**. Use a sturdy spoon or a hand mixer on low speed (preferred) and begin beating the fudge. The mixture will initially be glossy and thin. Continue beating until the fudge **loses its gloss, thickens significantly, and turns opaque/matte**. This process takes $5\text{–}10\text{ minutes}$ and requires patience.
- **Set:** Immediately pour the thickened fudge into the prepared pan. If necessary, press it gently into the corners—do not smooth the top aggressively. Let the fudge **cool completely** at room temperature for at least $2\text{ hours}$ before cutting into squares.
Tips: Essential Techniques for Creaminess
Use a Thermometer: Success in fudge-making is $\mathbf{90\%}$ temperature. A **candy thermometer** (Instruction 3) is essential. Undercooking results in soft, liquid fudge; overcooking results in hard, brittle candy.
Washing Down: The use of a **damp pastry brush** (Instruction 2) to clean the sides of the pot is critical. Even a single sugar crystal falling back into the syrup can trigger premature crystallization, leading to gritty fudge (Crystallization Control Mandate).
No Stirring Rule: Never stir the mixture after it reaches a full boil and before it hits the cooling temperature of $110^\circ\text{F}$ (Instruction 4). Any agitation during this window encourages large, grainy crystal growth.
High-Quality Cocoa: Use high-quality, unsweetened **Dutch-process cocoa**. It provides deeper color and richer flavor, masking any potential minor imperfections in the crystallization process.
The Beating Check: The fudge is ready for pouring (Instruction 5) when it is **difficult to stir** and you can draw a spoon across the bottom of the pot, leaving a visible, quick-closing trail. If you wait too long, it will seize in the pot.
Variations: Customizing Flavor and Texture
Easily adapt the flavor and texture profile of the fudge:
- **Nutty Crunch:** Fold in $1\text{ cup}$ of **toasted pecans or walnuts** immediately after the fudge has reached the matte stage (Instruction 5) before pouring into the pan.
- **Marshmallow Fluff:** For a softer, more forgiving fudge, stir in $\frac{1}{2}\text{ cup}$ of **marshmallow fluff** immediately after removing the mixture from the heat (before cooling). The stabilizers in the fluff help control crystallization.
- **Mint Chocolate:** Replace $1\text{ tsp}$ of vanilla extract with $\frac{1}{2}\text{ tsp}$ of **peppermint extract** for a classic holiday flavor.
- **Salt Balance:** Sprinkle the top of the fudge with a pinch of **flaky sea salt** just after pouring it into the pan (Instruction 6) for a modern, contrasting flavor note.
**Weather Watch:** Fudge is notoriously affected by humidity. On high-humidity days, the syrup retains more moisture, making it harder to reach the soft-ball stage. **It may be necessary to cook the mixture $1\text{–}2^\circ\text{F}$ higher** to compensate.
**Troubleshooting Graininess:** If the fudge starts to become grainy while cooling, the cooling process was likely disturbed. If it is already set and grainy, you can technically **re-cook it**: add water until it dissolves, bring back to $234^\circ\text{F}$, and try the cooling and beating process again perfectly.
**Pot Size:** Always use a pot that is **at least twice the volume** of the liquid ingredients (a $3\text{-quart}$ pot for this recipe). The sugar syrup bubbles vigorously and expands dramatically when boiling.
**Cutting the Fudge:** For clean, sharp slices (Instruction 6), chill the fudge in the refrigerator for $1\text{ hour}$ before cutting. Use a **large, sharp knife** that has been dipped in hot water and wiped dry before each slice.
Conclusion: The Ultimate Creamy Indulgence
The **Old-Fashioned Chocolate Fudge** recipe is a delicious demonstration of the delicate science of confectionery. By controlling the **Crystallization Control Mandate** through precise cooling, and executing **The Sugar Transformation Protocol** perfectly at the soft-ball stage, you successfully create a smooth, creamy texture that defines this classic treat. This homemade fudge is far superior to any store-bought version and is a triumph for any baker who takes on the challenge!
Frequently Asked Questions (FAQ)
Q: Why is my fudge hard and brittle like a candy bar?
A: The mixture was **overcooked** (Sugar Transformation Protocol, Instruction 3). The temperature went significantly higher than $234^\circ\text{F}$, leading to a higher sugar concentration (hard-ball or crack stage).
Q: Why is my fudge grainy and gritty?
A: Sugar crystals were allowed to grow large. This is usually due to **stirring while cooling** (Instruction 4) or not properly washing down the sides of the pot (Instruction 2).
Q: Why did my fudge not set and remain liquid?
A: The mixture was **undercooked** (below $230^\circ\text{F}$), containing too much moisture, or it was **not beaten long enough** (Instruction 5) to initiate crystallization.
Q: Can I use a wooden spoon instead of a mixer to beat the fudge?
A: **Yes**, a sturdy wooden spoon is traditional (Instruction 5), but it requires significant effort and patience. The key is continuous, vigorous movement to force rapid crystallization.
Related posts:
 Prairie Perfection
 Confectionery Chemistry: Mastering Old-Fashioned Fudge
 The Art and Science of Oklahoma Nut Candy: A Confectionery Masterclass
 Mastering Paula Deen’s 5 Minute Fudge
 Confectionery Chemistry: Mastering No-Bake Banana Fudge
 Cloud Nine Confection: Mastering the Art of Easy Divinity Candy
