- The Yeast Bloom: In a small bowl, combine warm water, sugar, and yeast. Let it sit for 5–10 minutes until it becomes “foamy.”
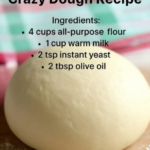
- The Dough Build: In a large mixing bowl, whisk together the flour, powdered milk, and salt. Add the yeast mixture and vegetable oil.
- The Knead: Mix until a “soft and tacky” dough forms. Knead for about 5 minutes. Pro-Tip: This dough should be softer and more “bread-like” than traditional pizza dough.
- The First Rise: Place in a greased bowl, cover, and let rise in a warm spot for about 60 minutes until doubled in size.
- The Pan Prep: Liberally grease a 13×18-inch sheet pan with oil or butter. This is key to the “fried” bottom texture.
- The Press: Gently press the dough into the corners of the pan. Let it rest for 15 minutes if it tries to “snap back.”
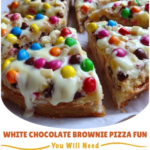
- The Assembly: Spread a thin layer of sauce to the very edges. Top with a “mountain” of cheese and your toppings.
- The Final Bake: Bake at 425°F (218°C) for 15–18 minutes until the cheese is bubbly and the edges are a deep golden brown.
- The Square Cut: For the full effect, use a pizza cutter to create those iconic rectangles!
Serving and Storage
Serving: Best served hot with a side of corn or a simple garden salad for that authentic “cafeteria” aesthetic. The crust should be thick enough to hold with one hand without flopping.
Storage: This pizza is “leftover royalty.” Store in an airtight container for up to 3 days. To maintain the “shattered-glass” crispiness of the bottom, reheat in a skillet or oven. Avoid the microwave to keep the crust from becoming “rubbery.”
Tips: Why Powdered Milk?
You might wonder if you can just use regular milk. The answer is that powdered milk is a concentrated form of dairy solids without the extra water. It acts as a “tenderizer” for the flour, preventing the gluten from becoming too tough or chewy. It results in a crust that is “pillowy” on the inside but structural enough to handle heavy toppings. It truly is the “treasure” of school-style baking.
Variations: Customizing the Classic
- The “Breakfast” Pizza: Swap the tomato sauce for white gravy and top with scrambled eggs and bacon crumbles.
- The Mexican Pizza: Use taco meat and a blend of cheddar and mozzarella, topped with crushed tortilla chips after baking.
- The Garlic Crust: Brush the edges of the dough with garlic butter and a sprinkle of dried parsley 5 minutes before the pizza is done baking.
Tips: The “Edge-to-Edge” Rule
In the school kitchen, every square inch of the pan was utilized. To get that authentic look, make sure you spread your sauce and cheese all the way to the edge of the dough. As the pizza bakes, the cheese that touches the metal pan will caramelize and form a “crispy, lacy” crust that is often considered the best part of the whole slice.
Conclusion: A Satisfying Trip Back in Time
Mastering the School Pizza Recipe is a reminder that the most “satisfying” flavors aren’t always the most complex. It is a dish that rewards the cook with “soul-deep” nostalgia and a meal that feeds a crowd with ease. Simple, nourishing for the inner child, and a true kitchen treasure—this recipe is a win. Enjoy your rectangular slice of heaven!
Frequently Asked Questions
- Can I use bread flour?
- You can, but it will make the pizza much “chewier.” All-purpose flour is the secret to getting that “soft, biscuit-like” school texture.
- What if I don’t have a sheet pan?
- You can use two 9×13-inch baking pans instead. The pizza will be even “thicker” and fluffier, which some people actually prefer!
- Is this pizza freezer-friendly?
- Yes! You can bake the pizza, let it cool, and freeze individual rectangles. They are the perfect “grab-and-go” lunch for kids—or nostalgic adults!