

Step 1: Prep the Pan
Line a 9×9-inch baking pan with parchment paper, leaving an overhang on the sides. This is crucial for lifting the bars out later so you can get clean, sharp cuts.
Step 2: Mix the Peanut Butter Fudge
In a large bowl, combine the melted butter, creamy peanut butter, and vanilla extract (optional). Gradually stir in the powdered sugar and graham cracker crumbs until the mixture is thick and smooth. It should feel like a soft, pliable fudge.
Step 3: Press and Level
Transfer the peanut butter mixture into the prepared pan. Use the bottom of a measuring cup or a flat spatula to press the mixture into an even, level layer. Place the pan in the refrigerator for about 20 minutes to firm up slightly.
Step 4: The Chocolate Glaze
In a microwave-safe bowl, combine the chocolate chips and the oil/shortening. Heat in 30-second intervals, stirring until completely smooth. The oil ensures the chocolate stays slightly soft when chilled, which prevents it from cracking when you bite into it.
Step 5: The Final Pour
Pour the melted chocolate over the chilled peanut butter layer. Tilt the pan to spread the chocolate to the very edges. Refrigerate for at least 2 hours, or until the chocolate is fully set.
Serving and Storage
Serving: Use the parchment paper to lift the entire block out of the pan. Use a warm knife to slice the bars into small, rich squares. Because they are so sweet, a 1-inch square is usually the perfect serving size.
Storage: These bars must be kept in the refrigerator in an airtight container to keep the peanut butter layer firm. They will stay fresh for up to 2 weeks, or you can freeze them for up to 3 months.
Tips: The Perfect Slice
- Clean Cuts: To get professional-looking squares, run your knife under hot water, wipe it dry, and make a single long cut. Wipe the knife clean between every single slice to prevent the chocolate and peanut butter from smearing.
- The “Snap” Factor: Don’t skip the vegetable oil in the chocolate. Without it, the chocolate will become too hard in the fridge and will shatter into pieces when you try to cut it.
Variations: Twists on a Classic
- Salted Buckeye: Sprinkle a generous amount of flaky sea salt over the wet chocolate layer before it sets.
- Dark Chocolate: Use 70% dark chocolate chips for a less sweet, more adult version of the bar.
- Double Decker: Add a middle layer of crushed pretzels or whole peanuts for an extra salty crunch.
Conclusion: The Ultimate Crowd-Pleaser
Buckeye Bars are a reminder that some of the best desserts don’t require an oven. By marrying the salty-sweet depth of peanut butter with a silky chocolate canopy, you create a treat that is timeless and addictive. It is a recipe built for sharing, bringing a little piece of Midwest tradition to your kitchen with ease. Whether you’re a lifelong fan of the candy or a newcomer to the peanut butter and chocolate pairing, these bars are the quickest way to dessert heaven. Enjoy the richness!
Frequently Asked Questions
- Can I make these dairy-free?
- Yes! Use a plant-based butter substitute and dairy-free chocolate chips. Peanut butter is naturally dairy-free, so the swap is very simple.
- Do I have to use graham cracker crumbs?
- The crumbs help the peanut butter layer hold its shape and provide a slight “shortbread” flavor. If you omit them, you may need to add an extra 1/2 cup of powdered sugar to ensure the bars set firmly.
- Why is my peanut butter layer oily?
- This usually happens if you use “natural” peanut butter that requires stirring. For this recipe, standard commercial brands (like Jif or Skippy) work best because they contain stabilizers that keep the fats from separating.
Would you like me to suggest a “Dark Chocolate Ganache” recipe for a richer topping, or perhaps show you how to turn these into “Buckeye Brownies”?
Related posts:
 No-Bake Nirvana: Mastering Buckeye Bars
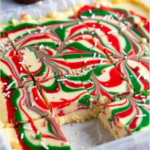
 The Holiday Magic Bar: Santa’s Simplified No-Bake Cookie Bars
 No-Bake Butterfinger Caramel Crunch Bars
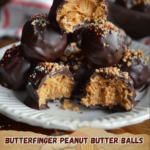 Mastering the Ultimate Butterfinger Peanut Butter Balls
 Holiday Magic: The Ultimate Guide to Two-Ingredient No-Bake Fudge
 Peanut Butter Microwave Fudge: A 15-Minute Modern Miracle
