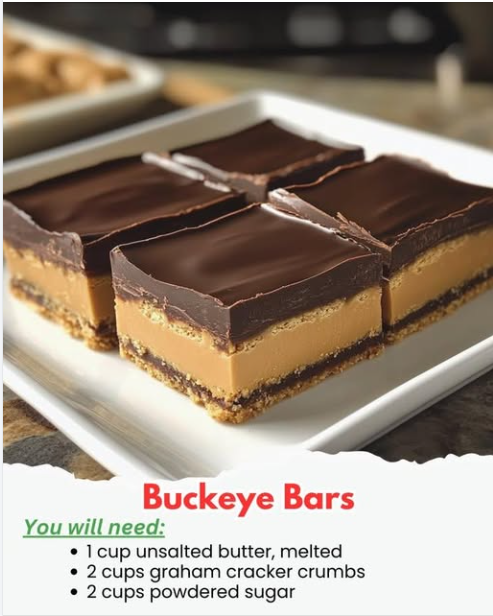
The complete ingredient list balances the rich, peanut butter base with a smooth, firm chocolate cap:
I. The Peanut Butter Base (Structural Layer):
- **1 cup** unsalted butter, melted (The hard binder)
- **2 cups** graham cracker crumbs (The coarse filler)
- **2 cups** powdered sugar (The fine filler and sweetener)
- **$1 \frac{1}{2}$ cups** creamy peanut butter (The flavor and soft binder)
- **1 teaspoon** vanilla extract (Assumed, for flavor depth)
II. The Chocolate Topping (Cap):
- **2 cups** semi-sweet chocolate chips (Assumed, the primary topping)
- **2 tablespoons** shortening or coconut oil (Assumed, the setting stabilizer)
Instructions: Compression, Stabilization, and Slicing
Phase 1: Preparing the Base and Initial Chill
- **Prepare the Pan:** Line a 9×13-inch or 8×8-inch baking dish with parchment paper, leaving an overhang on the long sides for easy removal.
- **Combine Dry Ingredients:** In a large bowl, combine the **graham cracker crumbs and powdered sugar**.
- **Mix Binders:** In a separate medium bowl, whisk together the **melted butter, creamy peanut butter, and vanilla extract (assumed)** until smooth.
- **Form Base:** Pour the binder mixture over the dry ingredients. Mix with a sturdy spoon or rubber spatula until a **stiff, uniform dough** forms. The dough should not be crumbly.
- **Compress (MANDATORY):** Transfer the dough to the prepared pan. **Press the mixture down firmly and evenly** using the base of a glass or the back of a measuring cup. The surface must be dense and flat.
- **Initial Chill (Stabilization):** Refrigerate the base for a minimum of **30 minutes** (or place in the freezer for 15 minutes). The base must be firm before applying the topping.
Phase 2: Applying the Topping and Final Set
- **Melt Topping:** In a microwave-safe bowl, combine the **semi-sweet chocolate chips and shortening/coconut oil**. Microwave in 30-second intervals, stirring until completely smooth and glossy.
- **Cool Topping (CRITICAL):** Allow the melted chocolate mixture to cool for **5–10 minutes** at room temperature. The topping should be warm and pourable, but not hot. Applying hot chocolate will soften the peanut butter base, causing the layers to merge.
- **Apply Cap:** Pour the cooled chocolate topping evenly over the chilled peanut butter base. Use an offset spatula to quickly and gently spread the chocolate to cover the entire surface.
- **Final Chill (MANDATORY):** Return the bars to the refrigerator for at least **2–3 hours** (or until the chocolate is completely firm).
Phase 3: Cutting and Serving
- **Warm Knife Prep (CRITICAL):** Remove the bars from the refrigerator. Run a large, sharp knife under hot water and dry it completely.
- **Cut and Serve:** Use the warmed knife to cut the bars into squares. **Wipe the knife clean and reheat it after every 2–3 cuts** to ensure clean, sharp slices that do not drag the chocolate topping.
Serving and Storage: Retaining Slice Integrity
Because the bars are fat-stabilized, proper chilling is required for storage.
- **Serving:** Best served slightly cool, straight from the refrigerator, to maintain a firm, non-sticky slice.
- **Storage:** Store in an **airtight container in the refrigerator for up to 1 week**.
- **Room Temperature Warning:** The bars will soften significantly at room temperature, especially on a warm day. They should not be left out for more than 2–3 hours.
- **Freezing:** Buckeye bars freeze exceptionally well. Cut into squares, place them in an airtight container layered with parchment paper, and freeze for up to 3 months. Thaw overnight in the refrigerator.
Tips: Essential Techniques for Setting and Cutting
**Peanut Butter Choice:** Use **creamy peanut butter** (Step 3). Natural peanut butter that requires stirring will separate when melted, leading to a greasy, oily base that won’t set firmly. Do not use crunchy peanut butter, as the chunks compromise the smooth final texture.
**Butter Temperature:** The butter must be fully **melted** (Step 3) to properly bind the dry ingredients. Softened butter will not incorporate as evenly, potentially leaving dry pockets.
**Compression is Key:** Spend the necessary time firmly pressing the base (Step 5). This prevents the bars from crumbling when sliced and ensures a flat, level surface for the chocolate topping.
**Chocolate Setting Agent:** The **shortening or coconut oil** (Step 7) is vital for the topping. It helps the chocolate set smoothly at a softer texture than pure melted chocolate, preventing the topping from cracking or shattering when you slice the chilled bar.
**Cutting Protocol:** The practice of **warming the knife** (Step 11) is essential. The chilled chocolate is brittle and the peanut butter base is dense. A warm, dry knife blade cuts through both layers cleanly, giving you those professional, neat edges.
Variations: Customizing Crunch and Flavor
The basic peanut butter and chocolate structure is perfect for small customizations:
- **Chocolate Crust:** Replace the **2 cups of graham cracker crumbs** with **crushed chocolate sandwich cookies (like Oreos)** for an even richer base.
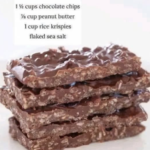
- **Salted Topping:** Sprinkle a pinch of **flaky sea salt** over the warm chocolate topping immediately after spreading (Step 9) for a classic salted chocolate finish.
- **Crispy Texture:** Mix **1 cup of crisp rice cereal** (like Rice Krispies) into the peanut butter base mixture (Step 4) for an added layer of crunch.
- **White Chocolate Swirl:** Melt 1/4 cup of white chocolate chips separately and use a spoon to drizzle thin lines over the dark chocolate topping (Step 9) before the final chill. Drag a toothpick through the lines for a marble effect.
- **Toffee Crunch:** Fold in **1/2 cup of toffee bits** into the peanut butter base (Step 4) for a caramel-toffee flavor layer.
**Pan Size Impact:** A **9×13-inch pan** (Step 1) yields thinner bars (about 1 inch thick), which set faster. An **8×8-inch pan** yields thicker, richer bars (about $1 \frac{1}{2}$ inches thick) but requires a longer chilling time (closer to 4 hours total).
**Powdered Sugar Sifting:** While not strictly mandatory, **sifting the powdered sugar** (Step 2) helps prevent small lumps in the peanut butter base, especially if it feels grainy during mixing.
**Chilling Time is Law:** Do not attempt to skip or shorten the chill times (Step 6 and 10). The peanut butter base will not set sufficiently, resulting in a sticky, impossible-to-slice mess.
**Ganache Temperature Check:** Test the chocolate topping (Step 8) with your finger. It should feel pleasantly warm, not hot. If it stings your finger, it will melt the peanut butter. Wait longer!
Conclusion: Sliceable, Sweet Perfection
Buckeye Bars are the pinnacle of efficient, no-bake confectionery. Success is guaranteed by controlling the ratio of fat to sugar for the peanut butter base’s structural integrity, followed by the mandatory double-chill thermal stabilization cycle. Adhering to the Compression Protocol ensures a firm base, and using the simple trick of warming the knife guarantees a perfect, neat slice every time. This recipe delivers a delicious, highly shareable treat without ever heating an oven.
Frequently Asked Questions (FAQ)
Q: Why are my bars too sticky and refuse to cut cleanly?
A: They were **not chilled long enough** (Step 10). The fats (butter and peanut butter) need to be completely solid. Alternatively, the **ratio was too wet** (too much melted butter or oily peanut butter used).
Q: My peanut butter base is crumbly and falls apart. What happened?
A: The mixture was **too dry** (too much graham cracker/powdered sugar) or, more likely, the base was **not compressed firmly enough** into the pan (Step 5). Compression is necessary to bind the ingredients.
Q: Why did my chocolate topping crack when I sliced the bars?
A: The topping was made with **pure melted chocolate chips and no added shortening/oil** (Step 7). Pure chocolate sets too hard and becomes brittle when cold. The added fat gives it flexibility.
Q: My chocolate topping melted into the peanut butter base. Why?
A: The **chocolate topping was applied too hot** (Step 8), or the **peanut butter base was not chilled sufficiently** (Step 6) before the chocolate was applied, causing the layers to merge.