Phase 1: The Creaming Stage
Beat the softened cream cheese and powdered sugar together first. You are looking for a completely smooth paste. The “Grainy” Warning: If you see lumps now, they will stay in the pie forever. Ensure the cream cheese is truly at room temperature before starting.
Phase 2: The Peanut Butter Integration
Add the peanut butter and milk to the cheese mixture. Blend on medium speed. This creates a “thick slurry.” The milk will emulsify with the fats in the peanut butter, turning the mixture from a heavy paste into a silky cream.
Phase 3: The “Cloud” Fold
This is the most critical step. Use a spatula to gently fold half of the Cool Whip into the peanut butter mixture. Do not use the electric mixer! You want to keep the air bubbles intact. Once the first half is incorporated, fold in the remaining Cool Whip. This “staged folding” prevents the heavy PB mixture from deflating the delicate topping.
Phase 4: The Leveling
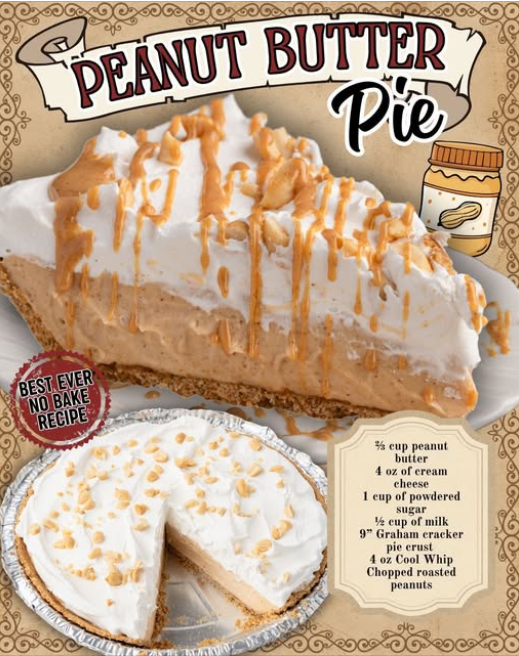
Pour the mixture into the graham cracker crust. Use the back of a spoon to create a slight “dome” in the center. Sprinkle the roasted peanuts on top immediately so they “sink” slightly into the surface, anchoring them to the pie.
Phase 5: The Chilled Cure
The pie must chill for at least 4 hours, though overnight is better. During this time, the fats solidify and the cornstarch in the sugar hydrates. This is when the “mousse” becomes a “sliceable pie.”
The Science of Salt and Sugar
Why do we add roasted peanuts on top? It’s for Sensory Contrast. The filling is high in sugar and fat, which can overwhelm the palate. The roasted peanuts provide a “salt hit” and a “crunch” that resets the taste buds, allowing you to enjoy the next bite as much as the first. This is the same reason why salted caramel is so popular—the salt enhances our perception of sweetness while preventing “cloying” fatigue.
Chef’s Tips for a “Million Dollar” Slice
- The “Hot Knife” Trick: To get a perfect, clean slice, dip your knife in a tall glass of hot water and wipe it dry between every single cut. The heat will glide through the fat of the pie like butter.
- The Chocolate Drizzle: Melt 1/4 cup of semi-sweet chocolate chips with 1 tsp of coconut oil and drizzle it over the top before chilling. The oil ensures the chocolate stays soft enough to bite through without cracking the pie.
- Texture Boost: Use Crunchy peanut butter in the filling if you want an “old-fashioned” rustic texture instead of a smooth mousse.
Holiday Variations
| Variation | The Twist | The Vibe |
|---|---|---|
| Chocolate Peanut Butter | Use a chocolate graham cracker crust. | A “Reese’s Cup” in pie form. |
| Pretzel Bottom | Swap the crust for a crushed pretzel base. | Extreme salty-sweet harmony. |
| Banana PB Pie | Layer sliced bananas on the bottom of the crust. | A “King-style” (Elvis) tribute. |
Conclusion: The Ultimate Holiday Lifesaver
The No-Bake Peanut Butter Pie is proof that a dessert doesn’t have to be difficult to be spectacular. It relies on the inherent strengths of its ingredients—the stability of cream cheese, the richness of peanuts, and the lightness of whipped topping. On this Christmas Eve 2025, as you share this pie with your loved ones, you can take pride in the fact that you’ve served a masterfully engineered treat that tastes like hours of work, but took only minutes. Enjoy the creamy, nutty bliss!
Frequently Asked Questions
- Can I use real whipped cream instead of Cool Whip?
- You can, but the pie will be softer and must be eaten within 24 hours. Real whipped cream is less stable and will begin to “leak” water (weep) into the crust over time.
- Can I freeze this pie?
- Yes! This pie actually makes an incredible “Frozen Peanut Butter Treat.” Freeze it for a firmer, ice-cream-like texture. Let it sit on the counter for 10 minutes before slicing.
- Why is my filling runny?
- This usually happens if the cream cheese wasn’t softened enough (causing it not to emulsify) or if the mixture wasn’t chilled long enough. Make sure you hit that 4-hour minimum chill time!
Would you like me to suggest a “Salted Caramel Drizzle” recipe to go over the top, or perhaps show you how to turn this filling into “Peanut Butter Cheesecake Bars”?