Step 1: Activating the Yeast and Mixing
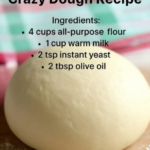
- **Hydrate:** In a large bowl, whisk the **lukewarm milk** and **1 tsp yeast**. Add the **7 Tbsp sugar** and let it sit for 10 minutes. The surface should become foamy and smell “bread-like.”
- **Combine Wet:** Add the **egg** and **oil** to the yeast mixture. Whisk until the egg is fully incorporated.
- **Incorporate Dry:** Gradually add the **flour** and **salt**. Stir with a wooden spoon until a shaggy dough forms.
Step 2: Kneading and The First Rise
- **Knead:** Turn the dough onto a floured surface. Knead by hand for **8–10 minutes** (or 5 minutes in a stand mixer) until the dough is smooth, elastic, and no longer sticks to your hands.
- **First Proof:** Place in a lightly oiled bowl. Cover with a damp cloth and let rise in a warm spot for **1 hour**, or until it has doubled in size.
Step 3: Rolling and Filling
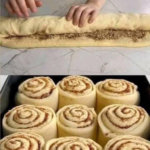
- **Degas:** Gently punch the dough down. Roll it out into a large rectangle (approx. 12×18 inches).
- **Spread:** Apply the **softened butter** over the dough. Sprinkle with **sugar, cinnamon, and chopped walnuts**.
- **Roll:** Starting from the long edge, roll the dough into a tight log.
- **Slice:** Cut the log into 12 even pieces. Pro-Tip: Use unflavored dental floss to slice the rolls without squishing them!
Step 4: The Second Rise and Baking
- **Second Proof:** Place the rolls in a greased baking pan. Cover and let rise for **30 minutes**.
- **Bake:** Bake at **$350^{\circ}\text{F}$ ($175^{\circ}\text{C}$)** for **20–25 minutes** until the tops are golden brown.
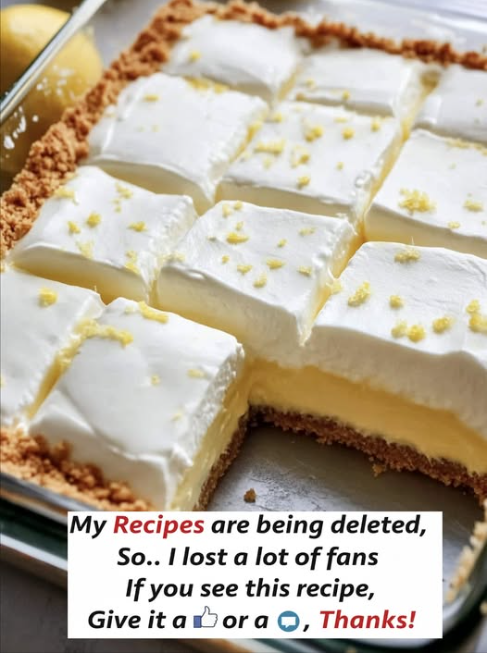
- **Frost:** While warm, spread the whisked **cream cheese frosting** over the rolls.
Expert Tips for Success
Tip 1: Milk Temperature is Key
If your milk is hotter than $115^{\circ}\text{F}$ ($46^{\circ}\text{C}$), you risk killing the yeast. If it is cold, the yeast will stay dormant. Aim for “baby bath” temperature—pleasantly warm to the touch, but not hot.
Tip 2: Toasted Walnuts
For a much deeper flavor, toast your chopped walnuts in a dry pan for 3–5 minutes before adding them to the filling. This releases their natural oils and makes the crunch even more satisfying.
Tip 3: The “Softness” Secret
Don’t over-bake! The rolls should be just golden. If they look too brown, they may become dry. The carry-over heat in the pan will finish the centers while keeping the outer layers soft.
Variations: Customizing Your Rolls
| Variation | Modification | Vibe |
|---|---|---|
| **Maple Pecan** | Swap walnuts for pecans; add maple syrup to frosting. | Southern Comfort. |
| **Orange Zest** | Add orange zest to the dough and the frosting. | Bright and Citrusy. |
| **Apple Pie** | Add finely diced apples to the cinnamon filling. | Fall Harvest. |
Serving and Storage
These rolls are famous for disappearing quickly, but if you have leftovers, they store exceptionally well.
- **Room Temp:** Keep in an airtight container for **2 days**.
- **Reheat:** 15 seconds in the microwave makes them taste “fresh from the oven” again.
- **Freezing:** You can freeze the baked (unfrosted) rolls for up to **3 months**. Thaw at room temp and frost before serving.
Conclusion: A Kitchen Table Legacy
Baking these Cinnamon-Walnut rolls is more than just following a recipe; it’s about creating a moment. Whether it’s the smell wafting through the house on a Sunday morning or the joy of seeing your niece grab the first one, these rolls are built for making memories. With their soft crumb, crunchy interior, and tangy frosting, they are the ultimate proof that some of the best things in life are made from scratch.
Frequently Asked Questions
Q: Can I use instant yeast?
A: Yes! If using instant yeast, you can skip the 10-minute “activation” wait and mix it directly into the dry ingredients.
Q: Why are my rolls tough?
A: This usually happens if too much flour was added during kneading. The dough should be slightly tacky, not dry and stiff.
Q: Can I make these the night before?
A: Absolutely! After slicing and placing them in the pan, cover and refrigerate overnight. In the morning, let them sit at room temp for 45 minutes before baking.