
The Chili Slurry Matrix
1. Introduction: The Physics of the “Coney” Texture
Unlike traditional chili, which features distinct chunks of meat and vegetables, hot dog chili is a Viscous Emulsion. To achieve this, we utilize a Pre-Heat Hydration technique. By mixing the raw ground beef with water before cooking, we separate the individual muscle fibers. As the slow cooker heats, these fibers cook in isolation, resulting in a fine, uniform grain that provides maximum surface area for sauce adhesion.
2. The Ingredients: The Structural Infrastructure
The success of this sauce depends on the balance of lean protein and aqueous solvents.
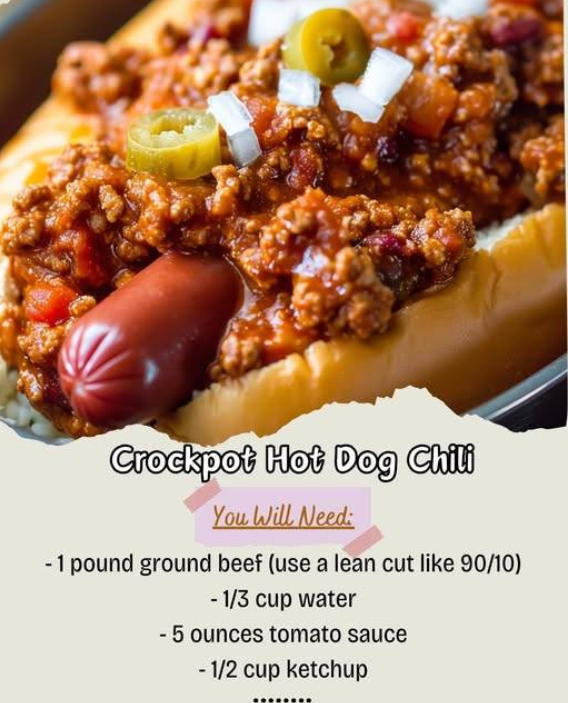
- 1 lb Ground Beef (90/10): High-protein, low-lipid substrate. Minimal fat prevents the sauce from “splitting” or becoming greasy.
- 1/3 Cup Water: The critical Dissociation Agent. This breaks the protein bonds before they can be “set” by heat.
- Tomato & Spice Chassis: (Standard additions typically include tomato sauce, ketchup, mustard, and chili powder) These provide the acidity and sugars for the Maillard-driven flavor profile.
3. Instructions: The Regulatory Methodology
Phase 1: The Cold-Mash Hydro-Slurry
In the slow cooker (unheated), combine the raw ground beef and the water. Use a whisk or a potato masher to break the beef into a fine slurry until no large lumps remain. Regulatory Warning: If you add the beef to a hot cooker, the proteins will instantly coagulate into clumps, ruining the “Coney” texture.
Phase 2: Additive Integration
Incorporate your tomato base, aromatics (onion/garlic), and spices. The salt in the spices will initiate Protein Solubilization, helping the beef fibers absorb the liquid and flavors as the temperature rises.
Phase 3: Low-Thermal Transformation
Cook on Low for 4-6 hours. This slow thermal trajectory allows the connective tissues to convert into Gelatin, which provides the characteristic “glossy” mouthfeel without the need for additional thickeners like cornstarch.
4. Service and Storage: Post-Reduction Management
As the chili cools, the viscosity will increase significantly. For the best application, serve while the chili is at its Flow Point (approximately 150°F).
| State | Texture Observation | Stability Limit |
|---|---|---|
| Hot (160°F) | Highly fluid; ideal for pouring. | Keep on ‘Warm’ setting. |
| Room Temp (72°F) | Thick, spread-like; maximum flavor. | Limit to 2 hours. |
| Refrigerated | Stable gel; easily portioned. | 5 Days; best flavor on day 2. |
5. Tips: Managing the Particle Gradient
- The Immersion Hack: If your chili still has small lumps after 4 hours, use an Immersion Blender for 10 seconds. This creates a velvet-smooth suspension of protein in sauce.
- Fat Management: If using 80/20 beef, you must skim the lipids from the surface halfway through the cook. Excess oil will prevent the tomato sauce from properly emulsifying with the meat.
