ADVERTISEMENT
The simplicity of the ingredient list belies the complexity of the final flavor. Success in this recipe hinges on using the specified ingredients in the correct proportions. Do not attempt substitutions, especially with the butter, sugar, and syrup, as they dictate the toffee’s texture and setting point.
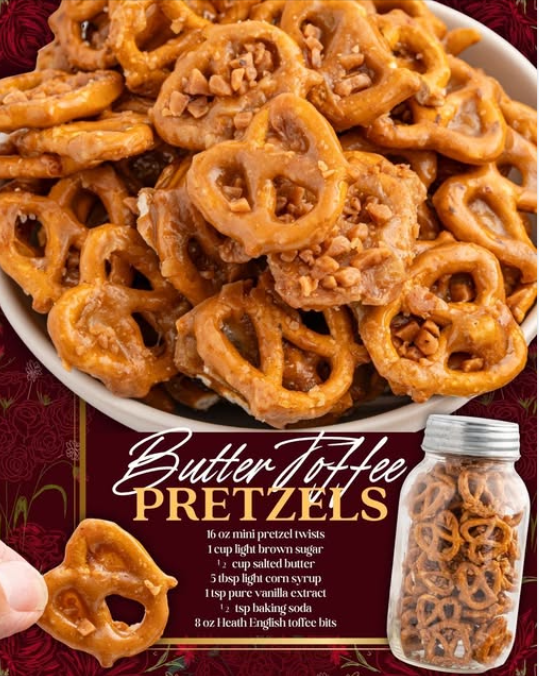
- 16 ounce mini pretzel twists: The classic mini twists are essential. Their shape provides maximum surface area for the toffee coating to adhere, creating a thick, crunchy shell. Avoid the thinner, rod-style pretzels.
- 1 cup light brown sugar: Provides the deep, molasses-rich base for the caramel. Packing the sugar firmly into the measuring cup is crucial for accurate proportions.
- ½ cup salted butter: Salted butter is non-negotiable here. The extra salt interacts with the sweet toffee to enhance the overall flavor, elevating the sweet-salty profile. Cut it into chunks for faster melting.
- 5 tbsp light corn syrup: The critical component for preventing crystallization. Corn syrup acts as an invert sugar, ensuring the toffee mixture remains smooth, glossy, and pliable, resulting in a perfectly glassy, non-gritty final product.
- 1 tsp pure vanilla extract: Added at the very end, vanilla contributes depth and a warm, aromatic note that completes the toffee flavor profile. Use pure extract, not imitation.
- ½ tsp baking soda: This is the secret chemical agent! Baking soda reacts with the acidic brown sugar and heat, creating tiny air bubbles (carbon dioxide) in the syrup. This process, known as aeration, lightens the toffee’s texture, making it more brittle and easier to crunch, rather than rock-hard.
- 8 oz Heath English toffee bits: The final textural flourish. These provide concentrated bursts of crunchy, chocolate-coated toffee, embedding themselves into the glaze while it’s still warm for an added layer of flavor and aesthetic appeal.
A Note on Preparation: Ensure all your ingredients are measured and ready before you begin heating the toffee mixture. Candy making requires speed, and having your baking soda, vanilla, and toffee bits waiting will be the key to a seamless process.
Instructions: The Caramelizing Journey
Follow these steps precisely to achieve the perfect toffee coating. This process moves quickly, so read through all instructions before turning on the heat.
Step 1: The Preheat and Prep
Preheat your oven to a moderate **300°F (150°C)**. Line two large baking sheets with parchment paper or silicone mats. This is non-negotiable, as the sticky toffee will fuse directly to an unlined pan. Spread the **16 ounces of mini pretzel twists** in a single layer across both prepared baking sheets. A single layer is essential for even coating and baking.
Step 2: The Toffee Base
In a heavy-bottomed saucepan—a larger pot than you think you need, as the mixture will bubble—combine the **1 cup light brown sugar**, **½ cup salted butter**, and **5 tbsp light corn syrup**. Place the pan over medium heat. Stir constantly with a wooden spoon or heat-proof spatula until the butter is completely melted and the sugar is dissolved. The mixture should come to a rolling boil, where bubbles persist even when stirring.
Step 3: The Critical Boil Time
Once boiling, reduce the heat slightly to medium-low and continue to boil for exactly **three minutes**. This timing is crucial to reach the Soft-Crack stage, which provides the ideal brittle texture when cooled. Do not stir during this three-minute boil; simply let it bubble. The mixture will darken slightly and thicken.
Step 4: The Aeration and Flavor
Immediately remove the saucepan from the heat. Stir in the **1 tsp pure vanilla extract**. Be cautious, as the mixture will steam violently. Next, quickly whisk in the **½ tsp baking soda**. The mixture will immediately foam up dramatically, expanding in volume and turning a lighter, golden-brown hue. This transformation is the aeration process at work, promising a light and crunchy toffee.
Step 5: Coating the Pretzels
Working swiftly, pour about half of the hot toffee mixture evenly over the pretzels on the first baking sheet. Use a spatula to gently, but thoroughly, fold and toss the pretzels until they are mostly coated. Repeat this process with the second half of the toffee on the second sheet of pretzels. It is important to distribute the toffee evenly before baking, but don’t worry if the coverage is not yet perfect.
Step 6: The Bake and Set
Place both baking sheets into the preheated 300°F oven. Bake for **5 minutes**. Remove the sheets and, using a spatula, gently stir and flip the pretzels to redistribute the melting toffee. Return to the oven and bake for another **5 to 7 minutes**, or until the toffee coating looks deeply caramelized, glossy, and sticky. The total baking time will be between 10 and 12 minutes.
Step 7: The Toffee Finish
Immediately remove the baking sheets from the oven. While the toffee coating is molten hot and ultra-sticky, generously sprinkle the **8 ounces of Heath English toffee bits** over the entire surface of both trays. Gently press the toffee bits into the pretzels. Allow the pretzels to cool completely and undisturbed at room temperature for at least **2 hours**, or until the toffee has fully hardened and is brittle to the touch.
Step 8: Break and Serve
Once cooled, the pretzels will be stuck together in large clusters. Gently break them apart into desired serving sizes. Store according to the instructions below.
Serving and Storage: Maximizing Freshness and Crunch
One of the best qualities of Butter Toffee Pretzels is their incredible stability, which makes them a dream for entertaining and gifting. However, a few key guidelines ensure they maintain their crisp texture and deep flavor.
Serving Suggestions:
- Party Bowl: Serve them in a decorative, open bowl where guests can easily grab clusters. Their beautiful, glossy sheen makes them an instant centerpiece.
- Ice Cream Topping: Crush a handful of the finished pretzels and use them as a textural topping for vanilla or salted caramel ice cream.
- Gift Bags: For gift giving, fill small, clear cellophane bags (about 4-6 oz capacity) and tie them tightly with festive ribbons. The clarity of the bag showcases the irresistible texture.
Storage Guidelines:
The enemy of the toffee pretzel is humidity. When the toffee coating absorbs moisture, it begins to soften, losing its signature brittle snap.
Once completely cooled and broken apart, store the pretzels in an **airtight container** at **room temperature**. A cool, dark pantry is ideal. Avoid refrigerating, as the cold environment often introduces condensation when they are brought back out, leading to softening.
Properly stored, Butter Toffee Pretzels will retain their peak crunch and flavor for up to **two weeks**. For longer storage, you can freeze them in a heavy-duty freezer bag for up to three months. To thaw, simply allow them to come to room temperature while still sealed in the bag to prevent condensation buildup.
Tips: Ensuring Success and Troubleshooting
While this recipe is straightforward, a few professional pointers can make the difference between a good batch and an unforgettable one.
- The Pan Size: Use a larger saucepan for the toffee than you think you need. The mixture will almost double in volume when the baking soda is added (Step 4), and a large pot prevents a messy overflow.
- Altitude Adjustment: If you live at a high altitude, liquids boil faster and at lower temperatures. You may need to boil the toffee for an extra minute or two (closer to 4-5 minutes) to ensure it reaches the correct setting point.
- Scraping the Sides: Do not scrape down the sides of the saucepan while the toffee is boiling. The stray sugar crystals clinging to the sides can fall into the hot syrup and trigger unwanted crystallization, resulting in grainy toffee.
- Cooling Surface: If you live in a very humid climate, consider cooling the pretzels in a dehumidified space or briefly in an air-conditioned room to ensure the toffee sets quickly and hardens completely.
- Cleaning Tip: The toffee residue in the saucepan can be a nightmare to clean. Immediately after pouring the toffee, fill the pot with water and bring it to a boil. The boiling water will dissolve the hardened toffee, making cleanup effortless.
Variations: Customizing Your Pretzel Canvas
The basic Butter Toffee Pretzel recipe is a perfect canvas for creativity. While the core toffee formula should remain untouched, you can introduce different flavors and textures with the final toppings and coatings.
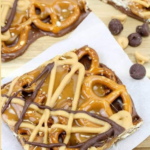
Chocolate Drizzle:
Once the toffee pretzels are completely cooled and broken apart, melt 6 ounces of milk, dark, or white chocolate chips in a double boiler or microwave. Transfer the melted chocolate to a Ziploc bag, snip a tiny corner, and drizzle it artfully over the pretzel clusters. Let the chocolate set fully on parchment paper before storing.
Holiday Spice:
Introduce a seasonal warmth by adding **½ teaspoon of ground cinnamon** and **¼ teaspoon of ground nutmeg** to the toffee mixture when you add the vanilla extract in Step 4. This gives the toffee a classic gingerbread or snickerdoodle note.
Nutty Crunch:
Replace the Heath English toffee bits with **8 ounces of chopped toasted pecans or walnuts**. Sprinkle the nuts over the hot pretzels in Step 7, just as you would the toffee bits, for a different textural contrast and a rich, earthy flavor.
Peppermint Bark:
A perfect variation for Christmas gifting. Replace the Heath bits with **crushed candy canes** and drizzle the final product with **white chocolate**. The cool peppermint and rich toffee create a festive and irresistible pairing.
Conclusion: The Ultimate Party Treat Mastered
The journey from simple pantry staples—butter, sugar, and pretzels—to the glorious, crunchy, and addictive Butter Toffee Pretzel is a testament to the magic of confectionery. We have meticulously covered every step, from selecting the right mini twists to achieving the perfect, airy texture with the baking soda activation, and finally, the professional techniques for serving and storage.
This treat succeeds because it provides a multi-sensory experience: the satisfying crackle of the toffee, the deep, rich flavor of caramelized brown sugar, and the necessary counterpoint of the salty pretzel base. Whether you are a dedicated home baker looking for a reliable signature recipe or a last-minute gift-giver in search of an unforgettable handmade item, these Butter Toffee Pretzels will undoubtedly become a highly requested favorite. Now, gather your ingredients and prepare for the compliments; your next batch of sweet and salty perfection awaits.
Frequently Asked Questions: Troubleshooting and Clarifications
Q: Why did my toffee turn out grainy instead of smooth and glassy?
A: Grainy toffee is a sign of crystallization. This usually happens if you stirred the mixture while it was boiling in Step 3, causing sugar crystals to break off and seed the entire batch, or if you didn’t use enough corn syrup. Be sure to let the mixture boil undisturbed for the required time.
Q: Why are my pretzels soft and chewy instead of hard and crunchy?
A: This is almost always due to **undercooking** or **humidity**. The toffee did not reach the correct temperature (Soft-Crack stage), meaning there was too much moisture left in the sugar syrup. Next time, ensure you boil for the full 3 minutes, or even 4 minutes, to evaporate more water. Also, ensure they are cooled in a low-humidity environment.
Q: Can I use different types of pretzels?
A: The mini twists are highly recommended for optimal coating. However, you can use thin pretzel rods or waffle pretzels, but you must ensure they are spread in a thin layer and stir them gently to prevent breakage. Adjusting the baking time slightly may be necessary for very thick or thin pretzels.
Q: What is the purpose of the baking soda?
A: The baking soda is essential for texture. It reacts with the acids and heat to release tiny air bubbles, which makes the toffee lighter, more brittle, and much easier to bite into. Without it, the toffee would be a rock-hard coating that is difficult and unpleasant to eat.
ADVERTISEMENT