
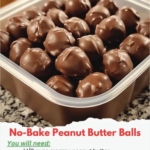
The ingredient list is optimized for maximum moldability and firm texture:
I. The Peanut Butter Core:
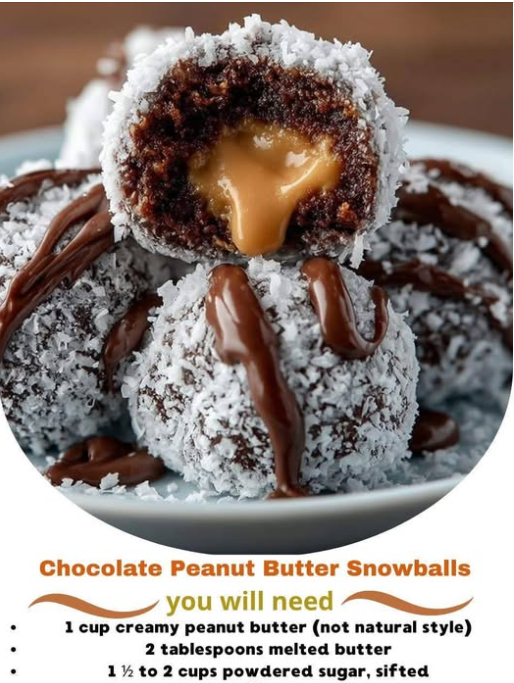
- **1 cup** creamy peanut butter (Stabilized, not natural)
- **2 tablespoons** melted butter (Adds necessary plasticity and flavor)
- **1 ½ to 2 cups** powdered sugar, sifted (Binder and texture agent)
- **1 teaspoon** vanilla extract (Assumed, for aromatic depth)
II. The Chocolate Shell and Drizzle (Assumed):
- **12 ounces** semi-sweet or milk chocolate melting wafers or chips (For dipping)
- **1 teaspoon** coconut oil or vegetable shortening (For achieving a smooth, thin coating)
- **1/2 cup** thick caramel sauce (For drizzling)
- **1/2 teaspoon** fine sea salt (For topping, to enhance the caramel flavor)
Instructions: Rolling, Dipping, and Chilling Protocols
Phase 1: Forming the Peanut Butter Core and First Chill
- **Combine Base:** In a large bowl, combine the **creamy peanut butter** and **melted butter**. Stir until fully smooth. Stir in the **vanilla extract**.
- **Mix to Consistency (CRITICAL):** Gradually add the **sifted powdered sugar**, starting with $1 \frac{1}{2}$ cups. Mix thoroughly until the mixture is cohesive, firm, and no longer sticky. Add the remaining $1/2$ cup of powdered sugar only if the dough is still too tacky to handle. The final dough should be firm enough to roll without sticking to your hands.
- **Roll Balls:** Scoop the dough into small balls (about 1 inch in diameter, or 1 tablespoon each). Place the balls on a parchment-lined baking sheet.
- **First Chill (MANDATORY):** **Freeze the peanut butter balls for at least 30 minutes**, or until they are rock hard. This chill is essential for maintaining the shape during dipping and preventing the chocolate from blooming.
Phase 2: Chocolate Dipping and Second Chill
- **Melt Chocolate:** In a microwave-safe bowl, melt the **chocolate melting wafers** with the **coconut oil or shortening** in 30-second intervals, stirring well between each interval, until the chocolate is smooth and fluid. The oil or shortening helps the chocolate set to a glossy, non-streaky finish.
- **Dip Balls:** Remove the peanut butter balls from the freezer. Using a toothpick or a candy dipping fork, quickly dip each frozen ball into the melted chocolate, turning to coat completely. Tap the fork against the side of the bowl to allow excess chocolate to drip off.
- **Set Chocolate:** Return the dipped balls immediately to the parchment-lined sheet. Remove the toothpick if used, and cover the hole with a dab of chocolate.
- **Second Chill (MANDATORY):** **Refrigerate the dipped balls for at least 15 minutes** to allow the chocolate shell to harden completely.
Phase 3: Caramel Drizzle and Finishing
- **Prepare Drizzle:** Gently warm the **caramel sauce** until it is fluid enough to drizzle (if using store-bought, you may need to add 1 teaspoon of milk or cream to thin it slightly).
- **Drizzle:** Using a fork or a piping bag with a tiny hole, drizzle the caramel over the chilled, set chocolate snowballs. Sprinkle lightly with **fine sea salt** immediately after drizzling.
- **Final Set:** Allow the caramel to set for 10–15 minutes before serving.
Serving and Storage: Maintaining Shape and Shell
The high fat content of this candy dictates that it must be stored in a cool environment to maintain its firm texture and chocolate shell integrity.
- **Serving:** Serve chilled or at cool room temperature. Allowing the balls to warm slightly enhances the peanut butter flavor and tenderness.
- **Storage:** Store the finished snowballs in an **airtight container in the refrigerator for up to 2 weeks**, layered between sheets of parchment paper. They will remain firm and fresh.
- **Freezing:** **Freezing is highly recommended** for long-term storage. Place the finished snowballs in an airtight, freezer-safe container for up to 3 months. Thaw overnight in the refrigerator before serving.
- **Bloom Prevention:** Never store or chill the chocolate too quickly or unevenly. The second chill (Step 8) should be in the refrigerator, not the freezer, to ensure the chocolate sets slowly and smoothly.
Tips: Essential Techniques for a Glossy Finish
Sift the Sugar: The **powdered sugar must be sifted** (Step 2). This prevents lumps and ensures the smoothest, most tender final texture, which is crucial in a no-bake candy where ingredients are not dissolved by heat.
The Double Boil Method: If melting chocolate chips, use the double boiler method (or a heatproof bowl over a simmering pot of water). This provides gentle, controlled heat, minimizing the risk of scorching the chocolate, which is vital for a glossy shell.
Peanut Butter Quality: Use a **shelf-stable, creamy peanut butter**. Natural peanut butter’s separation prevents the formation of the necessary firm, cohesive dough, resulting in an oily, messy confection.
Dipping Aid: Use a **candy dipping tool or fork** (Step 6), not a standard kitchen fork. This allows the excess chocolate to drain completely, preventing puddles and thick, cracked bases.
Caramel Consistency: The caramel should be thin enough to drizzle elegantly but thick enough to hold its shape. If too thick, thin it with a **teaspoon of milk**; if too thin, let it cool for a few minutes to thicken naturally.
Variations: Customizing Flavors and Coatings
The simple peanut butter core is a robust base for flavor experimentation:
- **White Chocolate Shell:** Substitute the semi-sweet chocolate (Step 5) with **high-quality white chocolate or white almond bark**. White chocolate pairs exceptionally well with the tartness of raspberry or orange zest, if added.
- **Crunchy Core:** Replace 1/4 cup of the creamy peanut butter with **crunchy peanut butter** or fold in 1/4 cup of finely chopped, roasted peanuts into the dough.
- **Spice Blend:** Add **1/4 teaspoon of ground cinnamon** to the peanut butter mixture for a warmer, seasonal flavor.
- **Nutella Swirl:** Substitute 1/4 cup of the peanut butter with **Nutella (hazelnut spread)** for a chocolate-hazelnut flavor boost in the core.
- **Decorative Coating:** Instead of caramel, dust the chocolate-coated balls with **flaked sea salt, shredded coconut, or crushed graham crackers** immediately after dipping, while the chocolate is still wet.
Batch Management: Dip the frozen balls in small batches (3-4 at a time). This prevents the balls waiting on the sheet from warming up, which would compromise the quality of the final chocolate shell.
Powdered Sugar Test: The dough is ready (Step 2) when you can press it between your fingers and it holds its shape perfectly without leaving a sticky residue. If it’s too dry, add a few drops of **milk or cream** to bind it.
Coconut Oil’s Purpose: The addition of coconut oil (Step 5) is important for achieving a smooth, thin shell that dries quickly. Coconut oil melts and hardens rapidly, aiding in the setting process and minimizing bloom.
Temperature Maintenance: If the chocolate begins to thicken during the dipping process, reheat it briefly in the microwave (10–15 seconds). It is essential to keep the chocolate fluid for an even, thin coating.
Conclusion: A Decadent, Precise Confection
The Chocolate Peanut Butter Snowball is a simple yet technically demanding no-bake treat. Success relies on the meticulous balance of fat and sugar for the core and the rigorous application of the double-chill protocol to ensure a smooth, glossy chocolate shell free of bloom. By adhering to these regulations—from sifting the powdered sugar to chilling the dipped candies—the confectioner guarantees a tender, flavorful center encased in a perfect, crisp chocolate coating, making this recipe a reliable favorite.
Frequently Asked Questions (FAQ)
Q: Why is my peanut butter mixture grainy or dry?
A: It is usually due to **unsifted powdered sugar** or using too much powdered sugar (more than 2 cups). The lumps cause graininess, and excess sugar absorbs too much moisture, making the dough crumbly. Use a few drops of milk to rehydrate if too dry.
Q: What causes the chocolate coating to look gray or streaky (bloom)?
A: Bloom occurs when the cocoa butter separates. This happens if the chocolate was **scorched during melting** (too hot), or if the balls were not **frozen solid** (Step 4), causing the warm interior to melt the chocolate unevenly.
Q: My chocolate is too thick for dipping. How can I thin it?
A: Add a small amount (1/2 teaspoon at a time) of **additional coconut oil or vegetable shortening** to the melted chocolate and stir until fluid. Avoid adding liquid, which can cause the chocolate to seize.
Q: Can I skip the freezing step?
A: No. Skipping the freezing step will result in soft peanut butter balls that deform when dipped and warm up the chocolate, leading to a thin, streaky, or bloomed shell. The frozen interior is critical for a high-quality finish.
I absolutely adore the precise techniques required for no-bake confections! Please keep sending your recipes; I’m ready for the next delicious challenge!
Related posts:
 The No-Bake Confection: Mastering Peanut Butter Snowballs
 Mastering Chocolate Peanut Butter Snowballs
 The Ultimate Guide to Decadent Chocolate
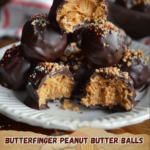 Mastering the Ultimate Butterfinger Peanut Butter Balls
 Effortless Indulgence: Mastering No-Bake Peanut Butter Balls
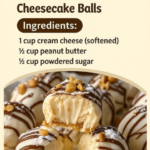 Decadent Perfection: Homemade No-Bake Peanut Butter Cheesecake Balls
