Follow these steps to master the “lamination” technique that creates those beautiful, flaky layers.
Step 1: Prep the Fruit
In a small bowl, toss your finely diced apples with the brown sugar, cinnamon, and melted butter. Let them sit for 10 minutes; this allows the apples to macerate and release their juices, which will later steam-cook inside the dough.
Step 2: The Dry Mix
Preheat your oven to 400°F (200°C). Whisk together the flour, sugar, baking powder, and salt in a large bowl. Using a pastry cutter or two knives, “cut” the cold cubed butter into the flour until the mixture resembles coarse crumbs with some pea-sized chunks of butter remaining.
Step 3: Hydrate the Dough
Make a well in the center and pour in the milk. Stir gently with a fork until a shaggy dough forms. Do not overmix! Overworking the dough develops gluten, which leads to tough, chewy biscuits.
Step 4: Incorporate the Apple Pie Soul
Turn the dough onto a floured surface. Gently fold in the spiced apple mixture. Pat the dough into a 1-inch thick rectangle. Fold the dough over itself three times (like a letter)—this creates the layers. Cut into circles using a biscuit cutter or squares with a sharp knife.
Step 5: The Bake
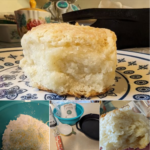
Place the biscuits on a parchment-lined baking sheet, ensuring they are touching if you want soft sides, or spaced apart for crispy edges. Bake for 15–18 minutes until the tops are a deep golden brown and the apple juices are bubbling slightly at the edges.
Service and Storage Tips
Service: These are best served warm, ideally within 20 minutes of leaving the oven. For an extra touch of indulgence, brush the tops with a simple glaze of powdered sugar and a drop of maple syrup.
Storage: Because of the fresh fruit content, these biscuits have a shorter shelf life than plain ones. Store them in an airtight container for up to 2 days at room temperature. To restore the “fresh-baked” texture, reheat them in a toaster oven at 350°F for 5 minutes.
Variants
- Caramel Apple Biscuits: Drizzle homemade salted caramel over the biscuits immediately after baking.
- The Nutty Crunch: Fold 1/4 cup of chopped pecans or walnuts into the dough along with the apples.
- Cheddar Apple: Add 1/2 cup of shredded sharp cheddar cheese to the dry ingredients for a classic savory-sweet pairing.
Tips
- Cold is Gold: If the butter starts to melt while you are working the dough, pop the whole bowl in the freezer for 5 minutes before continuing. Cold butter creates the steam pockets that make biscuits flaky.
- Small Dice: Make sure your apple pieces are no larger than 1/4 inch. If they are too big, they will cause the biscuit to fall apart.
- Don’t Twist: When using a biscuit cutter, press straight down and pull straight up. Twisting the cutter “seals” the edges and prevents the biscuit from rising.
Conclusion
Apple Pie Biscuits are a celebration of seasonal flavors and textural contrast. They offer the comforting, buttery flaky layers of a classic biscuit paired with the warm, spiced sweetness of a fruit pie. This recipe is simple enough for a Saturday morning but impressive enough to serve as a dessert with a scoop of vanilla ice cream. By mastering the balance of cold butter and spiced fruit, you bring a new holiday tradition to your kitchen that is sure to become a family favorite.
Frequently Asked Questions
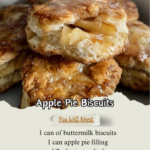
Q: Can I use canned apple pie filling?
A: You can, but it is much wetter than fresh apples. If you use canned filling, chop the pieces smaller and use a slotted spoon to avoid adding too much excess liquid to the dough.
Q: My biscuits didn’t rise. What happened?
A: This is usually due to expired baking powder or over-handling the dough. Also, ensure your oven is fully preheated before the biscuits go in.
Q: Can I make these ahead of time?
A: You can cut the biscuits and keep them on the baking sheet in the fridge for up to 4 hours before baking. Baking them cold actually helps them rise better!