
Follow these steps carefully to ensure your cheesecake has a crisp base and a cloud-like filling.
Step 1: Construct the Crust
In a medium bowl, whisk together the almond flour, brown and granulated sweeteners, cinnamon, and salt. Pour the melted butter over the dry ingredients and stir until the mixture resembles wet sand. Press the mixture firmly into the bottom of a 9-inch springform pan. Use the bottom of a flat measuring cup to ensure it is packed tightly. Place the pan in the freezer to set while you prepare the filling.
Step 2: Whip the Cream
In a chilled bowl, beat the heavy whipping cream until stiff peaks form. Be careful not to over-beat it into butter, but it must be firm enough to hold its shape. Set this aside in the refrigerator.
Step 3: The Cream Cheese Base
In a large mixing bowl, beat the three packages of softened cream cheese with the powdered sweetener until completely smooth and lump-free. Add the sour cream, lemon juice, and vanilla extract, and continue to mix until the ingredients are fully incorporated and the texture is glossy.
Step 4: The Fold
Gently fold the whipped cream into the cream cheese mixture using a silicone spatula. Do not use a mixer for this step, as you want to keep the air in the whipped cream. Fold until no white streaks remain.
Step 5: Chill and Set
Spread the filling evenly over the chilled crust. Smooth the top with an offset spatula. Cover with plastic wrap and refrigerate for at least 6 hours, though overnight is highly recommended for the best “sliceable” consistency.
Service and Storage Tips
Serving: To get those perfect, restaurant-quality slices, run a thin knife around the edge of the springform pan before releasing the latch. Dip your slicing knife in hot water and wipe it dry between every cut.
Storage: This cheesecake stores exceptionally well. Keep it in an airtight container in the refrigerator for up to 5 days. If you want to make this as a meal-prep dessert, you can freeze individual slices on a baking sheet, then wrap them in parchment paper and store them in a freezer bag for up to 3 months. Thaw in the fridge for 30 minutes before eating.
Variants
- Chocolate Swirl: Melt 2 oz of unsweetened chocolate and swirl it into the top of the filling before chilling.
- Berry Topped: Simmer a handful of raspberries with a teaspoon of lemon juice and a dash of sweetener to create a keto-friendly coulis.
- Pumpkin Spice: Add 1/2 cup of pumpkin puree and 1 teaspoon of pumpkin pie spice to the filling for a seasonal twist.
Tips
- Room Temperature Ingredients: Your cream cheese must be fully softened. If it is cold, your filling will be lumpy, and no amount of mixing will fix it.
- Avoid the Grain: Always use powdered sweetener for the filling. Granulated sweeteners do not dissolve in cold fats and will result in a crunchy, sandy texture.
- Parchment Paper: If you are worried about the crust sticking, line the bottom of your springform pan with a circle of parchment paper.
Conclusion
The Perfect Keto No-Bake Cheesecake is a testament to the fact that a low-carb diet can be sustainable and delicious. By focusing on high-quality fats and the right sweetening agents, you can create a dessert that satisfies the most intense sugar cravings without compromising your health goals. It is elegant, simple, and undeniably creamy—making it the perfect addition to your keto recipe rotation.
Frequently Asked Questions
Q: Can I use coconut flour instead of almond flour?
A: It is not a 1:1 swap. Coconut flour is much more absorbent. If you must use it, use only 1/3 cup and add more melted butter until the consistency is correct.
Q: Is Swerve the only sweetener I can use?
A: No, you can use Monkfruit or Allulose, provided they are in powdered form. Note that Allulose may result in a softer set.
Q: Why didn’t my cheesecake set?
A: Usually, this is because the heavy cream wasn’t whipped to stiff enough peaks or the cream cheese was too warm/liquid. Ensure it chills for the full 6 hours.
Related posts:
 Ultra-Fudgy Keto Cheesecake Brownies: The Comprehensive Guide
 The Definitive Guide to High Protein Cheesecake Jars
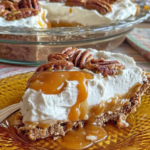 No-Bake Pecan Pie Cheesecake: Creamy, Crunchy, and Utterly Indulgent
 White German Chocolate Cake with a Cheesecake Center
 The Decadent and Delightful Strawberry Cheesecake Bars
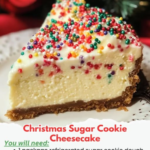 The Ultimate Holiday Fusion: Christmas Sugar Cookie Cheesecake
