This recipe involves assembling the crust, the filling, and the topping sequentially before chilling.
Step 1: Preparing the Crust
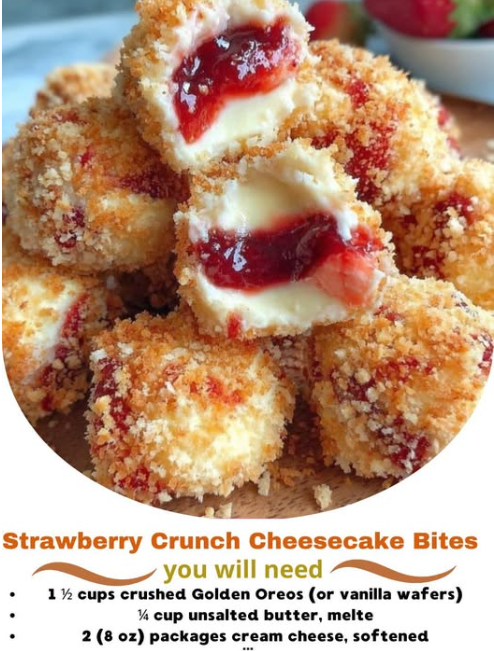
- Combine: In a medium bowl, combine the **crushed Golden Oreos** ($1\frac{1}{2}$ cups) and the **melted butter**. Mix until the crumbs are evenly moistened.
- Press: Press the crumb mixture firmly and evenly into the bottom of an 8×8-inch baking pan (lined with parchment paper for easy lift-out). Use the bottom of a glass or a measuring cup to achieve a dense, flat base.
- Chill: Place the crust in the freezer for **15 minutes** while preparing the filling. (Optional Quick-Bake: Bake the crust at $350^{\circ}\text{F}$ for 8 minutes, then cool completely.)
Step 2: Preparing the Velvety Filling
- Whip Cream Cheese: Beat the **softened cream cheese** in a large bowl with an electric mixer until completely smooth and creamy (2-3 minutes). Do not skip the softening step!
- Sweeten and Flavor: Gradually add the **powdered sugar** and beat until fully incorporated and the mixture is fluffy. Scrape down the sides of the bowl.
- Finish Filling: Add the **heavy cream** and **vanilla extract**. Beat on medium-low speed until the mixture is uniform and holds a soft, thick consistency (about 1 minute).
- Spread: Spoon the filling evenly over the chilled crust. Return the pan to the refrigerator to chill for at least **2 hours** (or freezer for 30 minutes) to allow the filling to set slightly before topping.
Step 3: Creating the Signature Crunch Topping
- Prepare Mix: In a medium bowl, combine the **$1/2$ cup crushed Golden Oreos** (for the crunch), the **crushed freeze-dried strawberries**, and the **strawberry gelatin powder**. Mix well. The gelatin powder gives the topping its brilliant color and flavor.
- Bind: Pour the **$1/4$ cup melted butter or shortening** over the dry crunch mixture. Toss with a fork until all the dry ingredients are moistened and form a coarse, clumpy mixture.
- Sprinkle: Retrieve the chilled cheesecake from the refrigerator. Evenly sprinkle the **strawberry crunch mixture** over the top of the cheesecake filling. Gently press the topping down lightly so it adheres to the filling.
- Final Chill: Return the pan to the refrigerator and chill for a minimum of **4 hours** or, ideally, overnight until fully set.
Step 4: Serving the Bites
Use the parchment paper overhang to lift the entire cheesecake slab out of the pan. Cut into small, uniform squares (Bites) using a large, sharp knife dipped in hot water and wiped clean between each slice. Serve chilled.
Serving and Storage: Presentation and Longevity
The Ideal Presentation
The cheesecake bites are stunning on their own, but can be elevated with a small, strategic garnish. Place each bite in a decorative paper cupcake liner (optional). Garnish with a small dollop of whipped cream and a sliver of fresh strawberry just before serving to emphasize the fresh fruit flavor and enhance the vibrant color contrast.
Storage and Longevity
Due to the dairy content, these cheesecake bites must be stored in the refrigerator. Place them in an **airtight container** where they will stay fresh for up to **5 days**. They also freeze beautifully: once fully set, place the bites on a baking sheet to freeze individually, then transfer them to a freezer-safe container. They can be frozen for up to **2 months**. Thaw overnight in the refrigerator before serving.
Tips: Achieving Smoothness and Crunch
Tip 1: Eliminating Filling Lumps
Lumps in the cream cheese filling are the enemy of a no-bake cheesecake. Ensure the cream cheese is truly at **room temperature** (softened for 1-2 hours) and start whipping the cream cheese on its own *before* adding any sugar or liquid. This initial step creates a perfectly smooth base.
Tip 2: Intense Strawberry Flavor
The freeze-dried strawberries are key. To crush them, place them in a Ziploc bag and gently crush them with a rolling pin or the bottom of a heavy pan. Do not use a food processor, which can turn them into a fine dust. The slightly larger flakes offer better texture and flavor release.
Tip 3: The Crunch Binding Agent
Using **shortening** instead of melted butter to bind the crunch topping (Step 3) yields a slightly crisper, more stable crunch. Shortening is pure fat, which helps repel moisture from the filling and keeps the cracker-strawberry mix from softening over time, maintaining that iconic crunch.
Variations: Flavor Twists on the Crunch Bite
1. Lemon Crunch Cheesecake Bites
Replace the strawberry gelatin with **lemon gelatin powder**. Substitute the freeze-dried strawberries with **$1/4$ cup of lemon zest** (mixed with $1/4$ cup of the crushed Golden Oreos). Add 1 tablespoon of lemon juice to the cheesecake filling for a bright, tart contrast.
2. Chocolate Crunch Cheesecake Bites
Substitute the Golden Oreos in the crust and crunch with **regular chocolate Oreos**. Replace the strawberry gelatin and freeze-dried strawberries with $1/4$ cup of **cocoa powder** and $1/2$ cup of **mini chocolate chips**. The result is a rich, fudgy, and crunchy dessert.
3. Raspberry and White Chocolate Swirl
Reduce the powdered sugar in the filling by $1/4$ cup. Melt $1/2$ cup of **white chocolate chips** and fold into the filling. For the crunch, use **freeze-dried raspberries** and raspberry gelatin powder for a beautiful pink/purple hue and a slightly tart flavor.
Advanced Tips: Scaling and Presentation
Tip 4: Clean Cutting Technique
For bakery-quality square slices, it is essential to chill the cheesecake overnight. When slicing, use a **large chef’s knife**. Dip the knife in a tall glass of very hot water, wipe the blade completely dry with a paper towel, and make one clean cut. Repeat this hot-water-and-wipe process for every single slice to prevent the creamy filling and wet crunch from sticking and tearing the sides.
Tip 5: Making the Bites in Muffin Tins
For guaranteed individual portions, press the crust into the bottoms of a **cupcake or muffin tin** lined with paper liners. Fill each cup with the cheesecake mixture and top with the crunch. This ensures every piece is perfectly portioned and requires no cutting, making them truly “Bites.”
Tip 6: Creating a Strawberry Layer
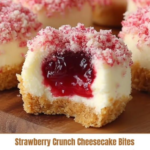
For an added layer of flavor, spoon **1 tablespoon of thick strawberry jam or preserve** onto the crust before adding the cheesecake filling. This provides a soft, fruity buffer between the crunchy base and the creamy center, mimicking the true texture of a shortcake.
Conclusion: A Flawless Fusion Dessert
The Strawberry Crunch Cheesecake Bite is a triumphant fusion of nostalgic flavor and elegant presentation. It delivers the luxurious richness of cheesecake without the temperamental baking process. Success is assured by focusing on a few simple steps: thoroughly softening the cream cheese, chilling the crust and filling at critical stages, and using freeze-dried strawberries to achieve that characteristic vibrant color and intense flavor.
This recipe is perfect for any occasion, offering a delightful combination of textures—the buttery crust, the smooth creaminess of the filling, and the unmistakable crunch of the topping. It is a showstopper that is as easy to make as it is delicious to eat.
Frequently Asked Questions: Troubleshooting and Customization
Q: My crunch topping became soft overnight. Why?
A: The topping absorbed moisture from the air or the cheesecake filling. Ensure the topping is bound well with butter or shortening (Tip 3). The most effective solution is to **add the crunch topping only 1-2 hours before serving**. The long overnight chill sets the filling, but the topping maintains its crunch best when added near the end.
Q: Can I use fresh strawberries instead of freeze-dried?
A: No. Fresh or frozen strawberries contain too much moisture, which would instantly dissolve the crushed cookies and gelatin, turning the “crunch” into a soggy, wet paste. Freeze-dried strawberries are essential because they are dry and intensely flavorful.
Q: What is the best way to crush the Golden Oreos?
A: A **food processor** is the fastest and best method for both the crust and the crunch topping, yielding a fine, consistent crumb. If you don’t have one, place the cookies in a heavy-duty freezer bag and crush them with a rolling pin.
Q: Can I use light cream cheese?
A: While you can, it is not recommended. Full-fat cream cheese provides the necessary stability for the no-bake setting process. Light cream cheese contains more water, which can result in a softer, looser filling that may not set up as firmly as desired.