Phase 1: The Foundation (The Crust)
Bake your deep-dish pie crust according to the specific package instructions. To ensure a professional finish, use pie weights or dock the dough with a fork to prevent bubbling. Critical Tip: The crust must be completely cold before assembly. A warm crust will compromise the aeration of the chocolate mousse.
Phase 2: The Aeration (The Whipped Cream)
Using a chilled metal bowl and an electric mixer, whip the 3 cups of heavy cream with 1/3 cup powdered sugar on high speed. Continue until stiff peaks form—usually around the 5-minute mark. Chill this immediately. This volume is your secret weapon: reserve 3 cups for the filling and the remainder for the decorative topping.
Phase 3: The Emulsion (The Filling)
In a large bowl, beat the softened cream cheese with the cocoa powder and powdered sugar until the mixture is uniform and creamy. In a separate microwave-safe bowl, melt the chocolate chips and butter together in 30-second bursts, stirring until glossy. Fold the melted chocolate into the cream cheese base, then gently incorporate the 3 cups of reserved whipped cream. Fold carefully to keep the “dangerous deliciousness” light and airy.
Phase 4: The Set
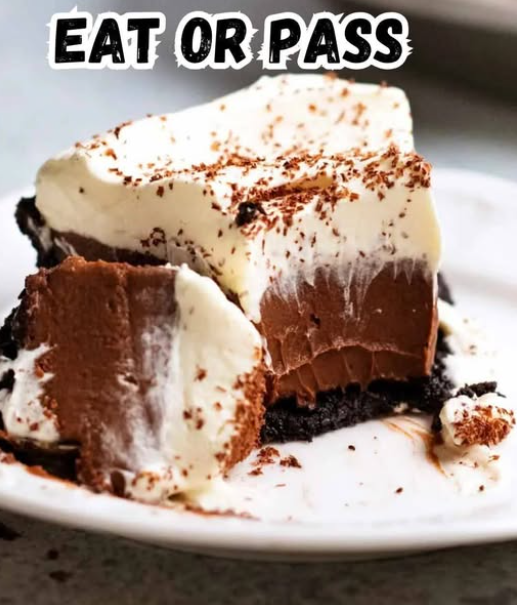
Spread the chocolate filling into the cooled crust, smoothing the top with an offset spatula. Place the pie in the refrigerator for a minimum of 4 hours. This allows the fats to re-solidify into a reliable, sliceable texture.
Serving and Storage: Protecting the Empress
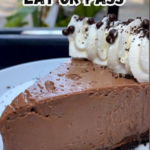
This dessert is designed to be a reliable make-ahead hero. Before serving, pile the remaining whipped cream on top and garnish with dark chocolate shavings or elegant curls.
| Storage Method | Shelf Life | Best Practice |
|---|---|---|
| Refrigerator | Up to 4 Days | Keep covered to prevent absorbing odors. |
| Freezer | Not Recommended | Freezing can break the emulsion of the cream cheese. |
Tips: The Pastry Chef’s Secrets
- Temperature Synergy: If your cream cheese is even slightly cold, you will end up with tiny white lumps. Ensure it is truly buttery-soft before mixing.
- The Salt Secret: Adding a tiny pinch of fine sea salt to the chocolate filling will actually make the chocolate taste “darker” and more intense.
- Vanilla Depth: A splash of pure vanilla extract added to the whipped cream provides a floral aroma that complements the cocoa perfectly.
Variations: Customizing the Fantasy
While the classic buttery crust is a reliable legend, you can pivot the profile easily:
- The Midnight Variation: Use a pre-baked Oreo or Chocolate Cookie crust for an all-black aesthetic and extra crunch.
- The Mocha Twist: Add 1 teaspoon of espresso powder to the melted chocolate to deepen the flavor profile.
- The Peanut Butter Bottom: Spread a thin layer of sweetened peanut butter on the crust before adding the chocolate filling.
Tips for Success and Efficiency
Speed vs. Quality: If you are in a time crunch, a pre-baked graham cracker crust is a “no-fail” alternative that adds a honeyed note to the dessert. While we always recommend fresh whipped cream for the gold standard of flavor, high-quality store-bought topping can be used in a pinch—just ensure you use two 8-oz tubs to maintain the proper volume.
Conclusion: A Worthy Indulgence
The Velvet Empress Chocolate Cream Pie is more than just a recipe; it is a reliable commitment to quality. By choosing real, rich ingredients over shortcuts, you produce a dessert with a restaurant-quality flavor that is effortlessly made at home. Whether you are serving this at a holiday gathering or as a midweek luxury, it remains a “dangerous delicious” favorite that guests will request for years to come. Enjoy your journey into chocolate-lover’s bliss!
Frequently Asked Questions:
Q: Can I make this pie a day in advance?
A: Yes! In fact, it is recommended. An overnight chill allows the flavors to marry and the texture to become even more stable.
Q: Why did my whipped cream collapse?
A: Usually, this is because the cream was not cold enough or the bowl was warm. Always start with chilled equipment for the best results.
Q: How do I get those perfect chocolate curls?
A: Use a vegetable peeler on a room-temperature chocolate bar. If the chocolate is too cold, it will splinter; if it is just right, it will curl into beautiful ribbons.