1. The Hydration Phase
In a large mixing bowl, combine the warm water and the melted butter. The fat in the butter helps to coat the flour proteins, which will eventually lead to a softer bite.
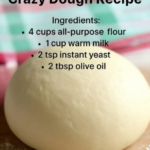
2. Incorporating the Dry Components
Gradually add the 420 grams of flour and the salt to the liquid. Stir until a shaggy dough begins to form. If the dough feels excessively sticky, add the additional tablespoon of flour.
3. The Cheese Infusion
Fold in the 100 grams of grated cheddar. Do not over-mix at this stage; you want pockets of cheese distributed throughout the dough rather than a uniform orange mass. These pockets will create “flavor craters” as the bread bakes.
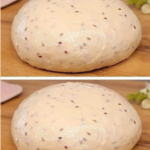
4. The Kneading Ritual
Turn the dough onto a lightly floured surface. Knead for about 5–8 minutes. You are looking for a smooth, elastic texture. If you are using yeast, let the dough rise in a warm spot for 60 minutes. If this is a quick-bread variation, proceed directly to the pan.
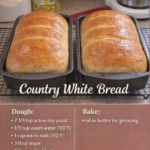
5. Shaping and Baking
Place the dough into a greased loaf pan or shape it into a rustic round on a baking sheet. For an extra-crispy finish, sprinkle a little extra cheese on the very top. Bake in a preheated oven at 190°C (375°F) for approximately 30–35 minutes until the loaf sounds hollow when tapped on the bottom.
Serving and Storage: Breakfast and Beyond
Serving: This bread is at its peak about 15 minutes after leaving the oven. Slice it thick and serve with a smear of salted butter or alongside soft-scrambled eggs.
Storage: Because of the high cheese and butter content, this bread stays moist longer than traditional white bread.
| Storage Type | Duration | Best Use |
|---|---|---|
| Room Temp | 2 Days | Fresh Slices |
| Refrigerator | 5 Days | Toasted with Jam |
| Freezer | 1 Month | French Toast Base |
Tips: The Wisdom of 20 Years
- Grate Your Own Cheese: Pre-shredded cheese is coated in potato starch to prevent clumping, which can interfere with how the cheese melts into the dough. Grating your own ensures a smoother texture.
- Water Temperature: Use a thermometer if possible. Water that is too hot will “scald” the flour and kill yeast; water that is too cold won’t incorporate the melted butter properly.
- The Steam Trick: Place a small pan of water on the bottom rack of the oven during the first 10 minutes of baking. The steam helps the bread expand fully before the crust sets.
Variations: Evolving the Classic
While the original is perfection, these tweaks can match different moods:
- The Garlic Herb: Add 1 tsp of garlic powder and 1 tbsp of fresh parsley to the dry ingredients.
- The Spicy Kick: Mix in a small tin of drained, chopped jalapeños along with the cheddar.
- The Morning Sweet & Salty: Add a tablespoon of honey to the water and use a mild white cheddar.
Tips: Troubleshooting Your Loaf
“My bread is too dense”: This usually means the flour was packed too tightly into the measuring cup. Use a scale for the 420 grams to ensure accuracy.
“The cheese all sank to the bottom”: Ensure your cheese is tossed in a little bit of flour before adding it to the dough. This helps it “grip” the dough structure.
Conclusion: A Taste of Consistency
The reason this Cheese Bread has never failed in two decades is its reliance on honest, simple ingredients and a proven method. It is a “mouthwatering” reminder that the best things in life don’t need to be complicated; they just need to be made with care and shared with those we love. Thank you for being part of this culinary journey—it is the passion of fellow bakers that keeps these recipes alive.
Frequently Asked Questions:
Q: Can I use different types of cheese?
A: Absolutely. Mozzarella makes it stretchier, while Pepper Jack adds heat. However, sharp Cheddar remains the gold standard for flavor.
Q: Is this bread suitable for sandwiches?
A: Yes! It makes an incredible grilled cheese sandwich, as the cheese in the bread toasts up alongside the filling.
Q: Can I make this in a bread machine?
A: Yes, use the “Basic” or “White Bread” setting and add the cheese when the “mix-in” beep sounds.