ADVERTISEMENT
Phase 1: Preparation and Mixing
- **Prep:** Preheat your oven to $350^\circ\text{F}$ ($175^\circ\text{C}$). Grease and flour a $9\times 5\text{-inch}$ loaf pan, or line it with parchment paper.
- **Mix Dry Ingredients:** In a large bowl, whisk together the **all-purpose flour, sugar, baking powder, baking soda, and salt**. Create a well in the center.
- **Mix Wet Ingredients (EMULSIFICATION):** In a separate bowl, whisk together the **sour cream, eggs, oil, vanilla extract, and $2\text{ tablespoons}$ of reserved pineapple juice** until well combined.
- **Combine:** Pour the wet ingredients into the well in the dry ingredients. Stir with a spatula only until the dry ingredients are mostly moistened.
- **Fold in Fruit (GENTLE MIXING PROTOCOL):** Gently **fold in the drained crushed pineapple**. Mix until the batter is *just* combined—a few lumps are okay. Do not mix for more than $10\text{ seconds}$ after adding the pineapple.
Phase 2: Baking and Cooling
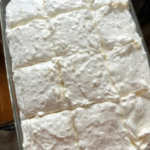
- **Bake:** Pour the batter into the prepared loaf pan and bake for **$50\text{–}60\text{ minutes}$**.
- **Test Doneness:** The bread is done when a wooden skewer or toothpick inserted into the center comes out clean.
- **Cool:** Let the bread cool in the pan for $10\text{ minutes}$ before carefully transferring it to a wire rack to cool completely before slicing.
Serving and Storage: Post-Bake Maintenance
Optimal handling for maximizing moisture and freshness:
- **Serving:** Slice with a serrated knife once fully cooled. Serving warm will make it crumble.
- **Storage:** Store in an airtight container at **room temperature for $3\text{–}4\text{ days}$**. The high moisture content keeps it fresh longer than typical dry breads.
- **Freezing:** Slice the cooled loaf and wrap individual slices tightly in plastic wrap, then aluminum foil. Freeze for up to **3 months**. Thaw slices at room temperature as needed.
Tips: Essential Techniques for Tenderness
Measuring Flour: Use the **spoon-and-level method** (Instruction 2): spoon the flour into the measuring cup and level off the top with a straight edge. Scooping directly can compact the flour, adding too much and resulting in a dry, dense loaf.
Draining the Pineapple: The **crushed pineapple** (Ingredient II) must be well-drained. Squeeze out excess liquid by pressing it against a sieve or using cheesecloth. Too much liquid will make the bread overly wet and dense (Moisture Mandate).
Room Temperature Eggs: Use **room temperature eggs** (Instruction 3). They emulsify more easily with the fats and sugars, leading to a smoother batter and a more uniform, tender crumb structure.
Pan Preparation: Properly **greasing and flouring the pan** (Instruction 1) is essential for easy removal and uniform baking. The flour coating helps the bread climb the pan’s sides as it rises.
Crumb Topping: Before baking, sprinkle the top of the batter with a mix of $2\text{ tablespoons}$ of **sugar** and $\frac{1}{2}\text{ teaspoon}$ of **cinnamon**. This provides a subtle crunch and appealing texture to the crust.
Variations: Customizing Flavor and Texture
Easily adapt the flavor and visual profile of the bread:
- **Coconut Crunch:** Add $\frac{1}{2}\text{ cup}$ of **toasted coconut flakes** with the pineapple (Instruction 5) for extra texture and tropical flavor.
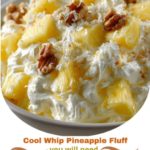
- **Nutty Addition:** Fold in $\frac{1}{2}\text{ cup}$ of **chopped walnuts or pecans** with the fruit.
- **Spice Blend:** Add $\frac{1}{2}\text{ teaspoon}$ of **nutmeg** and $\frac{1}{4}\text{ teaspoon}$ of **ground ginger** to the dry ingredients (Instruction 2) for a warmer flavor profile.
- **Glaze Finish:** For a simple finish, whisk $1\text{ cup}$ of **powdered sugar** with $2\text{ tablespoons}$ of **reserved pineapple juice** and drizzle over the cooled loaf.
**Testing Oven Temperature:** Oven temperature inaccuracies are a common cause of failure. Use an **oven thermometer** to ensure your oven is truly preheated to $350^\circ\text{F}$ (Temperature Principle).
**Leavener Freshness:** Ensure the **baking soda and baking powder** (Ingredient I) are fresh. Test baking soda by adding a pinch to vinegar (it should fizz vigorously) or baking powder by adding a pinch to hot water.
**Slowing Down Browning:** If the top of the bread begins to brown too quickly (Instruction 6), lightly tent the loaf pan with aluminum foil for the remainder of the baking time.
**High Altitude Adjustment:** For high altitude baking, reduce the **sugar** by $1\text{–}2\text{ tablespoons}$ and slightly increase the **liquid** (reserved pineapple juice) to prevent the batter from becoming too dry and sinking.
Conclusion: A Moist, Tender Loaf
The **Pineapple Quick Bread** is a satisfying technical bake achieved through careful attention to ingredient ratios and mixing technique. By adhering to **The Moisture and Acidity Mandate** to ensure proper lift and strictly following **The Gentle Mixing Protocol** to avoid gluten development, you are guaranteed a tender, moist, and flavorful loaf every time.
Frequently Asked Questions (FAQ)
Q: Why did my quick bread sink in the middle?
A: The most common causes are **undercooking** (not enough heat reached the center) or **overmixing** (which weakened the gluten structure and could not support the rise).
Q: Why is my loaf tough and full of tunnels?
A: This is the definitive sign of **overmixing** (Gentle Mixing Protocol, Instruction 5). The gluten was overdeveloped, causing the crumb to be chewy and form large air pockets (tunnels).
Q: Can I substitute plain yogurt for sour cream?
A: **Yes**, plain, full-fat Greek yogurt is an acceptable substitute, as it provides similar acidity and fat content (Moisture Mandate).
Q: My bread is done on the outside but raw in the center. Why?
A: Your oven temperature may be running too high (Temperature Principle), setting the crust quickly while leaving the interior raw. Use an oven thermometer to verify the temperature and reduce it by $25^\circ\text{F}$ if necessary.
ADVERTISEMENT