The success of this recipe relies on using the right type and quality of binder (marshmallows and caramel) and ensuring the crunch components are properly prepared.
| Component | Quantity | Role and Preparation Note |
|---|---|---|
| **The Base** | ||
| **Graham Crackers** | $6 \frac{1}{2}$ sheets (approx. $1 \frac{1}{2}$ cups crushed) | Provides the stable, slightly spiced base. Crush finely in a food processor or Ziploc bag. |
| **Melted Unsalted Butter** | $\frac{1}{4}$ cup (57g) | The binding agent for the Graham cracker crust. |
| **The Crunch Filling** | ||
| **Mini Marshmallows** | 2 cups | Chewiness and volume; provides stretch and stability to the caramel. |
| **Caramel Bits** | 1 (11 oz) bag | Primary flavor and binder. Add 2 tbsp milk/cream to prevent scorching. |
| **Milk or Cream** | 2 tablespoons | Aids in melting and creates a smooth caramel sauce. |
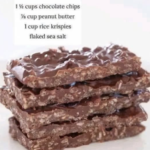
| **Crushed Butterfinger** | $1 \frac{1}{2}$ cups (approx. 4 standard bars) | The signature peanut butter crunch and salty flavor. Crush roughly. |
| **The Topping (Optional)** | ||
| **Milk Chocolate Chips** | 1 cup | For the smooth, setting chocolate layer. |
| **Peanut Butter** | 1 tablespoon (optional) | Used with the chocolate for a softer texture and added peanut flavor. |
Instructions: Mix, Press, and Chill
- **Prep the Pan and Crusher:** Line an $\mathbf{8 \times 8 \text{-inch baking pan}}$ with parchment paper, leaving an overhang on all sides for easy removal. Crush the $\mathbf{6 \frac{1}{2} \text{ sheets of Graham crackers}}$ into a fine crumb. Roughly crush the $\mathbf{4 \text{ Butterfinger bars}}$ and set aside.
- **Form the Crust:** In a medium bowl, combine the **Graham cracker crumbs** and $\mathbf{\frac{1}{4} \text{ cup of melted butter}}$. Mix until the crumbs are evenly moistened. Press the mixture firmly and evenly into the bottom of the prepared pan. Set aside.
- **Melt the Caramel:** In a large saucepan, combine the **caramel bits** and $\mathbf{2 \text{ tablespoons of milk or cream}}$. Heat over **low heat**, stirring continuously. Once the caramel is about two-thirds melted, add the **mini marshmallows**. Continue stirring until the mixture is completely smooth and gooey. **Do not boil.**
- **Mix the Crunch:** Remove the saucepan from the heat. Quickly stir in the **crushed Butterfinger pieces** and $\mathbf{\frac{1}{2} \text{ cup of the remaining Graham cracker crumbs}}$ (this is optional but adds flavor and texture). Mix only until everything is coated.
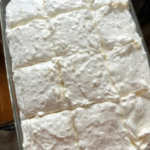
- **Press the Filling:** Immediately pour the hot, gooey caramel-marshmallow mixture over the prepared Graham cracker crust. Use an offset spatula or the back of a spoon (lightly oiled or dampened with water to prevent sticking) to gently spread and press the filling evenly over the crust.
- **Add the Chocolate Topping (Optional):** In a microwave-safe bowl, combine the $\mathbf{1 \text{ cup of milk chocolate chips}}$ and $\mathbf{1 \text{ tablespoon of peanut butter (if using)}}$. Microwave in 30-second intervals, stirring between each, until completely smooth and melted. Drizzle or spread the melted chocolate over the caramel layer.
- **Chill and Set:** Place the pan in the refrigerator and chill for at least **2 hours**, or until the bars are completely set and firm.
- **Slice and Serve:** Use the parchment overhang to lift the entire bar out of the pan. Place on a cutting board and slice into $\mathbf{16 \text{ or } 20 \text{ squares}}$. Serve at room temperature or slightly chilled.
Serving and Storage: Maximizing Freshness and Chewiness
The Ideal Serve
The texture of these bars is best when they are served at a cool, slightly firm temperature, ensuring the crunch of the Butterfinger remains distinct from the chew of the caramel.
- **Presentation:** For an attractive finish, sprinkle a small pinch of **flaky sea salt** or a few remaining crushed Butterfinger crumbs over the melted chocolate topping right after spreading it (Step 6), before it sets.
- **Slicing Tip:** If the bars are too cold, they can crack when sliced. If they are too warm, they will be sticky. Slicing when they are firm but not rock-hard is ideal. Use a large, sharp knife and wipe the blade clean between cuts for the neatest edges.
- **Pairing:** Serve alongside cold milk, which complements the peanut butter and chocolate flavors beautifully, or with black coffee to balance the sweetness.
Storage and Longevity
Since these bars are butter and sugar-based, they have excellent stability and shelf life, making them perfect for gifting or batch baking.
- **Room Temperature:** Store in an airtight container at room temperature for up to **4 days**. If the environment is very warm, the chocolate topping may soften.
- **Refrigeration (Recommended):** Store in an airtight container in the refrigerator for up to **1 week**. Refrigeration keeps the bars firm and maintains the distinct crunch of the Butterfinger pieces.
- **Freezing:** Slice the bars, wrap them tightly in plastic wrap, and place them in a freezer-safe container. Freeze for up to **3 months**. Thaw overnight in the refrigerator or for a couple of hours at room temperature before serving.
Tips: Achieving the Perfect Gooey Crunch
Tip: The Marshmallow and Caramel Ratio
The combination of $\mathbf{2 \text{ cups of marshmallows}}$ to $\mathbf{1 \text{ bag of caramel bits}}$ is the perfect ratio for chewiness and stability. Marshmallows ensure the caramel doesn’t become brittle once cooled, providing the signature soft, chewy bite.
Technique Enhancements
- **Crushing the Candy:** Place the Butterfinger bars in a heavy-duty Ziploc bag and gently hit them with a rolling pin or the flat side of a meat tenderizer. Aim for a mix of fine crumbs and small, recognizable chunks for maximum textural contrast.
- **Preventing Caramel Scorching:** Always melt the caramel and marshmallows over **very low heat** and add the $\mathbf{2 \text{ tablespoons of milk or cream}}$ from the start. High heat will cause the sugars to burn and lead to a bitter flavor and grainy texture.
- **Even Pressing:** When pressing the caramel filling over the crust (Step 5), avoid applying too much pressure, which can squeeze the caramel into the crust and make the base dense and hard. Use gentle, even pressure to ensure a uniform layer.
- **Substitute for Caramel Bits:** If using unwrapped caramels, ensure they are soft and fresh. Use $\mathbf{1 \frac{1}{4} \text{ cups of unwrapped caramels}}$ and proceed with the recipe as written.
Variations: Customizing the Crunch Bar
Candy and Crunch Swaps
The crunchy element can be easily substituted, allowing for endless flavor combinations based on other popular candy bars or ingredients.
- **Peanut Butter Cup Crunch:** Substitute the Butterfinger with **crushed Reese’s Peanut Butter Cups** and omit the optional peanut butter in the topping.
- **Pretzel Crunch:** Replace the Butterfinger with **$\mathbf{1 \frac{1}{2} \text{ cups of roughly crushed mini pretzels}}$** for an intense sweet and salty flavor that is less peanut-forward.
- **Chocolate Chip Base:** Replace the $\mathbf{6 \frac{1}{2} \text{ sheets of Graham crackers}}$ with $\mathbf{1 \frac{1}{2} \text{ cups of crushed shortbread cookies}}$ or $\mathbf{1 \frac{1}{2} \text{ cups of finely crushed chocolate wafer cookies}}$ for a change in the crust’s flavor profile.
Filling and Topping Adjustments
- **Dark Chocolate Topping:** Use **dark chocolate chips** (60–70% cocoa) instead of milk chocolate for the topping. This cuts the overall sweetness and provides a deeper, richer finish.
- **Salted Toffee Caramel:** Mix $\mathbf{\frac{1}{4} \text{ cup of finely crushed toffee bits}}$ into the caramel mixture along with the Butterfinger pieces for an extra layer of crunch and burnt sugar flavor.
- **White Chocolate Drizzle:** Instead of a full chocolate coating, melt **white chocolate chips** and drizzle them over the top of the set milk chocolate layer for a decorative, contrasting finish.
Tips: Advanced Troubleshooting
Tip: The Role of the Parchment Overhang
The parchment overhang is critical in no-bake bars, especially those with sticky fillings like caramel. If you skip this, the set caramel will be nearly impossible to remove cleanly, resulting in ragged edges. The overhang acts as a sling for easy removal.
Common Issues and Remedies
- **Filling is Too Hard:** If the caramel mixture sets too quickly before you can spread it (Step 5), gently place the saucepan back over **very low heat** for 30 seconds, stirring until it loosens slightly. Work quickly once it’s spreadable.
- **Crust is Too Crumbly:** If the Graham crust doesn’t hold its shape, the crumbs were likely too coarse, or there wasn’t enough melted butter. Next time, ensure the crumbs are fine and add an extra $\mathbf{1 \text{ teaspoon of melted butter}}$ to bind.
- **Chocolate Layer Cracks:** Cracking usually happens when the bars are cut too cold. If the chocolate cracks when sliced, let the bars sit at room temperature for $\mathbf{10 \text{ minutes}}$ to allow the chocolate to warm and become slightly pliable before cutting.
- **Grainy Caramel:** This indicates the caramel was melted too quickly or too hot, causing the sugars to crystallize. To fix, remove from heat and stir in $\mathbf{1 \text{ teaspoon of milk or cream}}$ vigorously until the crystals dissolve.
Conclusion: A Decadent, Effortless Favorite
The **No-Bake Butterfinger Caramel Crunch Bar** is a perfect example of a high-impact, low-effort dessert. Its success is rooted in the careful layering of textures: the solid Graham cracker base, the chewy marshmallow-caramel filling, and the explosive crunch of the Butterfinger pieces. The straightforward, no-bake preparation makes this recipe universally appealing, delivering a familiar and deeply satisfying combination of sweet, salty, and peanut-buttery flavors. By adhering to the precise melting techniques and allowing ample chilling time, these bars become a reliable, decadent favorite for any occasion.
Frequently Asked Questions:
Q: Can I use a glass baking dish instead of metal?
A: Yes, but glass retains heat differently. If you were baking, it would matter more, but for a no-bake recipe, a $\mathbf{8 \times 8 \text{-inch or } 9 \times 9 \text{-inch glass dish}}$ works fine. Just ensure you still use the parchment overhang for easy removal.
Q: Can I use regular marshmallows instead of mini marshmallows?
A: Yes, but you will need to cut them down. Chop or snip the regular marshmallows into smaller pieces to ensure they melt quickly and evenly with the caramel. The volume remains the same: $\mathbf{2 \text{ cups}}$ of marshmallow material.
Q: How do I get the Butterfinger pieces to stay crunchy?
A: The **chilling time** (Step 7) is key. The caramel filling needs to set and firm up around the Butterfinger pieces. If the bars are served warm or at room temperature in a hot climate, the caramel may soften and slightly diminish the “crunch.” Refrigeration is the best way to maintain crispness.
Q: My caramel looks grainy. What’s the fix?
A: This is due to crystallization (scorch or high heat). Remove the pot from the heat immediately. Stir in a small amount of **cold liquid** ($\mathbf{1 \text{ teaspoon of milk or cream}}$) until the grains dissolve and the mixture returns to a smooth consistency. Remember to use very low heat next time.