
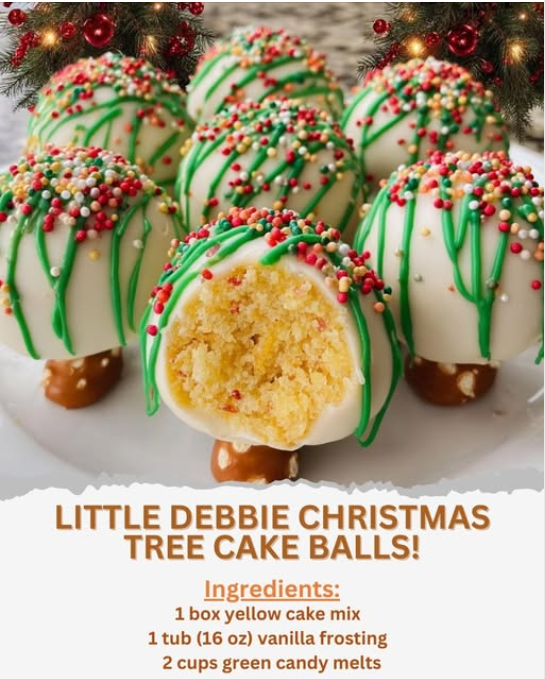
Confectionery Cohesion: The Science of Little Debbie Cake Balls 🌲🍭
The creation of **Little Debbie Christmas Tree Cake Balls** is a two-part lesson in food physics: first, **cohesion through a high-fat matrix**, and second, **stabilization through a fast-setting compound coating**. The process begins by purposefully destroying the cake’s delicate crumb (Step 4) and then rebuilding it into a dense, non-porous structure using the $\mathbf{16 \text{ oz tub of vanilla frosting}}$.
The frosting acts as the primary **binder and plasticizer** due to its high fat and sugar content. The fat molecules coat the starch and protein fragments of the crumbled cake, creating a thick, moldable mass—a **fat-based colloid**—that holds the cone shape (Step 6). The $\mathbf{1 \text{ hour chilling time}}$ (Step 7) is essential; it solidifies the fat in the frosting and cake, giving the structure the necessary internal rigidity to withstand the heat and mechanical stress of dipping. The final coat, the $\mathbf{2 \text{ cups of green candy melts}}$, is a **compound coating** made primarily of vegetable oil (like palm kernel oil) and sugar. Unlike real chocolate, compound coatings do not require tempering and set rapidly at room temperature, forming a hard, protective, and moisture-sealing shell (Step 12).
Phase I: Structural Breakdown and Re-Cohesion
The first steps involve converting an airy baked structure into a dense, malleable dough.
From Crumb to Dough
- **Crumbing (Step 4):** The baked cake has a structure composed of air pockets held rigid by coagulated egg protein and gelatinized starch. Crushing the cake destroys this $\mathbf{\text{air-pocket structure}}$, resulting in a very high-density powder of starch and protein.
- **Binding (Step 5):** The $\mathbf{16 \text{ oz of vanilla frosting}}$ (a mixture of sugar, water, and saturated fats) is added to the crumbs. The fat and sugar molecules fill the tiny spaces between the cake fragments. This creates a dense, $\mathbf{\text{low-moisture, high-fat dough}}$ where fat acts as the continuous phase, locking the particles together.
The Importance of Chilling
The $\mathbf{1 \text{ hour chill}}$ (Step 7) is a crucial step in the physics of the cake ball. The chilling process brings the internal temperature of the cake ball down, causing the saturated fat in the frosting to **crystallize and harden**. This solidifies the binder, giving the cone shape $\mathbf{\text{enough internal shear strength}}$ to prevent slumping or falling apart when dipped into the warm liquid candy coating (Tip 2).
Phase II: Compound Coating and Thermal Shock
The dipping process is successful due to the chemical properties of the coating and temperature contrast.
The Candy Melt Advantage
The $\mathbf{2 \text{ cups of green candy melts}}$ are not true chocolate; they are a **compound coating** or **confectionery coating**.
* **No Tempering:** They use a high proportion of $\mathbf{\text{non-polymorphic vegetable fats}}$ (like palm kernel oil). These fats solidify easily at room temperature without the complex temperature cycling (**tempering**) required for cocoa butter.
* **Rapid Set:** This allows the coating to harden in minutes (Step 12), creating a fast, glossy, and durable outer shell that seals the moisture inside the cake ball.
Managing Thermal Shock
When the cold cake ball (from the fridge) is dipped into the warm $\mathbf{\text{melted candy}}$ (Step 10), a $\mathbf{\text{thermal shock}}$ occurs. The warmth of the coating rapidly melts the surface of the fat binder on the cake ball. Simultaneously, the coating itself begins to set instantly upon contact with the cold surface.
* **The Pretzel Stick (Step 9):** Inserting the pretzel stick for the ‘trunk’ is a structural necessity, providing a $\mathbf{\text{handle and a stable axis}}$ to hold the cake ball against the resistance and heat of the viscous melted coating (Tip 1).
