The success of the recipe depends entirely on the quality and temperature of the cream, and the selection of the correct pudding type.
| Component | Quantity | Functional Role and Technical Insight |
|---|---|---|
| **The Base (Temperature Critical)** | ||
| **Heavy Whipping Cream** | $1 \frac{1}{2}$ cups | **Foam Formation:** Must contain high fat content ($\mathbf{>35\%}$); **must be ice cold** ($\mathbf{35^{\circ}\text{F}}$ to $\mathbf{40^{\circ}\text{F}}$) for fat structure. |
| **Stabilization and Sweetness** | ||
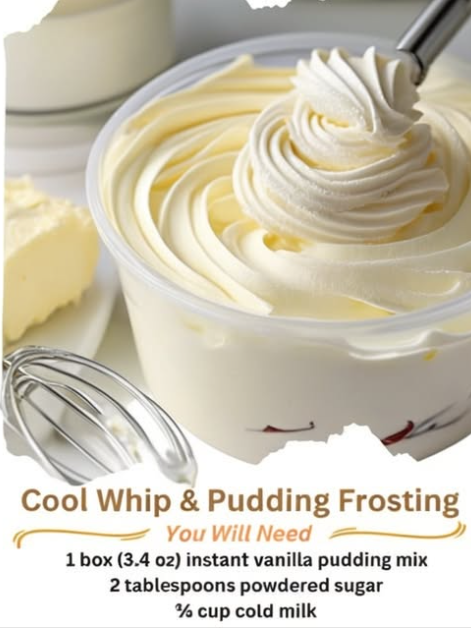
| **Instant Pudding Mix** | 1 package (3.4 oz) | **Hydrophilic Stabilizer:** Contains starches and gums that rapidly absorb free moisture and prevent weeping. **Cook-and-serve will not work.** |
| **Powdered Sugar** | $\frac{1}{2}$ cup | **Sweetener and Tenderizer:** Dissolves immediately; cornstarch content also aids slight stability. |
Instructions: The Cold Whipping Protocol
The instructions prioritize maintaining a cold environment and ensuring proper ingredient incorporation.
- **Chill Equipment (Maximizing Cold):** Place the $\mathbf{\text{mixing bowl and whisk attachments}}$ (or beaters) in the freezer for $\mathbf{10 \text{ minutes}}$. This step maximizes the foam structure by keeping the cream colder for longer.
- **Whip Cream:** Pour the $\mathbf{1 \frac{1}{2} \text{ cups of ice-cold heavy whipping cream}}$ into the chilled bowl. Begin whipping on medium-low speed, gradually increasing to high speed. Whip until the cream reaches $\mathbf{\text{soft peaks}}$ (the peaks fold over slightly).
- **Add Stabilizers:** Reduce the speed to low. Gradually sprinkle in the $\mathbf{1 \text{ package of instant pudding mix}}$, $\mathbf{\frac{1}{2} \text{ cup of powdered sugar}}$, and $\mathbf{1 \text{ tsp of vanilla extract}}$.
- **Whip to Stiff Peaks:** Increase the speed to medium-high. Continue whipping for $\mathbf{1 \text{ to } 2 \text{ minutes}}$, or until the frosting reaches **stiff peaks** (the peaks stand straight up when the whisk is lifted). Do not over-whip past stiff peaks, or the frosting will turn into butter.
- **Chill and Set (Final Stabilization):** Transfer the frosting to an airtight container and $\mathbf{\text{chill for at least } 30 \text{ minutes}}$. This chill time allows the stabilizers in the pudding mix to fully hydrate and set the structure, making the frosting easier to pipe and spread.
Serving and Storage: The Refrigerated Shelf Life
Optimal Serving and Application
The frosting is ready to use immediately after the final chill and is ideal for light, delicate bakes.
- **Usage:** This recipe yields enough frosting for about $\mathbf{12 \text{ to } 18 \text{ cupcakes}}$ or a standard $\mathbf{9 \times 13 \text{-inch sheet cake}$.
- **Piping:** Because of its stabilized structure, this frosting pipes beautifully using a variety of tips. Ensure the surface of the cake/cupcake is $\mathbf{\text{fully cooled}}$ before applying to prevent the cream from melting.
- **Temperature Tolerance:** While far more stable than pure whipped cream, this frosting is still $\mathbf{\text{dairy-based}}$ and should not be left at room temperature for more than $\mathbf{2 \text{ hours}}$.
Storage and Longevity
The pudding mix significantly extends the life of the whipped cream, but refrigeration is mandatory.
- **Refrigeration:** Store in an $\mathbf{\text{airtight container}}$ in the refrigerator for up to $\mathbf{5 \text{ days}}$. The structure will remain stable and the texture will be maintained.
- **Freezing:** **Not recommended.** The freezing and thawing process tends to break the foam structure, causing the liquid and fat to separate, resulting in a watery, grainy texture.
- **Pre-Whip Chill:** If the frosting seems too stiff after prolonged refrigeration, allow it to sit at room temperature for $\mathbf{10 \text{ minutes}}$ and then gently beat it with a spatula to restore its airy texture.
Tips: Achieving Maximum Volume and Stability
Tip: The Butterfat Factor
Always use **heavy whipping cream** ($\mathbf{35\% \text{ or more fat}}$) instead of “whipping cream” ($\mathbf{30\% \text{ fat}}$). The higher fat content in $\mathbf{1 \frac{1}{2} \text{ cups}}$ of heavy cream is critical for forming the strong fat globule network that stabilizes the foam and provides maximum volume.
Troubleshooting and Technique
- **Chill Everything:** For ultimate volume, ensure the $\mathbf{\text{cream, bowl, and beaters}}$ are all chilled. If the cream starts warm, it will never achieve its maximum volume or stability.
- **Scrape the Bowl:** While whipping, stop the mixer once or twice to scrape down the sides of the bowl. Cream often gets warmer on the outside edges, and scraping ensures even temperature and uniform whipping throughout the $\mathbf{1 \frac{1}{2} \text{ cups}}$.
- **Instant Mix ONLY:** Double-check that the $\mathbf{1 \text{ package of pudding}}$ is the **instant** variety. Cook-and-serve pudding contains raw starches that require boiling to activate their thickening power; they will not dissolve or stabilize the cold cream.
- **Avoid Over-Whipping:** Stop the mixer the moment the frosting reaches **stiff peaks** (Step 4). Whipping any further will cause the fat globules to completely separate, resulting in a greasy, churned mixture known as over-whipped cream, which is on its way to becoming butter.
- **Sift the Powdered Sugar:** Sift the $\mathbf{\frac{1}{2} \text{ cup of powdered sugar}}$ before adding it to prevent any small lumps from compromising the smooth texture of the final frosting.
Variations: Flavor Infusion and Texture Shifts
The stability of the pudding base allows for a wide range of flavor and color modifications.
Pudding Mix Swaps
- **Chocolate Cloud:** Use a $\mathbf{\text{chocolate instant pudding mix}}$ instead of vanilla. For an even deeper color and flavor, whisk in $\mathbf{1 \text{ tablespoon of unsweetened cocoa powder}}$ with the dry ingredients.
- **Lemon or Cheesecake:** Use $\mathbf{\text{lemon or cheesecake instant pudding mix}}$ for a tangy, bright variation. For maximum zing, add $\mathbf{\frac{1}{2} \text{ teaspoon of lemon zest}}$ with the dry ingredients.
- **Pistachio:** Use $\mathbf{\text{pistachio instant pudding mix}}$ for a pale green color and nutty flavor. Fold in $\mathbf{\frac{1}{4} \text{ cup of finely chopped toasted pistachios}}$ at the end of the mixing process.
Liquid and Extract Alterations
- **Liqueur Infusion:** Replace the $\mathbf{1 \text{ tsp of vanilla extract}}$ with $\mathbf{1 \text{ teaspoon of rum, brandy, or a favorite liqueur}}$ to add a sophisticated depth of flavor.
- **Coffee Cream:** Dissolve $\mathbf{1 \text{ teaspoon of instant espresso powder}}$ in $\mathbf{1 \text{ teaspoon of the cold heavy cream}}$ before starting the whipping process (Step 2).
- **Extract Swap:** Replace vanilla with $\mathbf{\text{almond extract}}$ or $\mathbf{\text{coconut extract}}$ for a different aromatic profile.
Tips: The Science of Stabilization
Tip: The Gelatin Boost
For even greater stability in warm weather, use a $\mathbf{\text{gelatin stabilizer}}$. Dissolve $\mathbf{1 \text{ teaspoon of plain gelatin}}$ in $\mathbf{2 \text{ tablespoons of cold water}}$ and let it bloom. Microwave for $\mathbf{10 \text{ seconds}}$ to dissolve, cool slightly, then drizzle the liquid gelatin into the cream just before adding the pudding mix (Step 3). This creates a highly temperature-resistant foam.
Advanced Stabilization Notes
- **Sugar Role:** The $\mathbf{\frac{1}{2} \text{ cup of powdered sugar}}$ is not just for taste; it also contributes to stability. Sugar is a $\mathbf{\text{hygroscopic}}$ molecule, meaning it attracts and holds onto moisture, further helping the pudding mix to bind the free water content in the cream.
- **Preventing Graininess:** Ensure the dry pudding mix is added **slowly** and on **low speed** (Step 3). If the dry mix is dumped in all at once, it can clump, resulting in pockets of grainy texture in the final frosting.
- **Don’t Substitute Milk:** Do not substitute the $\mathbf{1 \frac{1}{2} \text{ cups of heavy whipping cream}}$ with milk or half-and-half. These liquids lack the high fat content necessary to form the initial stable foam structure; the frosting will remain liquid, and the pudding mix will just form a soupy custard.
- **Humidity Factor:** In highly humid environments, even stabilized whipped cream can deflate slightly. Sticking closely to the $\mathbf{\text{30-minute chill time}}$ (Step 5) and using a $\mathbf{\text{gelatin boost}}$ (see Tip Box) can counteract environmental moisture.
Conclusion: A Decadent Lesson in Foam Engineering
The **Whipped Pudding Frosting** is a triumph of rapid dessert construction, successfully bridging the gap between the delicate texture of whipped cream and the durability of traditional frosting. The key is the meticulous control of **temperature** to establish the $\mathbf{\text{fat foam structure}}$ and the strategic use of the **instant pudding mix** as a powerful $\mathbf{\text{hydrophilic stabilizer}}$. By locking the moisture within the fat network, this recipe delivers a light, pipeable, and flavorful frosting that elevates any baked good without the excessive richness or weight of a high-butter recipe. It is the epitome of smart, efficient baking.
Frequently Asked Questions:
Q: Can I use Cook-and-Serve pudding mix?
A: **Absolutely not.** Cook-and-serve pudding contains raw starches that require boiling to activate their thickening properties. When added to cold cream, it will not dissolve or thicken, leaving a grainy texture and a liquid frosting. You **must** use the $\mathbf{\text{instant pudding mix}}$.
Q: My frosting is soupy and won’t thicken. What did I do wrong?
A: The cream was likely **not cold enough** (Step 2) or you didn’t use **heavy whipping cream** ($\mathbf{>35\% \text{ fat}}$). If the fat is not cold, it can’t form the air-trapping network. To fix it, try chilling the mixture in the freezer for $\mathbf{10 \text{ minutes}}$ and then re-whipping it on high speed. If that fails, add $\mathbf{1 \text{ teaspoon of cornstarch}}$ mixed with $\mathbf{1 \text{ Tbsp of cream}}$ and re-whip quickly.
Q: Why did my frosting turn into butter?
A: You **over-whipped** the cream (Step 4). Continuing to whip past the stiff-peak stage causes the fat globules to coalesce too tightly, squeezing out the liquid and air, resulting in a greasy, grainy texture that is essentially butter. Unfortunately, over-whipped cream cannot be reversed to a frosting; you must start over.
Q: Is this frosting suitable for a wedding cake or outdoor event?
A: It is **more stable** than plain whipped cream, but it is still a dairy-based frosting. It is suitable for events indoors or outdoors for a **very limited time** ($\mathbf{<2 \text{ hours}}$). For extended outdoor events, a traditional shortening-based or Italian meringue buttercream is recommended over this frosting.
Yield: Enough for 12-18 cupcakes or a 9×13 inch cake.
Prep Time: 10 minutes | Chill Time: 30 minutes (recommended)