Ingredient choice and preparation are strategic, supporting both the flavor profile and the final texture.
| Component | Quantity | Functional Role and Technical Insight |
|---|---|---|
| **Aromatics and Flavor Release** | ||
| **Oil & Onion** | 1 Tbsp oil, 1 small onion | **Sweating:** Heating the $\mathbf{1 \text{ small onion}}$ in oil releases its volatile sulfur compounds and moisture, creating a transparent, sweet foundation without browning (Step 1). |
| **Paprika, Cumin, Coriander** | 1 tsp, $\frac{1}{2}$ tsp, $\frac{1}{2}$ tsp | **Spice Blooning:** These fat-soluble spices release their maximum aroma when briefly heated in the oil/fat before the sauce is added. |
| **Sauce Structure and Protein** | ||
| **Cottage Cheese** | 1 cup | **Non-Separating Cream Base:** High in stable casein protein, which thickens the sauce upon gentle heating without separating into fat and water. |
| **Chicken Breast Chunks** | 1 lb | **Lean Protein Source:** Quick-cooking; provides structure and a large surface area for the sauce to cling to. |
Instructions: Controlling Heat for Creaminess
The methodology is straightforward but hinges on two critical heat transitions to achieve the silky sauce.
- **Aromatic Base (Sweating):** Heat the $\mathbf{1 \text{ tbsp oil}}$ in a skillet. Cook the $\mathbf{1 \text{ small chopped onion}}$ until soft (translucent), about 3-5 minutes. The goal is to ‘sweat’ the onion, not brown it, to maximize sweetness.
- **Flavor and Seasoning:** Add the $\mathbf{1 \text{ lb chicken chunks}}$ and season immediately with $\mathbf{\text{salt, pepper, paprika, cumin, and coriander}}$.
- **Browning (Maillard Reaction):** Brown the chicken on all sides over medium-high heat. This creates the deep savory base.
- **Heat Management (Crucial Step):** **Lower the heat** to the minimum necessary for a very gentle simmer (often the lowest setting on the stovetop). Add the $\mathbf{1 \text{ cup of cottage cheese}$.
- **Sauce Development (Emulsification):** Stir gently and continuously. The curds will begin to soften and break down, releasing their moisture and forming the sauce. The sauce will thicken rapidly as the proteins emulsify.
- **Final Simmer:** Simmer for a final $\mathbf{2 \text{ minutes}}$ to fully heat the cheese and ensure the chicken is cooked through ($\mathbf{165^{\circ}\text{F}}$ internal temperature).
- **Serve:** Serve immediately with rice or warm bread, allowing the sauce to cling to the chosen starch.
Serving and Storage: The Cold Chain and Protein Quality
Optimal Serving and Starch Pairing
The skillet is best served immediately when the sauce is at its creamiest, optimal temperature.
- **Cling Factor:** The thick, protein-rich sauce is designed to cling. Serve with a starch that maximizes this effect, such as steamed white rice, couscous, or crusty bread for dipping (the classic ‘sauce mop’).
- **Freshness Boost:** Garnish with a sprinkle of fresh chopped parsley or cilantro to introduce a contrasting fresh, herbaceous note.
Storage and Reheating
Due to the dairy and lean protein content, safe storage is important.
- **Refrigeration:** Store cooled leftovers in an airtight container for up to $\mathbf{3 \text{ days}}$.
- **Reheating Challenge:** Reheating dairy-based sauces can be tricky. When reheating on the stovetop, use the **lowest possible heat** and add $\mathbf{1 \text{ tablespoon of milk or water}}$ to reintroduce moisture, stirring constantly to prevent the sauce from separating or becoming grainy. Microwaving may cause the sauce to separate unevenly.
- **Protein Density:** With its impressive $\mathbf{42 \text{ grams of protein}}$ per serving, this is an excellent meal prep option, provided it is reheated gently.
Tips: Guaranteeing a Silky Sauce
Tip: The Blender Pre-Treatment
If you are concerned about any residual texture from the curds, pre-blend the **$\mathbf{1 \text{ cup of cottage cheese}$** with a hand blender or in a food processor until perfectly smooth before adding it to the skillet. This eliminates the chance of grainy texture, guaranteeing the smoothest sauce possible.
Technical Pointers
- **Avoid Boiling:** **Never allow the sauce to boil** once the cottage cheese has been added. Boiling causes the proteins to denature too quickly, leading to shrinkage (syneresis) and separation, resulting in a grainy, broken texture.
- **Moisture Adjustment:** If the sauce becomes too thick during the final simmer, add a tablespoon of $\mathbf{\text{water, milk, or chicken broth}}$ until the desired consistency is reached. The absorption of liquid by the chicken can vary.
- **Cottage Cheese Type:** While low-fat cottage cheese can be used, **full-fat cottage cheese** (4% milkfat) is recommended. The extra fat increases the sauce’s stability and richness, making it less likely to separate under heat.
- **Spice Blooning:** For maximum flavor impact, ensure the spices are added directly to the pan while the chicken is browning. Heating the spices in the fat/oil releases their fat-soluble aromatic compounds in a process called **blooming**.
Variations: Altering the Spice Profile and Protein
The core methodology—browning protein and creating a cottage cheese sauce—can support many flavor profiles.
Spice and Herb Substitutions
- **Indian-Inspired:** Substitute the cumin, coriander, and paprika with $\mathbf{1 \text{ Tbsp of curry powder}}$ and $\mathbf{\frac{1}{2} \text{ tsp of turmeric}}$. Add a handful of $\mathbf{\text{spinach}}$ at the end for color and nutrients.
- **Mediterranean Lemon-Dill:** Omit the paprika/cumin/coriander. Use $\mathbf{1 \text{ Tbsp of dried oregano}}$ and $\mathbf{1 \text{ Tbsp of lemon juice}}$ (added with the cottage cheese). Garnish with fresh $\mathbf{\text{dill}}$.
- **Smoky Chili:** Increase the paprika to $\mathbf{1 \text{ Tbsp}}$, using the smoky variety. Add $\mathbf{\frac{1}{2} \text{ tsp of chipotle powder}}$ for heat. Stir in $\mathbf{\frac{1}{4} \text{ cup of chopped fire-roasted tomatoes}}$ for color and depth.
Protein and Veggie Swaps
- **Ground Turkey Skillet:** Substitute the $\mathbf{1 \text{ lb chicken chunks}}$ with $\mathbf{1 \text{ lb of ground turkey}}$. Brown the turkey fully before adding the spices. The cooking time will be similar.
- **Shrimp:** Substitute the chicken with $\mathbf{1 \text{ lb of shrimp}}$. Because shrimp cooks very quickly, remove it immediately after browning (Step 3), make the sauce (Steps 4-5), and then return the shrimp to the pan for the final 2 minutes of simmering (Step 6).
- **Vegetable Bulk:** For added fiber and volume, sauté $\mathbf{\frac{1}{2} \text{ cup of sliced mushrooms}}$ or $\mathbf{\frac{1}{2} \text{ cup of bell peppers}}$ with the onion (Step 1).
Tips: Nutrition and Flavor Deep Dive
Tip: Nutritional Density
The reported nutrition ($\mathbf{42 \text{ g protein } | 15 \text{ g fat } | 9 \text{ g carbs}}$) is exceptionally high in lean protein. To further control the fat content, remove the chicken’s internal fat deposits before cutting, or use non-fat cottage cheese (though this increases the risk of the sauce separating). To boost the carb/fiber count, serve with brown rice or quinoa.
Health and Culinary Notes
- **Acid and Curdling:** Be cautious if adding highly acidic ingredients (like vinegar or large amounts of lemon juice). Acids cause the casein proteins to coagulate more rapidly, increasing the risk of the sauce becoming chunky or splitting. If adding acid, incorporate it **off heat**, just before serving.
- **The Power of Vanilla:** While not used here, the compound **vanillin** is often added to cottage cheese recipes (like cheesecake) to enhance the perceived sweetness and creaminess, demonstrating how flavor compounds manipulate texture perception.
- **Salt Timing:** Seasoning the chicken and spices early (Step 2) allows the salt to penetrate the protein structure, leading to a more flavorful final product. Salt also helps draw out some chicken moisture, aiding in the browning process.
- **Internal Temperature Check:** Always verify the $\mathbf{1 \text{ lb of chicken breast chunks}}$ reach an internal temperature of $\mathbf{165^{\circ}\text{F}}$ ($\mathbf{74^{\circ}\text{C}}$) for food safety, especially since the final simmer is brief.
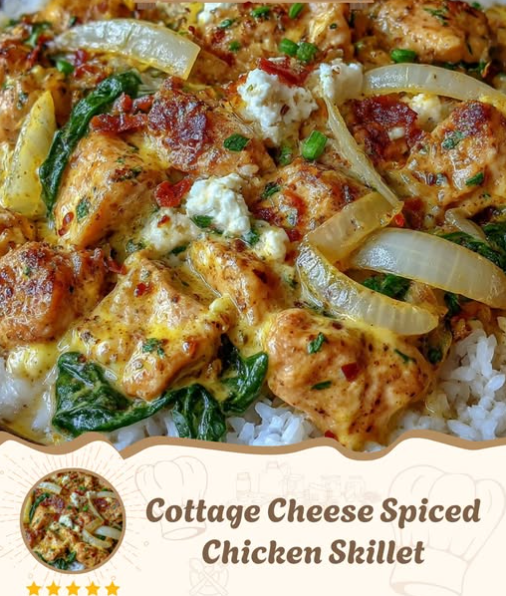
Conclusion: A Decadent Lesson in Efficient Cooking
The **Cottage Cheese Spiced Chicken Skillet** is a model of efficient, high-impact cooking. It expertly utilizes the unique thermal properties of cottage cheese to create a luxurious, protein-packed sauce that bypasses traditional thickening agents. By controlling the heat meticulously—from the high heat for the Maillard reaction to the low heat for the protein emulsification—the cook achieves a dish that is deeply savory, aromatically complex, and delightfully creamy, proving that speed and flavor are not mutually exclusive in the kitchen.
Frequently Asked Questions:
Q: Can I use Greek yogurt instead of cottage cheese?
A: **Greek yogurt is not recommended.** It is much more acidic than cottage cheese and will almost certainly curdle or separate immediately when heated, resulting in a grainy, broken sauce. Cottage cheese’s specific protein structure (casein curds suspended in whey) is far more heat-stable.
Q: My sauce turned out grainy. What happened?
A: The sauce became grainy because the **heat was too high** (Step 4) or it was allowed to **boil** (Step 6). High heat causes the casein proteins to denature too quickly and clump together, releasing their moisture and resulting in a “broken” or grainy texture. Next time, use the lowest heat setting and consider pre-blending the cheese.
Q: Do I need to drain the liquid from the cottage cheese?
A: **No, do not drain it.** The whey (liquid) in the cottage cheese is essential. When heated gently, this liquid, combined with the melted curds, forms the base of the creamy sauce. Draining the cheese would make the final sauce too thick and increase the risk of the remaining curds clumping.
Q: Can I add vegetables to this skillet?
A: **Yes, definitely.** Add $\mathbf{\text{harder vegetables}}$ (like carrots, bell peppers, or mushrooms) along with the onion (Step 1) to give them time to soften. Add $\mathbf{\text{tender vegetables}}$ (like spinach or peas) during the final 2-minute simmer (Step 6) to avoid overcooking.