The core components of this lightened shortbread:
I. The Whipped Shortbread Base:
- **1 cup** butter, room temperature (The high-fat, air-holding medium)
- **½ cup** icing sugar (aka powdered sugar—for a fine, smooth texture)
- **$1 \frac{3}{4}$ cups** flour (The low-gluten structure)
II. Decoration (Optional):
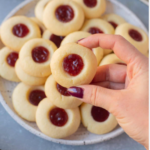
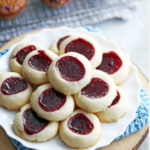
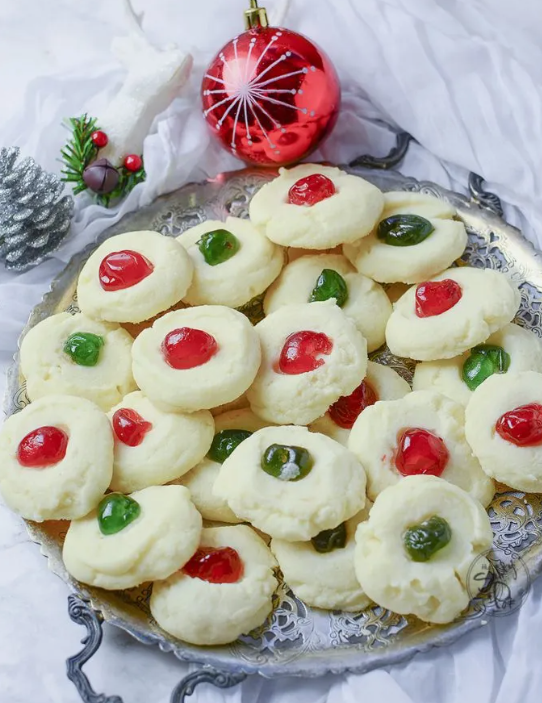
- Holiday cherries, nuts, or chocolate bits (For flavor and festive appearance)
Instructions: Whip for 10 Minutes, Cool, and Set
Phase 1: The Whipping Protocol (Aeration is Key)
- **Prep and Temperature Check:** Ensure the **1 cup butter** is at the correct room temperature. Set up your **electric mixer** (stand mixer with paddle attachment or hand mixer)—this is non-negotiable for success.
- **Cream Fat and Sugar:** Add the butter and **$\frac{1}{2}$ cup icing sugar** to the mixer. Cream them together on medium speed until well-combined, smooth, and fluffy (about 1–2 minutes).
- **Flour Integration (GENTLE):** Turn the mixer to **low speed**. Carefully add all of the **$1 \frac{3}{4}$ cups flour** at once. Mix until the mixture is shaggy and there is no risk of flour flying out of the bowl.
- **The 10-Minute Whip (EXTREME AERATION):** Scrape down the bowl. Turn the speed up to **medium-high** and beat the dough for a full **10 minutes**. The dough will lighten several shades of pale yellow and become noticeably fluffier, increasing significantly in volume.
Phase 2: Shaping and Baking
- **Preheat and Prep:** Preheat the oven to **$350^\circ\text{F}$ ($175^\circ\text{C}$)**. Line a baking sheet with parchment paper.
- **Portion and Decorate:** Drop the soft, fluffy dough in **small spoonfuls** onto the prepared baking sheet (the dough will be difficult to shape, so a spoon or small cookie scoop is ideal). Decorate as desired with cherries, nuts, or chocolate bits.
- **Bake:** Bake at $350^\circ\text{F}$ for about **10 minutes**. The cookies are done when the edges may just begin to turn a very light golden color, but the majority of the cookie remains pale.
- **Cooling Protocol:** Allow the cookies to cool for **several minutes on the baking sheet** before carefully removing them to a wire rack to cool completely. The delicate texture is prone to breakage when warm.
Serving and Storage: Protecting the Crumb
Optimal handling for these delicate cookies:
- **Serving:** Serve once completely cooled. They are extremely delicate and should be handled with care.
- **Storage:** Store cooled shortbread in an airtight container at room temperature for up to **1 week**. Place parchment or wax paper between layers to prevent breakage.
- **Freezing:** Whipped shortbread freezes exceptionally well. Freeze baked, cooled cookies in a single layer, then transfer them to an airtight container. Thaw at room temperature.
Tips: Essential Techniques for Airiness
Mixer Check (Absolutely Necessary): Do not attempt this recipe without an **electric mixer** (Step 1). The 10-minute whipping time is impossible to replicate by hand and is the single most important factor for the texture.
Icing Sugar vs. Granulated: The use of **icing sugar** ($\frac{1}{2}$ cup) (Step 2) is non-negotiable. Its fine particles blend seamlessly and help achieve the final smooth, light texture that granulated sugar cannot provide.
Troubleshooting Spread: If your shortbread spreads excessively, your **butter was likely too warm** (The Perfect Room Temperature Standard). Next time, ensure the butter is only slightly pliable. You can also try chilling the portioned dough for 15 minutes before baking.
Flour Measurement: Use the **spoon and level** method for the **$1 \frac{3}{4}$ cups flour** (Step 3). Too much flour will absorb the butter and stiffen the dough, hindering the whipping process and resulting in a tougher cookie.
Oven Consistency: Shortbread requires a low, even bake. Use an **oven thermometer** to ensure your oven temperature is exactly $350^\circ\text{F}$ (Step 5), as variations can drastically affect baking time and texture.
Variations: Customizing Flavor
Easily adapt the flavor profile of this tender cookie:
- **Peppermint:** Add **$\frac{1}{2}$ teaspoon of peppermint extract** to the butter (Step 2) and top with crushed candy canes before baking.
- **Vanilla Bean:** Add the **scraped seeds of $\frac{1}{2}$ a vanilla bean** along with the icing sugar (Step 2) for a rich, aromatic flavor.
- **Almond:** Substitute **$\frac{1}{4}$ cup of the flour** with **finely ground almond flour** (Step 3) for a subtle nutty flavor and even more tender crumb.
- **Drizzle:** For a final touch, melt chocolate melting wafers (dark or milk) and **drizzle** over the completely cooled cookies.
**Hand Shaping:** If you want a more uniform look (Step 6), chill the dough for about **20 minutes** after the 10-minute whip. This firms it up just enough to roll into logs or press into a small pan before cutting, but you must work quickly to prevent the air from escaping.
**Use of Salt:** If using **unsalted butter** (1 cup), add a scant $\frac{1}{4}$ teaspoon of fine salt to the flour mixture (Step 3). The salt helps balance the high-fat content and sugar.
**Avoid Over-Baking:** Watch the cookies closely during the final minutes (Step 7). Over-baking is the single greatest error; the cookies should look barely set and maintain their very pale color. If they turn golden brown, they will lose their melt-in-your-mouth tenderness.
**Piping:** For an extra-fancy presentation (Step 6), the dough is soft enough after the 10-minute whip to be piped using a piping bag and large star tip. You must use the dough immediately before it stiffens.
Conclusion: Air, Butter, and Perfection
The **Whipped Shortbread** recipe is a masterclass in controlled aeration. By rigorously adhering to **The 10-Minute Whipping Protocol** and ensuring the butter is at **The Perfect Room Temperature Standard**, you transform simple ingredients into an incredibly light and delicate cookie. This technique guarantees the signature fluffy texture that distinguishes whipped shortbread—a truly melt-in-your-mouth experience perfect for the holidays or any special occasion.
Frequently Asked Questions (FAQ)
Q: Can I use granulated sugar instead of icing sugar?
A: **No, it is not recommended.** (Step 2). Granulated sugar’s coarse particles will interfere with the smooth whipping process and result in a much denser, grainier texture.
Q: Why did my dough deflate after the 10-minute whip?
A: The most common cause is the **butter was too warm** (The Perfect Room Temperature Standard). Warm butter cannot trap and hold the air as effectively, leading to deflation when the flour is added.
Q: Why did my cookies spread too much?
A: Again, the **butter was too warm** (Step 1), causing the fat to melt too quickly in the oven. Try chilling the portioned cookies for 15 minutes before baking.
Q: Can I skip the electric mixer?
A: **No.** (Step 1). The 10-minute whipping time required to introduce the necessary volume of air is physically impossible to achieve by hand or with a standard whisk.