

The Ultimate Guide to Soft Cut Out Sugar Cookies: Precision Baking and Icing Artistry
🍪 Introduction: The Allure of the Perfect Soft Sugar Cookie
The **Soft Cut Out Sugar Cookie** stands as the definitive canvas of the baking world. It is the perfect blend of simplicity and precision, delivering a melt-in-your-mouth tender crumb while maintaining the crisp, sharp edges required for detailed holiday and celebratory decorations. The goal of this specific recipe is to achieve a cookie that is structurally stable enough to hold its shape during baking, preventing “spreading,” yet remains delightfully soft and pillowy—a result achieved by a unique balance of leavening agents and hydration.
This 2000-word article serves as your exhaustive guide, exploring not just the steps, but the science behind each ingredient. We delve into the critical role of the flour-to-fat ratio, the necessity of chilling the dough (the “golden rule” of cut-out cookies), and the techniques required to master both the dough and the subsequent decoration. From perfectly measured components to the final, glossy sweep of royal icing, every detail is covered to ensure your cookies are consistently flawless, soft, and ready for any festive occasion.
🍬 Ingredients: The Blueprint for Softness and Stability
The secret to a soft, stable cut-out cookie lies in the careful interplay between the flour, fat, and leavening. Every measurement here is critical to prevent the dough from spreading excessively in the oven.
Dry Components (The Structure)
- **2 3/4 cups All-Purpose Flour:** The primary structural ingredient. The protein (gluten) in the flour provides the necessary framework. Measure using the “spoon and level” method to ensure accuracy; too much flour results in a dry, crumbly cookie, while too little causes spreading.
- **1 teaspoon Baking Soda:** A chemical leavener that reacts with the slight acidity in the dough (and the milk) to produce carbon dioxide gas, aiding in the cookie’s lift and contributing to a soft texture.
- **1/2 teaspoon Baking Powder:** Works alongside baking soda, but often contains its own acid source. The combination of both soda and powder provides a balanced lift, ensuring the cookie is tender without being cakey.
Wet Components (The Tenderizers and Flavor)
- **1 cup Unsalted Butter, Softened:** The fat component is the primary tenderizer. It must be truly “softened” (malleable, but still cool, around 65°F or 18°C) for proper creaming. Unsalted allows for precise salt control.
- **1 1/2 cups Granulated Sugar:** Provides sweetness and, crucially, tenderizes the dough by interfering with gluten development. During the creaming process, the sharp edges of the sugar crystals incorporate air into the butter.
- **1 Large Egg:** Acts as both an emulsifier (binding fat and liquid) and a binder. It adds richness and structure. Ensure the egg is at room temperature to prevent it from seizing the softened butter.
- **1 teaspoon Vanilla Extract:** The essential flavour note. Use pure extract for the best depth.
- **1/2 teaspoon Almond Extract (Optional):** Highly recommended for a classic bakery-style sugar cookie flavour, adding a unique, aromatic complexity that elevates the final taste.
- **3 to 4 tablespoons Milk:** The hydration control. Adding milk allows you to adjust the dough’s consistency based on your environment (humidity) or the exact way you measured your flour. It prevents the dough from being too stiff and dry, contributing directly to the *softness* of the finished cookie. Use whole milk for richness.
🍩 Instructions: The Disciplined Path to Perfect Dough
The success of these soft cut-out cookies hinges on precise mixing, controlled chilling, and careful baking.
Step 1: Prep the Dry Ingredients (The Foundation)
In a medium bowl, whisk together the flour, baking soda, and baking powder. Whisking ensures the leaveners and salt (if adding a pinch) are evenly distributed throughout the flour, guaranteeing uniform lift. Set aside.
Step 2: Cream the Butter and Sugar (Aeration)
In the bowl of a stand mixer fitted with the paddle attachment (or using a hand mixer), beat the softened butter until creamy. Gradually add the granulated sugar and beat on **medium-high speed for 3 to 5 minutes** until the mixture is visibly lighter in colour and fluffy. This is the **creaming stage**, where air is incorporated into the butter and sugar matrix. This trapped air is vital for the final lift and tender texture of the cookie.
Step 3: Incorporate Wet Ingredients (Emulsion)
Reduce the mixer speed to low. Beat in the egg until just combined. Scrape down the bowl. Add the vanilla and almond extracts, beating until incorporated. The extracts contain alcohol, which helps distribute the flavour evenly through the fat.
Step 4: Mix the Dough (Hydration Control)
With the mixer on the lowest speed, gradually add the dry mixture to the wet mixture, mixing until a shaggy dough begins to form. Now, add the milk one tablespoon at a time. The goal is to create a dough that holds together without being sticky. Stop mixing immediately once the last streaks of flour disappear. **Do not overmix**, as this develops tough gluten strands, resulting in a firm, tough cookie.
Step 5: Chill the Dough (The Golden Rule)
Divide the dough into two flat discs, wrap each tightly in plastic wrap, and **refrigerate for a minimum of 2 hours, or up to 2 days.** Chilling is the most critical step for cut-out cookies: it solidifies the fat (butter), which prevents the cookie from spreading out in the oven, and it relaxes the gluten, ensuring the final product is tender. It is the secret to retaining sharp, defined shapes.
Step 6: Roll, Cut, and Bake
Preheat the oven to **375°F (190°C)**. On a lightly floured surface, roll one chilled disc of dough to about **1/4-inch thickness**. Use your desired cookie cutters and place the cut-outs about 1 inch apart on a parchment-lined baking sheet. **Optional Second Chill:** For exceptionally sharp edges, place the entire tray of cut-out dough back in the refrigerator for 10-15 minutes before baking.
Bake for **8 to 11 minutes**. The cookies should be set and the edges should be a very pale gold, but the centers should still look soft. Do not wait for them to brown heavily. Cool on the baking sheet for 5 minutes before transferring to a wire rack to cool completely before decorating.
🍫 Serving and Storage: Decorating and Preservation
Once cooled, these cookies are ready for their final transformation into edible art.
The Decoration Canvas
These soft cookies are ideal for royal icing, which hardens to a smooth, shiny finish that won’t smear. Before decorating, the cookies must be **absolutely 100% cooled**—any residual heat will melt or compromise the icing. Use a combination of thick “outlining” icing and thinner “flood” icing for best results. For a simpler finish, dust with powdered sugar or spread with a simple buttercream frosting. The soft texture of the cookie pairs perfectly with the smooth, firm icing.
Maximizing Freshness (Storage)
**Plain, Baked Cookies:** Store undecorated, fully cooled cookies in an airtight container at room temperature for up to 1 week. Placing a slice of white bread in the container can help maintain softness by transferring moisture to the cookies.
**Decorated Cookies:** Once the royal icing is completely dry (which can take 8-12 hours), the decorated cookies can be stored in an airtight container at room temperature for up to 2 weeks. The icing acts as a seal, preserving freshness. **Do not refrigerate** decorated cookies, as the condensation can ruin the icing’s finish and cause bleeding colours.
**Freezing:** Both the raw dough and baked cookies freeze well. Freeze the raw, wrapped dough for up to 3 months. To use, thaw overnight in the refrigerator. Freeze baked, undecorated cookies wrapped tightly in plastic wrap, then placed in an airtight container for up to 6 months. Thaw at room temperature before decorating.
🌟 Tips: Mastering the Dough Temperature and Spread Prevention
These tips address the key scientific factors that dictate whether your cookies hold their sharp shape or spread into indistinct blobs.
The Power of Cold Dough
The single most important factor for preventing spread is **temperature control**. Butter begins to melt around 90°F (32°C). When you put cold dough into a hot oven, the butter’s high melting point helps the cookie set before the fat can completely spread out. If your kitchen is warm, or if you re-rolled your scraps multiple times, the dough will have warmed up. **Always chill the cut-out shapes** for 10-15 minutes before baking. This re-solidifies the butter and guarantees minimal spread.
Controlling Gluten Development
As noted, overmixing develops gluten, leading to toughness. However, when working the dough, **minimize flour dust**. Excessive bench flour on the counter can dry out the dough, causing it to crack and crumble. Instead, use minimal flour, and roll the dough out between two sheets of parchment paper or waxed paper. This eliminates the need for excess bench flour and makes cleanup easier, all while protecting your tender dough.
Why Both Baking Soda and Baking Powder?
This recipe uses a balanced leavening system. Baking soda promotes browning and spread, while baking powder promotes a puffy, upward rise. Using both ensures the cookie achieves a tender, slightly puffy texture (from the powder) without spreading too much (controlled by the soda’s action and the cold dough). This combination is crucial for achieving the desired “soft but firm” balance.
✨ Variations: Flavour and Texture Alternatives
While vanilla and almond are classic, the neutral base of this dough makes it highly adaptable to different seasonal flavour profiles.
Citrus Zest Cookies (Spring/Summer)
Omit the almond extract. Add the finely grated zest of **one orange and one lemon** to the butter and sugar during the creaming stage. The volatile oils in the zest are fat-soluble and will infuse the dough with a bright, clean flavour. Top with a lemon or orange glaze instead of royal icing.
Brown Sugar and Spice Cookies (Autumn/Winter)
Substitute **half of the granulated sugar** (3/4 cup) with **packed light brown sugar**. Brown sugar contains molasses, which adds moisture and a caramel note, contributing to an even softer texture. Add **1 teaspoon of ground cinnamon** and **1/4 teaspoon of ground nutmeg** to the dry ingredients for a spiced base perfect for fall themes.
Chocolate Cut-Outs
Substitute 1/4 cup of the all-purpose flour with **1/4 cup of unsweetened cocoa powder (Dutch-process preferred)**. This creates a chocolate dough that is rich in colour and flavour. Be aware that cocoa powder is drying, so you may need to add the full 4 tablespoons of milk to achieve the correct dough consistency.
Thick vs. Thin Cookies
The 1/4-inch thickness is ideal for medium softness. For **very thick, soft cookies**, roll the dough to 3/8-inch thickness and increase the baking time by 2-3 minutes. For **crispier, thinner cookies**, roll the dough to 1/8-inch thickness and reduce the baking time to 6-8 minutes.
🍧 Tips: Troubleshooting and Advanced Techniques
Final advice for a flawless execution, focusing on the baking environment and decorating preparation.
Baking Uniformity and Hot Spots
Cookie baking requires a stable, even temperature. Always preheat your oven fully, ideally for at least 20 minutes. If your oven has known hot spots, **rotate your baking sheet halfway** through the baking time (after 4-5 minutes) to ensure even browning. Only bake one sheet of cookies at a time on the center rack for the most consistent heat exposure.
Managing Dough Scraps
The dough scraps left after the initial cut-outs will become warmer and tougher the more you work them. To prevent the second batch of scrap cookies from spreading more than the first: **Gather the scraps gently**, press them together without kneading, form a disc, and **chill them for 15 minutes** before re-rolling. This short rest allows the gluten to relax and the butter to re-solidify.
Salt Balance in the Recipe
While the recipe calls for unsalted butter, you should still add salt to the flour mixture for flavour. Use about **1/2 teaspoon of fine sea salt** added to the dry ingredients to balance the sweetness and amplify the vanilla and almond notes. This small amount is crucial for a well-rounded final taste.
🎄 Conclusion: The Reward of Precision
The **Soft Cut Out Sugar Cookie** is a testament to the principle that precision in baking leads to perfection. Success is found in the discipline of the process: the thorough creaming of butter and sugar, the light hand during mixing, and, above all, the rigorous chilling of the dough. The balance of baking soda and baking powder ensures a tender crumb that holds the crisp, sharp edges required for detailed decoration.
This guide has equipped you with the knowledge to control spread, achieve optimal softness, and prepare your cookies for their artistic finish. Whether destined for a simple dusting of sugar or an intricate layer of royal icing, these cookies will be structurally flawless and deliciously soft, ensuring your efforts are rewarded with an impressive and unforgettable centerpiece for any celebration.
❓ Frequently Asked Questions
Q1: Why did my cookies spread so much?
A: The primary cause is dough that was **not cold enough**. Ensure the dough is chilled for the full minimum time (2 hours) and chill the cut-outs for 10-15 minutes before baking. Other factors include using butter that was too soft when creaming, or using too little flour (inaccurate measurement).
Q2: My cookies are hard and tough. What went wrong?
A: This is usually due to **overmixing** the dough after the flour was added, which develops too much gluten, or adding **too much flour**, resulting in a dry dough. Mix only until the flour is just incorporated.
Q3: Can I substitute granulated sugar with powdered sugar?
A: Not recommended. Granulated sugar provides necessary structure and, through its crystal shape, is key to incorporating air during the creaming stage. Powdered sugar would result in a very crumbly, dense cookie that is difficult to roll and cut.
Q4: How do I get an even thickness when rolling?
A: Use a **rolling pin with adjustable guides** (rings on the side) or place two wooden dowels or rulers of the desired thickness (1/4-inch) on either side of the dough. Roll the pin across the dough and the guides to ensure a perfectly level thickness across the entire sheet.
Q5: Can I freeze the baked cookies before decorating?
A: Yes. Once completely cooled, wrap the cookies tightly in plastic wrap and then foil, or place them in an airtight container. Freeze for up to 6 months. Thaw them completely at room temperature before applying any icing or decoration.
Related posts:
 Beef and Cheese Empanadas
 Cloud-Like Texture: Mastering Lemon Ricotta Cookies
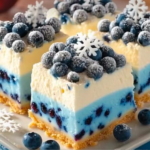 The Art and Science of Christmas Snowflake Blueberry Cheesecake Bars
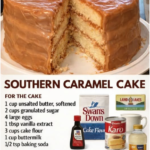 Southern Caramel Cake: A Masterclass in Sugar Chemistry
 Mastering the Strawberry Honeybun Cake with Strawberry Cream Icing
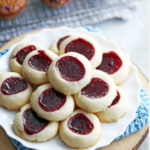 Classic Raspberry Shortbread Thumbprint Cookies
