ADVERTISEMENT
Phase 1: Preparing the Batter
- **Prep Ingredients and Pan (ROOM TEMPERATURE RULE):** Ensure all refrigerated ingredients are at room temperature. Preheat the oven to **$175^\circ\text{C}$ ($350^\circ\text{F}$)**. Grease and flour a 10-inch Bundt pan or tube pan well.
- **Cream Fat and Sugar (AIR INCORPORATION PROTOCOL):** In a large mixing bowl, beat the **softened butter, cream cheese, and granulated sugar** on medium-high speed for **5–7 minutes**, scraping down the sides often, until the mixture is very light, pale, and fluffy.
- **Add Eggs and Vanilla:** Beat in the **eggs** one at a time, ensuring each egg is fully incorporated before adding the next. Stir in the **vanilla extract**.
- **Mix Dry Ingredients:** In a separate bowl, whisk together the **cake flour, baking powder, and salt**. With the mixer on low speed, alternately add the flour mixture and the **sour cream** to the wet ingredients, beginning and ending with the flour mixture. Mix only until just combined; **do not overmix**.
Phase 2: Baking and Cooling
- **Bake (LOW-AND-SLOW RULE):** Pour the batter into the prepared pan. Place in the preheated oven and bake at **$175^\circ\text{C}$ ($350^\circ\text{F}$)** for 15 minutes. Then, **reduce the temperature to $150^\circ\text{C}$ ($300^\circ\text{F}$)** and continue baking for another **75–95 minutes**, or until a long wooden skewer inserted into the center comes out clean.
- **Cool:** Let the cake cool in the pan on a wire rack for **15–20 minutes**. Gently invert the cake onto the rack and allow it to cool completely before slicing or frosting.
Serving and Storage: Retaining Moisture
Optimal handling for this dense cake:
- **Serving:** Best served at room temperature. The dense texture allows it to be served plain, dusted with powdered sugar, or topped with a light vanilla glaze.
- **Storage (Room Temperature):** Store tightly covered at room temperature for up to **3 days** due to the high fat content. If you plan on keeping it longer, refrigerate.
- **Freezing:** This cake freezes exceptionally well. Wrap tightly in plastic wrap, then foil, and freeze for up to **3 months**. Thaw overnight at room temperature.
Tips: Essential Techniques for Structure and Smoothness
Cake Flour is Non-Negotiable: The **$3\frac{1}{2}$ cups of cake flour** (Ingredient III) has a lower protein content than all-purpose flour. This is critical for achieving a light, velvety crumb in such a rich, heavy batter. All-purpose flour will result in a tougher, denser cake.
Scraping the Bowl: During the creaming stage (Step 2), stop the mixer every 2 minutes to **scrape the sides and bottom of the bowl**. This ensures every ingredient is evenly incorporated and prevents a lumpy batter.
Oven Temperature Drop: The two-stage baking temperature (Step 5) is essential. The initial $175^\circ\text{C}$ ($350^\circ\text{F}$) heat gives the cake a quick initial rise, and the reduction to $150^\circ\text{C}$ ($300^\circ\text{F}$) prevents the exterior from burning while the interior slowly bakes.
Pan Preparation: Due to the high sugar content, the cake can easily stick. Take extra care to grease and flour the Bundt or tube pan thoroughly, ensuring the central tube is also coated (Step 1).
Visual Check: When the cake is almost done, it will **pull away slightly from the sides of the pan** (Step 5). This is a good visual indicator to start checking for internal doneness.
Variations: Customizing Flavor and Glaze
Easily adapt the flavor profile of the cake:
- **Citrus Zing:** Add **2 tablespoons of fresh lemon or orange zest** during the creaming stage (Step 2).
- **Almond Flavor:** Substitute **$\frac{1}{2}\text{ tsp}$ of the vanilla extract** with **almond extract** (Step 3) for a subtle nutty flavor.
- **Glaze:** Prepare a simple vanilla glaze by whisking **1 cup powdered sugar** with **2 tablespoons of milk** and **$\frac{1}{2}\text{ tsp}$ vanilla** and drizzling it over the cooled cake (Step 6).
- **Chocolate Swirl:** Swirl $\frac{1}{2}$ cup of cocoa powder mixed with $\frac{1}{4}$ cup of boiling water into the last $\frac{1}{3}$ of the batter before pouring it into the pan.
**Leavening Agent:** The **1 teaspoon of baking powder** (Ingredient III) is the only chemical lift. Because the batter is so heavy, this small amount is enough to ensure a tender, non-brick-like texture.
**Don’t Overmix the Flour:** Once the flour is added (Step 4), mix only until the flour streaks disappear. Overmixing develops gluten, resulting in a dense, tough cake, even with cake flour.
**Tube Pan vs. Loaf Pan:** The recipe volume is designed for a large, 10-inch tube or Bundt pan. Do not attempt to bake this entire quantity in a standard loaf pan; the center will not bake properly.
**Oven Opening:** Avoid opening the oven door during the first 60 minutes of baking (Step 5). Opening the door before the structure is set can cause the high-fat cake to collapse, resulting in a dense streak at the bottom.
Conclusion: A Study in Richness
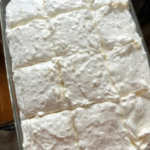
The **Easy Cream Cheese Cake** is a baking endeavor where technique is as important as the luxurious ingredients. By mastering **The Creaming and Air Incorporation Protocol** for volume, strictly following **The Low-and-Slow Baking Rule** for an even crumb, and ensuring all ingredients adhere to **The Room Temperature Rule**, you guarantee a cake that is ultra-smooth, perfectly dense, and infused with rich, buttery flavor. This recipe yields a dessert of unmatched elegance and simplicity.
Frequently Asked Questions (FAQ)
Q: Why did my batter curdle when I added the eggs?
A: The **eggs were too cold** (Step 3). Cold eggs cause the warm fat (butter/cream cheese) to solidify rapidly, breaking the emulsion. Ensure eggs and all dairy are at room temperature.
Q: Why did my cake fall or sink in the middle?
A: This is usually caused by **opening the oven door too early** (Tip 8), or by **removing the cake before it was fully baked** (Step 5). The high fat content needs full baking time to set its structure.
Q: Can I use all-purpose flour?
A: **No** (Tip 6). All-purpose flour’s higher protein content will make the cake tough and heavy. Cake flour is essential for the velvety texture.
Q: How can I tell when the cake is done?
A: Rely on the **wooden skewer test** (Step 5). Insert a long skewer deep into the center; it should come out clean. Also, the cake should spring back lightly when touched.
ADVERTISEMENT